Showing posts with label chocolate. Show all posts

Saturday, July 5, 2014

The Ultimate Chocolate Chip Cookies

Who doesn't love a chocolate chip cookie? I mean really. I don't think I could ever date a man who doesn't love a good ol' fashioned chocolate chip cookie. Basically, I don't want to have to eat the entire batch of cookies by myself. Anyway, I found this particular recipe in my handy dandy Cook's Illustrated Cookbook. Seriously, you guys, if you don't have this cookbook you're big time missing out. It's probably my favorite cookbook out of all the cookbooks that I have. And, trust me, I own a ton. Anyway, back to these scrumptious cookies. So, what I think really makes this recipe is the brown butter. Mmm. Brown. Butter. It gives the cookie a more robust flavor, and the chocolate packs a punch. I'm definitely making these cookies again, and I think they might be my new favorite recipe. Definitely an ultimate cookie!


Ingredients:
1 3/4 all-purpose flour
1/2 tsp baking soda
14 tbsp Unsalted Butter
3/4 cup packed dark brown sugar
1/2 cup sugar
1 tsp salt
2 tsp vanilla
1 large egg plus 1 large egg yolk
1 1/4 cup semi-sweet chocolate chip
3/4 cup pecans or walnuts, toasted and chopped (optional)

Preheat oven to 375. Line two baking sheets with parchment paper. Next, whisk flour and baking soda together in medium bowl; set aside.
Melt 10 tablespoon butter in 10 inch skillet over medium-high heat. Continue cooking, swirling pan constantly, until butter is dark golden brown and has a nutty aroma, 1 to 3 minutes. Transfer browned butter to a heat proofed large bowl. Add 4 remaining tablespoons butter and stir until completely melted. Add brown sugar, salt, vanilla, and granulated sugar to the melted butter. Whisk well. Add egg and egg yolk; whisk until mixture is smooth with no sugar lumps remaining, about 30 seconds. Let mixture stand for 3 minutes then whisk for 30 seconds. Repeat process of resting and whisking 2 more times until mixture is thick, smooth, and shiny.
Using rubber spatula, stir in flour mixture until just combined. Next, stir in chocolate chips and nuts (if using). Give dough final stir to ensure that no flour pockets remain and ingredients are evenly distributed. Roll the dough into balls and place on cookie sheets. Bake 1 sheet at a time until cookies are golden brown and still puffy and edges have begun to set but centers are still soft, about 10 to 14 minutes, and rotating baking sheet halfway through. Transfer baking sheet to wire rack, and let cookies cool to room temperature.


Monday, June 9, 2014

Ultimate Peanut Butter Chocolate Cookies

My friends had a cookout the other weekend, and I was contemplating what to bring. I believe last year I made homemade cupcakes, and while they were somewhat of a hit I got outplayed by someone who brought a box of cupcakes from one of our fabulous local bakeries. Sigh. Well, this year I decided to go with what I'm best at, and that's making cookies! Mmmm. Cookies. 

As per the usual, I found this recipe on Sally's Baking Addiction. And, O.M.G. These were frigging awesome. I kid you not! The cookie was thick and the peanut butter cups just burst in your mouth. Man, I could really use one of these right now. This recipe was very simple to make, and I highly recommend you get in the kitchen this evening and make me some. Oops, I mean make you some! :) Enjoy!


Ingredients:
1 and 1/2 (190g) cups all-purpose flour (accurately measured)
1/2 cup (64g) unsweetened natural cocoa powder
1/2 teaspoon baking soda
1/4 teaspoon salt
1/2 cup (1 stick or 115g) unsalted butter, softened to room temperature
1/2 cup (100g) light brown sugar, packed
1/2 cup (100g) granulated sugar
1/4 cup (60g) cup creamy or chunky peanut butter
1 large egg
1 teaspoon vanilla extract
2 Tablespoons (30ml) milk
1 and 1/4 cups Reese’s Peanut Butter Cups, chopped (about 16 Reese’s miniatures)
Drizzle: 1/3 cup (85g) creamy or chunky peanut butter (I omitted this step)

Go ahead and take out a medium sized bowl, and add in the flour, cocoa powder, baking soda, and salt. Whisk to combine, and then set the bowl aside for later.

Now, take out your standing mixer bowl (with the paddle attachment) and beat the butter on high until nice and creamy. This could take about a minute or so. If needed; scrape down the sides of the bowl and then add in the sugars and peanut butter and mix on medium speed until combined. Add the egg and vanilla, and mix till combined. Scrape down the sides of the bowl if necessary. Carefully, add in the flour mixture and stir until just combined. Having the speed on low is best for this. Go ahead and add in the milk and stir until just combined. Lastly, add in the peanut butter cups and stir until evenly disbursed. Wrap the bowl with plastic wrap, and refrigerate for an hour or at the most 24 hours.

Once you're ready to start baking; go ahead and pre-heat your oven to 350. Take out your cookie sheets and your dough. Roll the dough into balls and place on the sheet. I believe I got about 20 cookies out of this dough. Anyway, go ahead and place in the oven and bake for about 10-12 minutes. According to Sally, the dough won't spread much (and it didn't) so gently press down on the cookies with the back of a spoon once it comes out of the oven. Transfer to a wire rack, and cool.

Sunday, January 19, 2014

Chewy Chocolate Chunk Cookies

I've posted a couple chocolate chip cookies on this blog. You can't have too many, right? I've posted a thin and crispy chocolate chip cookie recipe, a nutella chocolate chip cookie, and now this chewy chocolate chip cookie recipe. I found this recipe from Sally's Baking Addiction, and she offered up a lot of great tips on how to get cookies to come out chewy. She suggests using one egg and an egg yolk and a little corn starch. She also suggests instead of rolling them into balls to roll them so they stand tall. Overall, I think these cookies were a huge hit, and I will definitely make them again. Enjoy!


Ingredients:
2 and 1/4 cups (280 grams) all-purpose flour, measured correctly
1 teaspoon baking soda
1 and 1/2 teaspoons cornstarch
1/2 teaspoon salt
3/4 cup (1.5 sticks or 170 grams) unsalted butter, melted
3/4 cup (150 grams) light brown sugar, loosely packed
1/2 cup (100 grams) granulated sugar
1 large egg + 1 egg yolk*
2 teaspoons vanilla extract
1 cup (180 grams) chocolate chips or chocolate chunks

Take out a large bowl and toss in the flour, baking soda, cornstarch, and salt. Set aside. Next, take out a medium bowl and melt the butter. Then, whisk in the sugars and stir well. Next, whisk in the egg and egg yolk. Stir well. Finally, whisk in the vanilla. Stir well. Then, fold the wet mixture into the dry mixture and mix together. Now, fold in the chocolate chips. The dough will be very sticky because of the melted butter, but just try to get the chips as well incorporated as you can. Cover the dough with plastic wrap and chill for at least 2 hours and up to 3 days. 

When you're ready to bake; take out the dough from the fridge and allow to soften for 15 minutes. Pre-heat your oven to 325, and line the cookie sheets with parchment paper or silpat. Roll the dough so they're taller rather than wider. Bake the cookies for 11-12 minutes. The cookies will come out of the oven looking soft and underbaked. Allow the cookies to cool on the cookie sheet for 10 minutes. Then, move cookies to wire rack to cool completely. 

Monday, June 17, 2013

Chocolate Cupcake with Strawberry Buttercream

The last couple posts have been fairly healthy; a couple salads and a pasta salad. Even the smoked wings are fairly healthy except for the ranch dip, perhaps. Alas, I'm here to post a so not healthy recipe but it's a so very good recipe!! Recently, a friend turned 35, and I offered to bring something for her celebration. I was told that if I brought one of my baked goodies they would be very happy. I found out that our friend loves chocolate and strawberries. I've seen several recipes floating around for cupcakes with strawberry frosting, and I thought it would be the perfect thing to bake. I decided to use this chocolate cupcake recipe. But, I shouldn't have started cleaning my bathtub while the cupcakes were baking, because they ended up a tad overbaked. Doh! I don't think anyone noticed. Hopefully. I found the strawberry buttercream from Sweet Lavender Bake Shop. It was quite scrumptious. Granted, the recipe calls for 4 sticks of butter! Yowza! Alas, this isn't a frosting you want to make every day, but once a year should suffice. Overall, I think the cupcakes were a big hit. The birthday girl approved, too! Enjoy!


Ingredients:
Cupcake Batter:
1 3/4 cups all-purpose flour
2 cups sugar
3/4 cups good cocoa powder
2 teaspoons baking soda
1 teaspoon baking powder
1 teaspoon kosher salt
1 cup buttermilk, shaken
1/2 cup vegetable oil
2 large eggs, at room temperature
2 teaspoons pure vanilla extract
1 cup freshly brewed hot coffee

Strawberry Buttercream:
5 large egg whites
1 cup granulated sugar
Pinch of salt
4 sticks unsalted butter, almost room temp (cut into little cubes)
2 tsp vanilla extract
½-1 whole vanilla bean
3/4 cup fresh strawberry puree macerated with 2 tablespoons sugar

Preheat your oven to 350 degrees. Line 2 cupcake pans with cupcake liners. Set aside. Take the bowl from your standing mixture and add in the sugar, flour, cocoa powder, baking soda, baking powder, and salt. Mix together to combine. Take a medium sized bowl and add in your buttermilk, vegetable oil (I used canola oil), eggs, and vanilla. Stir. Slowly add the liquids to the dry ingredients while the speed of the mixture is on low. Once combined; slowly add in the coffee. Now, I was pretty concerned because the mixture was very liquidy (sorry, just made up a new word). Have no fear; just pour the mixture directly into your prepared cupcake liners. Bake for 18-22 minutes or until a toothpick comes out clean when inserted into the middle of a couple cupcakes. Remove from oven and cool completely.

Now to make the strawberry buttercream; take out your blender and puree the strawberries. I used a pint of fresh strawberries. Measure out 3/4 of the strawberry puree and pour into a small bowl. Add 2 tbsp of sugar. Stir and set aside. Next, get out a medium sized saucepan and add water about half way. Bring to a boil. Add the bowl from your standing mixer to the saucepan to create a double boiler. Add the egg whites and sugar and whisk constantly until the sugar melts. This should only take a couple minutes if that. Remove the standing mixer and attach it back to the mixer. Attach your wire whisk and whisk the egg whites until they form stiff peaks. This takes about 10 minutes. Make sure they egg whites have cooled by touching the bottom of the bowl. Next, one square at a time add the butter into the egg whites. Continue to do this until the butter is fully incorporated. Add the vanilla and the vanilla bean. Lastly, add the strawberry puree to the mixture. Stir until full incorporated. Filly a pastry bag with a large star attachment and pipe onto the cooled cupcakes. Enjoy!

Monday, May 20, 2013

Cream Cheese Brownies

I've been getting a lot of slack lately at work. Not because of how I'm performing, or anything, but due to not bringing in any goodies lately. It's not that I don't want to, but I just haven't felt like baking. I think the warm weather has something to do with it. I mean who feels like turning on a hot oven on a 90 degree day? Personally, I would prefer firing up my ice cream maker and making some watermelon sorbet. Mmm. Alas, this weekend wasn't sunny and 90 degrees. Nope, try rainy and in the low 70s. Bleh. But, it worked out for my fellow co-workers, because I decided to try a new brownie recipe. I found this recipe in my handy Cook's Illustrated cookbook, and it was definitely yummy. The brownies turned out very moist and chocolatey (new word?). Plus, the cream cheese almost convinced you that you're eating a brownie cheesecake. Almost. I highly recommend this recipe, and if you bring it into work your co-workers will be most appreciative and complimentary! Promise!
 

Ingredients
Brownie Base:
2/3 cup all-purpose flour
1/4 tsp salt
1/2 tsp baking powder
4 oz bittersweet chocolate or semisweet chocolate (I used semi-sweet chocolate chips)
2 oz unsweetened chocolate
8 tbsp unsalted butter
1 cup sugar
2 tsp vanilla extract
3 large eggs
Cream Cheese Filling:
8 oz cream cheese, room temperature
1/4 cup sugar
1/2 tsp vanilla extract
1 large egg yolk

First pre-heat your oven to 325 degrees. Take out your 8x8 baking pan and place foil inside so the edges hang over the pan. This will make lifting the brownie out of the dish easier. Spray with cooking oil, and set aside. Take out a small bowl and add the flour, baking powder, and salt. Whisk and set aside. Now, take out a medium sized sauce pan and fill half way with water. Bring to a simmer, and then place a medium sized bowl in the saucepan. Place the butter and chocolate in the bowl. Stir occasionally, so the butter and chocolate melt and come to a smooth consistency. Remove the bowl from the saucepan, and then add the sugar and vanilla. Then, whisk in the eggs one at a time. Continue whisking until the mixture is completely smooth. Next, add the dry ingredients that you had set aside earlier, and whisk until just incorporated. For the cream cheese filling; beat the cream cheese in a small bowl with sugar, vanilla, and the egg yolk until just combined. Transfer half the brownie batter into the prepared baking dish. Then using a spatula add in half the cream cheese mixture. I just plopped about 3 spoonfuls into the brownie mixture. Then, add the remaining brownie batter and add the remaining cream cheese mixture. Then, use the tip of a knife and swirl the batter and cream cheese filling. Bake until the edges of the brownies have puffed slightly, and the toothpick inserted in center comes out with several moist crumbs attached. About 50 to 60 minutes. I believe mine took about 50 minutes to bake. Be sure to turn the brownie mixture half way thru baking to ensure it cooks evenly. Let brownies cool in pan on a wire rack for 5 minutes. Then, remove the brownies from the pan using the edges of the foil. Let cool on wire rack to room temperature, about 1 1/2 hours. Refrigerate until chilled, at least 3 hours. Cut brownies into 2-inch squares and serve.

Friday, December 21, 2012

Martha Washington Candies

Who doesn’t love candy? And, who doesn’t love chocolate, pecans, butter, and coconut? Well, if you are like me and you love all 4 of those ingredients then you will love these Martha Washington Candies. I used to make these candies all the time at Christmas back in my college years, because they are really super simple to make. But, be warned; they make a ton. And, you will probably find yourself popping a few in your mouth; you know, just to make sure they taste okay. This is another recipe where I think my mother got it from her mother. But, either way it’s super creamy and delicious. I hope you enjoy them as much as I do.


Ingredients:
4 sticks butter, melted
1 2 pound bag of powdered sugar
2 cups chopped pecans
1 can sweetened condensed milk
2 tsp vanilla
10 oz bag of coconut
1 12oz bag of semi-sweet chocolate chips
¾ block of paraffin wax (find in the canning section of your grocery store)

Take a large bowl, and combine all these ingredients thru the coconut. Mix well. Set in the fridge for a couple hours to cool.
Around the 2nd hour, take out a small saucepan and combine the wax and the chocolate. Let  the mixture melt over medium heat. Once the mixture is melted; set the heat on low/warm. Now, remove the candy mixture from your fridge, and using a small ice cream scooper; scoop out the candy, roll into a ball, and dip into the chocolate mixture. I used a slotted spoon to help coat the candies in chocolate. It can get pretty messy with your hands. Then, place the candies on a wire rack with parchment paper under it so the candies can set. It should make around 60+ candies. Best to keep in the freezer as they can get really soft if left at room temperature. Enjoy!

Friday, December 14, 2012

Chocolate Peanut Butter Clusters

You know what’s good? Simple. Easy. Uncomplicated. Especially during the time of year when things are often busy, difficult and stress-inducing. And these little clusters are the epitome of simple. Just 4 ingredients, a microwave, and some wax paper and you’ve got a simple little chocolatey candy that tastes really impressive. I love to include these in my Christmas cookie gifts because I always overcommit myself to difficult cookies and these are a lifesaver to fill out the tin at the last minute. (And hey, I hear Santa is a big fan as well).


Ingredients
12 oz semisweet chocolate chips
10 oz peanut butter chips
3 cups (give or take) unsalted peanuts
Sea salt for garnish

Are you ready for this? Simply empty the bags of chocolate and peanut butter chips into a large microwave safe bowl. Melt them. This is really easy if you have a melt setting on your microwave, but if not, just make sure to keep the power on fairly low and check it often. Melt until you can stir it together with no lumps and make sure the chocolate and peanut butter is completely combined. Then pour in your peanuts. You might want to start with fewer nuts and stir it in, then see where you are as far as your nut to chocolate ratio. You can always add more.

Once your nuts are stirred in, set out some wax paper on your countertop. Use a big spoon to drop clusters of these chocolate nuts. This will get messy, I promise. Just go slow and don’t lick your fingers until you’re done. Once you’ve laid out your clusters, go back and sprinkle just a touch of sea salt on top before they’ve completely set. If you wait too long, the salt will not stick, so you may have to work in batches. And that’s it! I guarantee you’ll get lots of compliments and guess what, you don’t have to tell anyone how easy it is to make. I won’t tell. 

Wednesday, December 12, 2012

Mint Chocolate Cookies

I love these cookies. In fact, you guys, I’m going to make a bold statement here. These are my favorite cookies. BOOM! That’s right. Favorite. Which explains why I only make them once a year. Because if I made them as often as I think about them (all the time) and ate them as often as I’d like to (all the time) I would have to be rolled into the office. Or maybe transported on a flatbed truck. Because they are THAT good. I mean, as long as you like chocolatey, fudgy cookies topped with delicious swirled Andes mints. You know, if you enjoy that sort of fabulous thing.

Anyway, I make these once a year, every year, for Christmas. I try to give most of them away, but I find myself making bigger and bigger batches so that I have plenty to keep for myself too. In the recipe book where we found this gem, there are post it notes stuck in with the measurements for double, triple, and quadruple batches. My mom used to make them when I was a kid, but I took over as soon as I could and have been making them ever since. I highly, HIGHLY recommend that you add them to your repertoire. Or you could always become my good friend and you’ll get them from me. Once a year.


2/3 cup packed brown sugar
6 Tbsps. unsalted butter
1 Tbsp. water
6 oz. semisweet chocolate chips
1 egg
1 ¼ cup flour
½ teaspoon baking soda
8 to 12 oz. Andes mints

In a saucepan over low heat, combine the brown sugar, butter and water. You want to stir often as the butter melts so that the brown sugar doesn’t burn on the bottom. Stir until the butter is completely melted (be patient!) and then pour in your chocolate chips and stir continuously. Again, make sure the chocolate doesn’t burn on the bottom. When the chips are completely melted and you no longer see any lumps and bumps, pour the mixture into a large bowl and let it cool for about 10 minutes.

Beat in one egg, and then add the flour and soda on top. Mix the soda into the flour before stirring it all together. Make sure that the flour is completely mixed in, but don’t over mix. Refrigerate for a few hours or overnight to make the next step easier.

Roll the dough out into 1-inch (or so) balls and place on a cookie sheet. You’ll cook them at 350 for about 7 minutes. You may have to adjust your cooking time based on your oven, and also for the first batch it usually takes a minute more (I think because the pan is cool). They should be puffed up and fragile looking with some crackles in the cookie.

While they are baking, unwrap your Andes mints and cut them in half. Take the cookies out and place a mint half on each cookie. Just barely push it down, just enough to create a tiny dip—don’t press the mint actually down into the cookie. Put them back in the oven for just one minute, and then pull them out again. With a butter knife, swirl the melted mint on top of the cookie a bit like frosting. You don’t need to cover the whole cookie, just the top. Then let them sit and cool for a few minutes. If you try to move them right away, they are likely to fall apart, but as they cool they hold together a little more. After a few minutes, remove them to some wax paper to cool fully before storing. Or before putting them directly in your mouth. 

Monday, November 26, 2012

Chocolate Chocolate Chip Zucchini Muffins

I generally am not a muffin person. I don’t know why. I just prefer cookies. Or the occasional cake. Or, mmmm… ice cream. Or cheesecake…yum! Okay getting side tracked. Anyway, during my recent vacation I had an extra zucchini lying around (who doesn’t) and decided that zucchini muffins were the way to go. And not just plain old zucchini, but chocolate chocolate chip zucchini. I found the recipe on From Ketchup to Chutney and they turned out pretty good. I may have overbaked them just slightly because they weren’t as moist as I would like, but still very tasty. And for anyone worried, you don’t taste the zucchini at all.

I did make a few tiny adjustments. The original recipe called for half wheat flour and half all-purpose flour and I just used AP flour for the whole thing. It also called for plain yogurt and I used plain Greek yogurt since I had some. One little thing that threw me was the orange zest. In the future, I might leave it out. I’m not a big fan of chocolate and citrus, and the orange smell was definitely prevalent the first day. However it did dissipate after that first day, so maybe it’s fine. If you do like the citrus-chocolate combination, by all means, leave it in. The recipe also said that it only made 24 mini-muffins but it made almost three times that.


1 ½ cups sugar
¾ cup vegetable oil
2 tsp vanilla extract
3 eggs
1/3 cup plain Greek yogurt
2 ¼ cups shredded zucchini
Zest of 1 lemon
Zest of ½ orange
2 ½ cups white flour
½ cup cocoa powder
1 ½ tsp baking soda
1 tsp salt
½ tsp ground cinnamon
8 oz chocolate chips

Start by preheating the oven to 375 degrees. Either line your muffin tins or spray them with Pam. In a large bowl, beat or whisk together the sugar, oil and vanilla, then beat in one egg at a time until smooth, followed by the yogurt. Stir in the citrus zest and the grated zucchini.

I usually don’t advocate separate bowls for wet and dry ingredients, but for this recipe I would make an exception. So in a separate bowl stir together your dry ingredients: flour, cocoa, baking soda, salt and cinnamon. Make sure they are mixed thoroughly. Add half the dry mixture to the wet mixture and stir (by hand, not mixer!) until it’s just mixed, before adding the rest. You don’t want to overmix, so just make sure that it’s all incorporated and that’s it. Add in your chocolate chips and stir briefly.

Fill your muffin cups three quarters full and bake. I made mini muffins so I baked each batch about 13 minutes. If I did it again I might try a batch at 11 minutes and see if they are any more moist. Full size muffins cook for 15-20 minutes.

I think my favorite part of making these was giving some to a couple male friends (mostly for them to take to their families). I didn’t think zucchini was such a weird ingredient but they both balked and said, “Chocolate chip—what?” Later one of them referred to the muffins as “Rutabaga-asparagus or something.” So I guess as long as your guests or kids aren’t as picky as those two, you’ll be set. 

Saturday, November 24, 2012

Thin and Crispy Chocolate Chip Cookies

If there's one dessert that always hits the spot it's chocolate chip cookies. I posted this chocolate chip cookie recipe more than a year ago, which is absolutely fabulous, but you have to wait till the next day before you can eat them. However, these thin and crispy chocolate chip cookies are great if you want to satisfy that craving now! I found this recipe in my handy Cook's Illustrated cookbook. These cookies remind me of the ones my Grandma use to bake and then freeze. Their thin, crispy, and would taste great frozen or at room temperature. My grandma always froze her cookies, and I always knew to check the freezer for those goodies. I doubt she noticed a couple were missing. ;) Enjoy!


Ingredients:
1 1/2 c all-purpose flour
3/4 tsp baking soda
1/4 tsp salt
8 tbsp unsalted butter, melted and cooled
1/2 c granulated sugar
1/3 c packed light brown sugar
2 tbsp light corn syrup
1 lg egg yolk
2 tbsp milk
1 tbsp vanilla extract
3/4 c semisweet chocolate chips

First, adjust your oven to the middle rack position and set your oven to 375 degrees. Then, line 2 baking sheets with parchment paper.

Now, whisk the flour, baking soda, and salt in a medium bowl and set aside. Take the bowl of a standing mixer fitted with the paddle attachment and beat the melted butter, the sugars, and corn syrup on low speed until thoroughly blended, about 1 minute. Then add in the egg yolk, milk, and vanilla; mix until fully incorporated and smooth, about another minute. With mixer running on low, slowly add the flour mixture and mix until just combined. Stir in the chocolate chips. Working with 1 tablespoon of dough at a time, roll into balls, and place 2 inches apart on baking sheets. Bake until the cookies are a deep golden brown and flat, about 10-12 minutes. Rotate the baking sheet halfway thru to ensure even baking. Let cookies cool on baking sheet for about 3 minutes before transferring to a wire rack. 

Tuesday, November 6, 2012

Palm Beach Brownies


When I was about 23 years old; I went to Vero Beach, Florida to visit my Aunt and Uncle. My cousin met me out there and we had a wonderful time. It was a lot of firsts for me during that trip. I went on my first boat ride, ate my first sushi, tried crab legs for the first time; saw my cousin in a play for the first time, etc. Eating brownies that my aunt had made wasn’t necessarily a first, but these brownies were to die for. They’re appropriately called Palm Beach Brownies. They have a crunchy outer crust and a soft inner layer. They are really good. I loved them so much that she gave me the recipe and I’ve been making them ever since. Hopefully, you’ll enjoy them, too!


Ingredients:
Makes 16 huge or 24 or more extra- large brownies
8 ounces unsweetened chocolate
8 ounces (2 sticks) unsalted butter
5 lg eggs
1 tablespoon vanilla extract
1 teaspoon almond extract
1/4 teaspoon salt
2 1/2 tablespoons dry instant espresso or other powdered (not granular) instant coffee
3 3/4 cups sugar
1 2/3 cup sifted all-purpose flour
8 ounces (2 generous cups) walnut halves (optional)
First, adjust your rack 1/3 from the bottom of the oven and preheat to 425 degrees. Next, take a 9x13 baking pan; turn it over and cover it with a piece of aluminum foil and press down the foil around sides of the pan using your hands. Remove the foil and turn the pan over then press the foil into the pan. Spray the foil with cooking spray.
Take a small saucepan and place over a large saucepan filled about ¼ of the way with water, then melt the butter and unsweetened chocolate over medium heat. Stir occasionally to help melt the chocolate and butter. Once melted removed the chocolate mixture from the heat and set aside to let cool.
In the bowl of an electric mixer, beat the eggs, vanilla extract, almond extract, salt, dry instant espresso or coffee, and sugar at high speed for 10 minutes. Turn the speed down to low and add in the chocolate mixture. Beat only till just mixed. Next, add in the flour and beat only till just mixed. Remove the bowl from the mixer and stir in the nuts, if using.
Pour the brownie mixture into your prepared baking pan and smooth the top. Bake for 15 minutes and then turn the pan to ensure even baking. Bake for an additional 10 minutes. If you insert a toothpick into the brownies it will come out wet even so it is done. Remove the brownies from the oven and let cool. Carefully, remove the brownie from the pan by lifting the foil. Cover with foil and refrigerate for several hours or leave it at room temperature over night. Use a serrated bread knife to cut into the brownies as they will be very sticky. Wrap brownies individually with foil or seal in an air tight container separating each layer with wax paper.

Wednesday, July 25, 2012

Iron Chef Basil: Chocolate Cake with Basil Buttercream

We had Iron Chef Basil about a month ago now, and I’m just getting around to posting my recipe. I like to choose the course that seems the most disparate with the ingredient. So for basil, that was of course dessert! I found a lot of strawberry-basil desserts but that seemed pretty classic and I wanted to challenge myself. When I found this recipe for chocolate cake with basil buttercream on The Vanilla Bean Blog, I knew I had to try it. Besides, the photos were gorgeous, and we all know that presentation is half the battle at our Iron Chef competitions. I had a lot of trouble getting the buttercream to set up, but in the end I think it tasted great. It didn’t have a lot of basil flavor that first night (darn it!) but it got stronger and stronger every day. In fact, by the fourth day, it might have been a little too strong, so you’ll want to eat it fast! This recipe is definitely kind of a process and reminds me why I don’t back layer cakes all that often, but for a special occasion (or a competition) it’s worth it. You need to start the night before to get the buttercream ready, so be prepared!


Cake Ingredients
1 3/4 cup flour
2 cups sugar
3/4 cup good cocoa powder
2 teaspoons baking soda
1 teaspoon baking powder
1 teaspoon salt
1 cup buttermilk, shaken
1/2 cup vegetable oil
2 eggs, at room temperature
1 teaspoon vanilla
1 cup freshly brewed hot coffee

This is Ina Garten’s chocolate cake recipe, and it’s very good. Mine was a bit dense because I may have overmixed it, so be careful! I think the recipe was a little hard to follow because it was written for someone with a stand mixer and surprise!—not everyone has one of those.

Start by preheating the oven to 350 and butter or spray two 8 inch round cake pans. I had non-stick pans but had a panicked moment when the cakes wouldn’t come out, so even if you do still butter. You could also put a round of parchment paper in the bottom of the pan.

Sift together the flour, sugar, cocoa, baking soda, baking powder and salt. I’m not a big sifter generally, but I would do it for this cake because of the cocoa powder. For some reason that always tends to clump up on me. Stir the ingredients together until they are well combined.

In another bowl, mix together the buttermilk, oil, eggs and vanilla until combined. Then slowly add the wet ingredients to the dry while mixing on low (it helps to have an extra set of hands for this). Next add the coffee and stir (with a spatula not the mixer) just enough to combine, scraping the bottom. I can’t stress enough not to overmix this. It will be super duper liquidy. I was nervous, but don’t be. Pour the batter into the two pans and bake 35-40 minutes until your toothpick comes out clean. Then remove from the oven and cool in the pans for 30 minutes before turning them out on to a cooling rack to finish cooling completely. Now, to make the buttercream.

Buttercream Ingredients
1 1/2 cups whole milk
1/3 cup heavy cream
1 cup fresh basil leaves, packed
1 1/2 cups granulated sugar
1/3 cup all purpose flour
1 1/2 cups (three sticks) unsalted butter, soft but cool, cut into small pieces
1 tsp pure vanilla extract

The night before stir milk, heavy cream and basil in a saucepan. I tore the basil leaves in half, thinking that it might let them seep out more basil flavor (who knows?). Heat on low until just barely simmering and then remove from heat. Let it cool to room temperature, then refrigerate overnight. When you’re ready to make the buttercream, remove the basil leaves from the cream, making sure to squeeze out the leaves.

Whisk sugar and flour together in your saucepan before adding the basil cream mixture. Cook over medium heat, whisking occasionally for 10-15 minutes, until the mixture boils and thickens. Then move the mixture to a bowl and beat on high speed until it is cool, about 7-9 minutes. I know it’s a pain to mix that long if you don’t have a stand mixer, but don’t skimp. If the sauce is too hot your buttercream won’t set.

You want your butter to be soft but cold. What I did was let it soften at room temperature, but then put it back in the fridge 10-15 minutes before I needed it. Reduce your mixing speed to low and add the butter, mixing until it’s fully incorporated. Then turn your mixer up to medium high speed and beat until the frosting is light and fluffy and frosting like! Should only take a couple minutes. Add the vanilla and mix until it’s combined.

Now you need to check the consistency. If your frosting is too soft (mine was) put it in the fridge to chill and then beat again until it’s right. If it’s too hard, you can set the bowl over hot water (simmering at most) and beat until it softens a little. Hopefully you won’t have to do either!

You should know how to frost a layer cake but just in case… start by topping one layer with frosting, then put the second layer on top. Now you’re ready to frost the rest of the cake, and decorate with a few basil leaves on top. We didn’t eat the leaves with the cake though! It’s a strange flavor combination but it definitely works, and I think the cake recipe will definitely become a staple of mine. 

Sunday, July 22, 2012

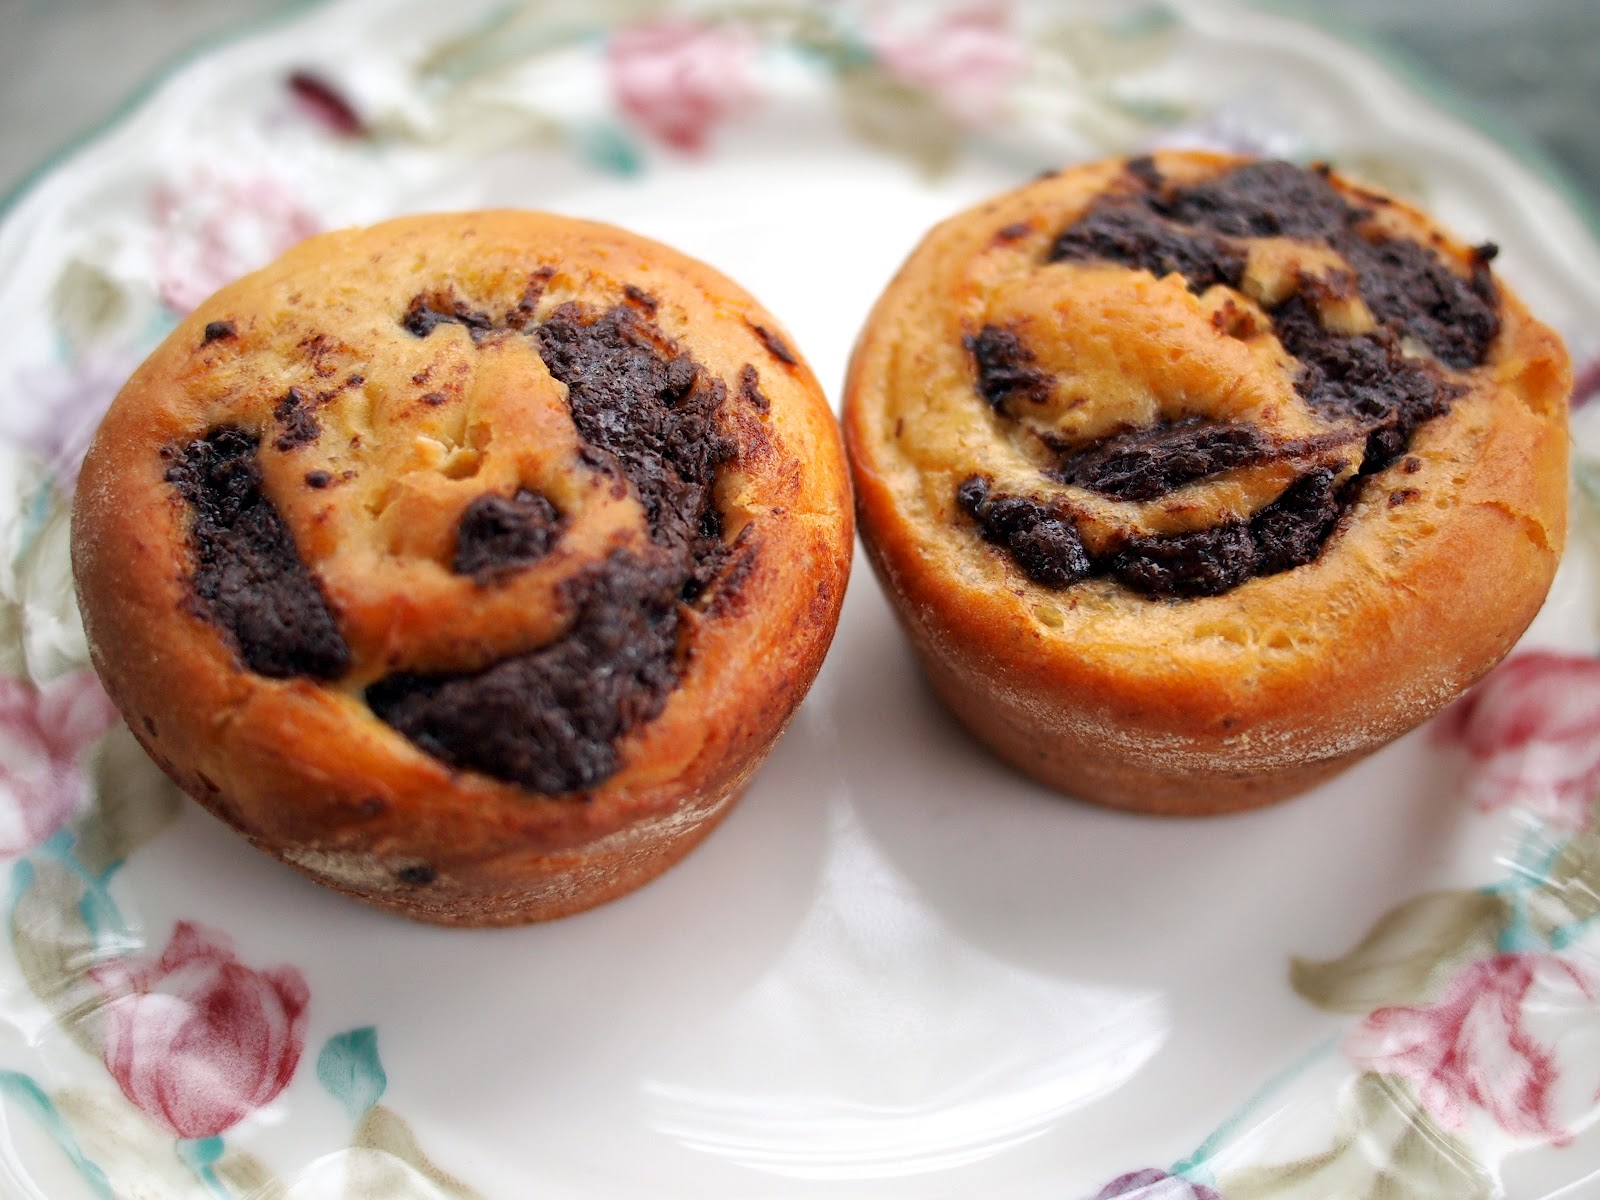
Chocolate Swirl Buns

So, I probably have more dessert recipes on this blog than anything else. But, there's nothing wrong with that, right? I mean a girl has to have her sweets. And, boy do I have my sweets. It's probably one of the things I love the most about being in the kitchen: baking. I love to make dough, cookies, brownies, ice cream, popsicles, cakes, etc. I love the smells and taking that first bite. It's just heaven to me. So, yesterday I decided to bake. It was cloudy. It was raining. And, I wanted something sweet. So, I decided to make these buns from smitten kitchen. The only bummer thing is that I ended up over-baking them a bit. Sigh. They're still good, though. I highly recommend this recipe. It is really easy and scrumptious. Enjoy.


Made 16 buns for me, but recipe says 12.
 Ingredients:
Dough
1/2 cup (120 ml) milk, preferably whole
1/4 cup (50 grams) plus a pinch of granulated sugar
1 1/2 teaspoons (5 grams) active dry yeast
1 large egg, brought to room temperature
2 cups (250 grams) all-purpose flour, plus more for work surface
1/2 teaspoon table salt
3 tablespoons (45 grams) unsalted butter, at room temperature, plus additional for bowl and muffin tins
Filling
3 tablespoons (45 grams) unsalted butter, at room temperature
1/4 cup (50 grams) granulated sugar
1/2 pound (225 grams) semisweet chocolate
Pinch of salt
3/4 teaspoon ground cinnamon (optional)
Egg wash (optional)
1 egg
2 teaspoons (10 ml) heavy cream or milk

To make the dough, take a small bowl and add in the warm milk (110 to 115 degrees) and a pinch of sugar. Sprinkle in the yeast and let sit for about 5 minutes until the yeast foams. While the yeast is dissolving, take a medium sized bowl and whisk the eggs and 1/4 cup sugar. Slowly, whisk in the yeast mixture. Next, take the bowl from you standing mixture and stir the flour and salt with the paddle attachment. While mixture is on low, slowly add in the egg mixture. Mix well. Then, add in the butter. Mix well. Change out the paddle attachment to the dough hook. Let knead for about 10 minutes on low speed. Prepare a large bowl by spraying with cooking spray. The dough will be very sticky and stringy. That's okay. Form into a ball and place in the large bowl. Wrap with plastic wrap and place the bowl in a warm draft-free place (I prefer my oven set at 85 degrees) for about an hour or until the dough has doubled in size. My dough took about 2 hours to rise.

While the dough is rising, get your filling ready. I used semi-sweet chocolate chips so I didn't have to do any chopping. Throw your chocolate, salt, sugar, and cinnamon into a food processor. Process until relatively fine. Add in the butter and process until well incorporated. Set aside. Now, remove the dough from the oven (or wherever you had it) and punch it down. Turn out onto a floured surface and let rest for about 5 minutes. Then, roll out to about 11 inches wide and 20 inches long. Sprinkle the chocolate mixture all over the dough. Tightly roll into a log starting at the shorter end of the dough. It will form into a long log. Carefully slice the dough using a sharp serrated knife into 1 inch pieces. Place swirl side up into your greased muffin sheets. I had to use 2 muffin sheets because I ended up 16 buns. Place back in your draft-free/warm environment for another 30 minutes. I placed a towel over the buns. Remove the buns from the oven and set to 350 degrees. Once the oven is ready; add the buns and cook for about 15 to 20 minutes. Deb (from smitten kitchen) said the dough should register 185 to 190 degrees when they're ready. I think my thermometer might be off, because mine got up to 180 degrees and I placed them back in the oven for a couple minutes. At that point, I should have just left them out because I ended up overbaking them. Bleh. Lesson learned. Cool on a wire rack. enjoy!

Sunday, July 15, 2012

Chocolate Ice Cream with Reese's Peanut Butter Cups

So, today is National Ice Cream Day. I don't know who needs an actual excuse to eat ice cream, but if you do there you go. I just gave you an excuse. Now, if you want an excuse to eat ice cream every day then here you go; July is National Ice Cream Month!!! I made David Lebowitz's Chocolate Ice Cream and added chopped Reese's peanut butter cups. The result turned out deelicious. The chocolate ice cream came out super smooth and very chocolaty. I'm seriously loving David Lebowitz The Perfect Scoop cookbook. It has such great recipes, and so far all the ones that I've tried have turned out wonderfully. So, here's to National Ice Cream Day and National Ice Cream Month. Now, go eat some ice cream! Enjoy!


Ingredients:
2 c. heavy cream
3 tbsp. unsweetened Dutch-process cocoa powder
5 oz. bittersweet or semisweet chocolate, chopped (I used 3/4c. semi-sweet chocolate chips)
1 c. whole milk
3/4 c. sugar
Pinch of salt
5 large egg yolks
1/2 tsp vanilla extract
2 cups chopped Reese's peanut butter cups (optional)

First, take a medium sauce-pan and warm the cream along with the cocoa powder, whisking thoroughly to blend the cocoa. Bring the mixture to a boil, then reduce the heat and simmer at low for about 30 seconds, whisking constantly. Remove from heat and stir in the chocolate. Stir until smooth. Then, stir in the remaining cream. Pour the mixture into a large bowl, and place a mesh strainer on top of the bowl. Set aside.

Clean out your saucepan, and then warm the milk, sugar, and salt. In a separate bowl, whisk together the egg yolks. Slowly pour the warm milk into the egg yolks, whisking constantly. Then, scrape the egg mixture back into the saucepan. Stir the mixture constantly over medium heat, scraping the bottom as you stir. The mixture should thicken and eventually coat your spatula or wooden spoon. It literally took me 30 minutes of standing there stirring. Pour the custard through the strainer and stir it into the chocolate mixture until smooth. Then stir in the vanilla. Stir until cool over an ice bath. Chill the mixture thoroughly in the fridge. Once chilled, freeze it in your ice cream maker. My mixture came out pretty thick, so I had to whisk it vigorously to thin it out before adding it to my ice cream maker. Once the ice cream has formed; add in the chopped Reese's peanut butter cups. Pour into your air-tight container and freeze. Enjoy!

Sunday, June 17, 2012

Chocolate Chip Banana Bread

I was at Physical Therapy the other day, when a nice man came by the office giving away vegetables and bananas from his farm. Don't worry; he's a patient at the office and he was advertising his farm on his truck. So, I'm sure he is legit. :) Well, I picked out some yellow squash as that was all he had left. I also grabbed a bunch of bananas. The bananas were very ripe. And, I only like to eat bananas when they are barely green. So, I figured I would use these bananas to make banana bread. I've made this recipe once before, and I can't believe I haven't posted it on the blog yet. The bread comes out very moist. Plus, the chocolate chips give a nice flair to boring ol' banana bread. I really think you should give it a try. You won't regret it one bit. Enjoy!

 
Ingredients:
1 c sugar
1 stick butter, softened
1 1/2 c mashed bananas
2 eggs, room temperature
2 tsp vanilla
2 c all-purpose flour
1 1/2 tsp baking powder
1 tsp baking soda
1/2 tsp salt
1/4 tsp cinnamon
1/8 tsp nutmeg
1 cup semi-sweet chocolate chips


Pre-heat oven at 325.

Take your bowl from a standing mixer, and add in the butter and sugar. Beat on medium speed until light and fluffy. Add in the mashed bananas, vanilla, and eggs. Beat well. Take a small bowl and add in the flour, baking powder, baking soda, salt, cinnamon, and nutmeg. At medium-low speed; gradually add the dry ingredients into the banana mixture. Fold in the chocolate chips until well incorporated. Pour the batter into a greased and floured 9x5x3 loaf pan. Cover loosely with a tent of aluminum foil. Bake for 40 minutes. Remove foil from oven and bake for an additional 20 minutes or until the toothpick comes out clean. Remove from oven and let cool. Invert the loaf pan onto a plate. Banana bread should come out easily once cooled. Enjoy!


(click for printable recipe)

Wednesday, June 13, 2012

Chocolate Ice Cream with Peanut Butter Cap'n Crunch

There are two items in my house that are at war. One is my ice cream maker. The other is my scale. They just do not get along. My scale has been winning out for awhile but this week the ice cream maker got back in the fight in a big way. A big chocolatey, peanut buttery way.

I used a chocolate ice cream recipe from Jeni, of Jeni’s Splendid Ice Creams via David Lebovitz. But I wanted to do something different and that’s why I added the Peanut Butter Cap’n Crunch at the very end. It was actually quite good at the beginning. But by the time the ice cream had hardened, I realized that the Cap’n just doesn’t hold up well to ice cream. Sadly, it got a little mushy. However, the chocolate ice cream was fantastic! Really rich and extremely chocolatey. I would recommend just making the chocolate ice cream and use the Cap’n Crunch as a topping if you so desire.

Ingredients:
1 cup whole milk
4 teaspoons corn starch
1 cup heavy cream
1 cup evaporated milk (unsweetened condensed milk)
2/3 cup sugar
2 tablespoons light corn syrup
1/3 cup unsweetened cocoa powder
3 ounces semisweet chocolate, chopped
1/4 teaspoon sea salt
1/2 teaspoon vanilla extract

In a very small bowl or prep dish, make a slurry with the corn starch and 3-4 tablespoons of the milk. Mix until it’s smooth. In a large saucepan, heat up the rest of the milk, cream, evaporated milk, sugar and corn syrup. I actually didn’t have evaporated milk, only sweetened condensed milk and the powers of the Internet told me that was not a suitable substitute. However, you can just use regular cream and that’s what I did.

When the milk mixture comes to a moderate boil, whisk in the cocoa powder very well and let it boil for about 4 minutes. You’ll know if the boil is too much if the milk starts to foam up and threaten to boil over. Just turn the heat down some if that happens. Try to break up any clumps of cocoa you see.

Next pour in your slurry. You may need to mix it again to loosen it up. Cook for about one minute while stirring constantly until it thickens slightly. This happened almost immediately for me. Take it off the heat and add your chocolate and salt and stir until everything is melted and smooth. Then add the vanilla.

For this next step it’s helpful to have an extra set of hands so get someone to help you if you can. Pour the mixture through a sieve into a Ziploc bag. Be careful because it’s very hot. Zip the bag closed and put it in a bowl filled with ice to cool down for about a half hour. You will want to check it and move the ice around as it melts to make sure the mixture is getting cool.

Once it’s cool, put the mixture into your ice cream maker and follow the instructions for freezing it. Once the mixture had the consistency of soft serve, I added the Cap’n Crunch. You can either leave the mixture in your canister and put it in the freezer to set up, or pour it into another container. I pour it into another container because I find that the ice cream maker canister freezes it so solid that it’s hard to ever get out. I found these great little pints on Amazon that work great. They make it easy to give away my ice cream, which makes my scale feel better about the whole thing. 


(click for printable recipe)

Sunday, June 3, 2012

Ara's Brownies

Not only do we play volleyball at Richmond Volleyball Club, but we also enjoy eating and drinking. Sometimes, food is brought in from home to help celebrate teammate's birthdays, anniversaries, etc. Well, one particular night Ara (one of the volleyball players at the club) brought in some brownies. She asked if we wanted a piece. I mean who am I to turn down a brownie, so I said sure. Man, that brownie was so yummy. I didn't have just one brownie; I had three! Since I liked it so much I decided to ask her for the recipe. Fortunately, she knew it by heart. I decided to make these brownies the other night. They are very gooey and the top has a crispy outer layer. Enjoy!

Ingredients:
2 sticks unsalted butter
4 oz. unsweetened chocolate
4 eggs
2 cups sugar
1 tsp vanilla
1/2 c flour

First, take a 9x13 pan and spray with cooking spray. Set the oven to 375 degrees.
Next, take 2 sticks of butter and the 4oz of unsweetened chocolate and put in a small saucepan. Melt on low heat. Once melted set aside to cool. Next, mix together the eggs, sugar, and vanilla. Stir in the flour and the cooled chocolate mixture. Pour the mixture into the baking pan. Bake for 20 to 25 minutes. When you stick a toothpick into the brownie it may come out with chocolate. That's okay. As long as the brownie is set it should be good. Set aside to cool, and then place in the fridge for an hour. Sprinkle with confectioner sugar. Enjoy.

(Click for printable recipe)

Friday, April 20, 2012

Chocolate Bourbon Cake

I made this for my co-worker's birthday. He's a big bourbon lover. To give you an idea of how good this cake is let me tell you the conversation my co-worker relayed to me that he had between him and his wife (he took the left-overs home): His wife: "You know I have a chocolate bourbon cake recipe." My co-worker: "You do?" His wife: "Yeah, but it only calls for 2 tbsp of bourbon. Do you know how much was in her recipe?" My co-worker: "She said a cup." His wife: "Well, no wonder hers is so much better!!" Now, I have to say that this isn't "my" recipe. I found it online from Simply Recipes. However, the blogger from that site said the recipe is from New York Times. So, there you have it. The cake was really good. And, I highly recommend it to all you bourbon lovers out there.

Ingredients:
1 cup (2 sticks) unsalted butter, softened, more for greasing pan
2 cups all-purpose flour, more for dusting pan
5 ounces high quality, unsweetened dark chocolate
1/4 cup instant espresso (can use instant coffee)
2 tablespoons unsweetened cocoa powder
1 cup bourbon whiskey (can use 1/2 cup), more for sprinkling
1/2 teaspoon kosher salt
2 cups granulated sugar
3 large eggs
1 tablespoon vanilla extract
1 teaspoon baking soda
1/4 cup confectioners’ sugar (powdered sugar), for sprinklingFirst set your oven to 325 degrees. Take out your bundt cake pan; and spray it generously with cooking oil. Throw some flour in there and coat the pan. Now, take your instant espresso and cocoa put it in a 2 cup measuring glass. Then, add boiling water to the measuring cup until it reaches 1 cup. Stir until the powder dissolves. Stir in the whiskey and salt. Set aside to cool.

Now, take your standing mixer's bowl and add in the butter and stir for a couple minutes until it's light and fluffy. Add in the sugar and beat until well combined. Add in the eggs one at a time...stirring well after each addition. Next, beat in the vanilla, baking soda, and melted chocolate. Now, set your mixer's speed to low. Gently, pour in some of the whiskey mixture. Beat well. Then add in some of the flour. Keep alternating the whiskey mixture with the flour mixture until you end with the whiskey. Pour into your prepared bundt pan. Bake in the oven for about an hour or until a toothpick comes out clean when inserted into the cake. Once that happens, remove the cake from the oven and let cool for about an hour to so. Once cool, invert the bundt pan using a plate and it should come out easily. Sprinkle with some bourbon and/or powdered sugar. Enjoy!!

(click here for printable recipe)

Thursday, April 12, 2012

Iron Chef Chocolate: Decadent Triple Chocolate Cheesecake

Ok, so Iron Chef Chocolate was a long time ago. Like a really long time. I don’t know why I haven’t written up this recipe before now. Well, ok, that’s kind of a lie. I know why. Because although this amazingly decadent chocolate cheesecake was deliciously rich and chocolatey, and although it took home second place in the Iron Chef Chocolate competition, it’s kind of a pain to make.  It’s not that it’s so difficult. It’s just that there are a lot of steps. It’s definitely not a weeknight cheesecake. In fact, it needs to be refrigerated overnight so it’s not even a one day cheesecake. But the good news is that it’s highly impressive to look at, and even more impressive to taste. So if you want to show off a little, and you have a weekend to spare—this is your cheesecake. I found this recipe at Mel's Kitchen Cafe.


CRUST
9-ounce package of chocolate graham crackers (or cookies)
1 tablespoon sugar
6 tablespoons butter, melted

Put the chocolate graham crackers in a food processor until they are finely ground. Mix them in a bowl with the sugar. Pour in the melted butter and mix until it’s evenly combined. Butter a 9-inch springform pan and then press the crumbs in an even layer on the bottom only. Bake in a oven preheated to 350 degrees for 5 minutes, just until set. Let cool, but leave the oven on.

FILLING
10 ounces semisweet or bittersweet chocolate, chopped
4 (8-ounce) packages cream cheese, room temperature
1 1/4 cups plus 2 tablespoons sugar
1/4 cup unsweetened cocoa powder
4 large eggs

Start by melting chocolate in a double boiler or, if you’re like me, the microwave, until completely melted and smooth. Let it cool just a little so it’s not completely hot. In the meantime, blend cream cheese, sugar and cocoa powder until completely smooth and combined. Add the eggs one at a time and beat, then mix in the chocolate. Pour the filling over the crust. Now is the hard part. You want to bake until the center is just barely set. It’s kind of hard to tell when it’s done so just do your best. I sometime just tap the side and see how much it jiggles. Some people swear on putting a pan of water in the oven as well to keep it moist. I’ve never done it, but I don’t think it could hurt if you want to.
When it’s done, remove from the oven and let it cool ten minutes before running a knife around the sides to loosen. Let it cool completely before refrigerating it overnight.

GANACHE
3/4 cup whipping cream
6 ounces semisweet or bittersweet chocolate, chopped
1 tablespoon sugar

Stir the cream, chocolate and sugar in a saucepan over low heat until smooth. Cool slightly before pouring over the center of the cheesecake. Spread it on top (within a half inch of the edge). This is great because it’ll cover any cracks you might have (don’t tell!). Chill for about one hour.

CHOCOLATE CURLS
3oz Semi-sweet baker’s chocolate
1 Tbsp Crisco

I used butter flavored Crisco because I had it around (it makes great chocolate chip cookies), but you can use unflavored as well. Put the chocolate and Crisco in a bowl and microwave for 30-45 seconds until the Crisco is melted. Using a fork, break up the chocolate and stir until it’s fully melted and combined. Use the back of a metal cookie sheet, and pour the chocolate on the back, spreading out into a very thin layer. Pop it in the freezer for a few minutes. You can tell if it is cold enough to make curls by touching it. If it leaves a big fingerprint, it’s not ready. If it only leaves a small imprint, you can start curling! With a metal spatula, scrape up the chocolate in long ribbons. It should automatically curl. If it breaks, then it’s too cold, so just wait 30 seconds before trying again. I found that I got the best curls when I moved the spatula in an arc, verses a straight line.
When you have enough curls, put them in a baggie and freeze until ready to serve.

To serve, release the springform pan and top with curls. It’s best to let it sit at room temperature for 1-2 hours before serving, to make it easier to slice. Speaking of slices... you'll want to keep them relatively small. This thing is hella decadent!