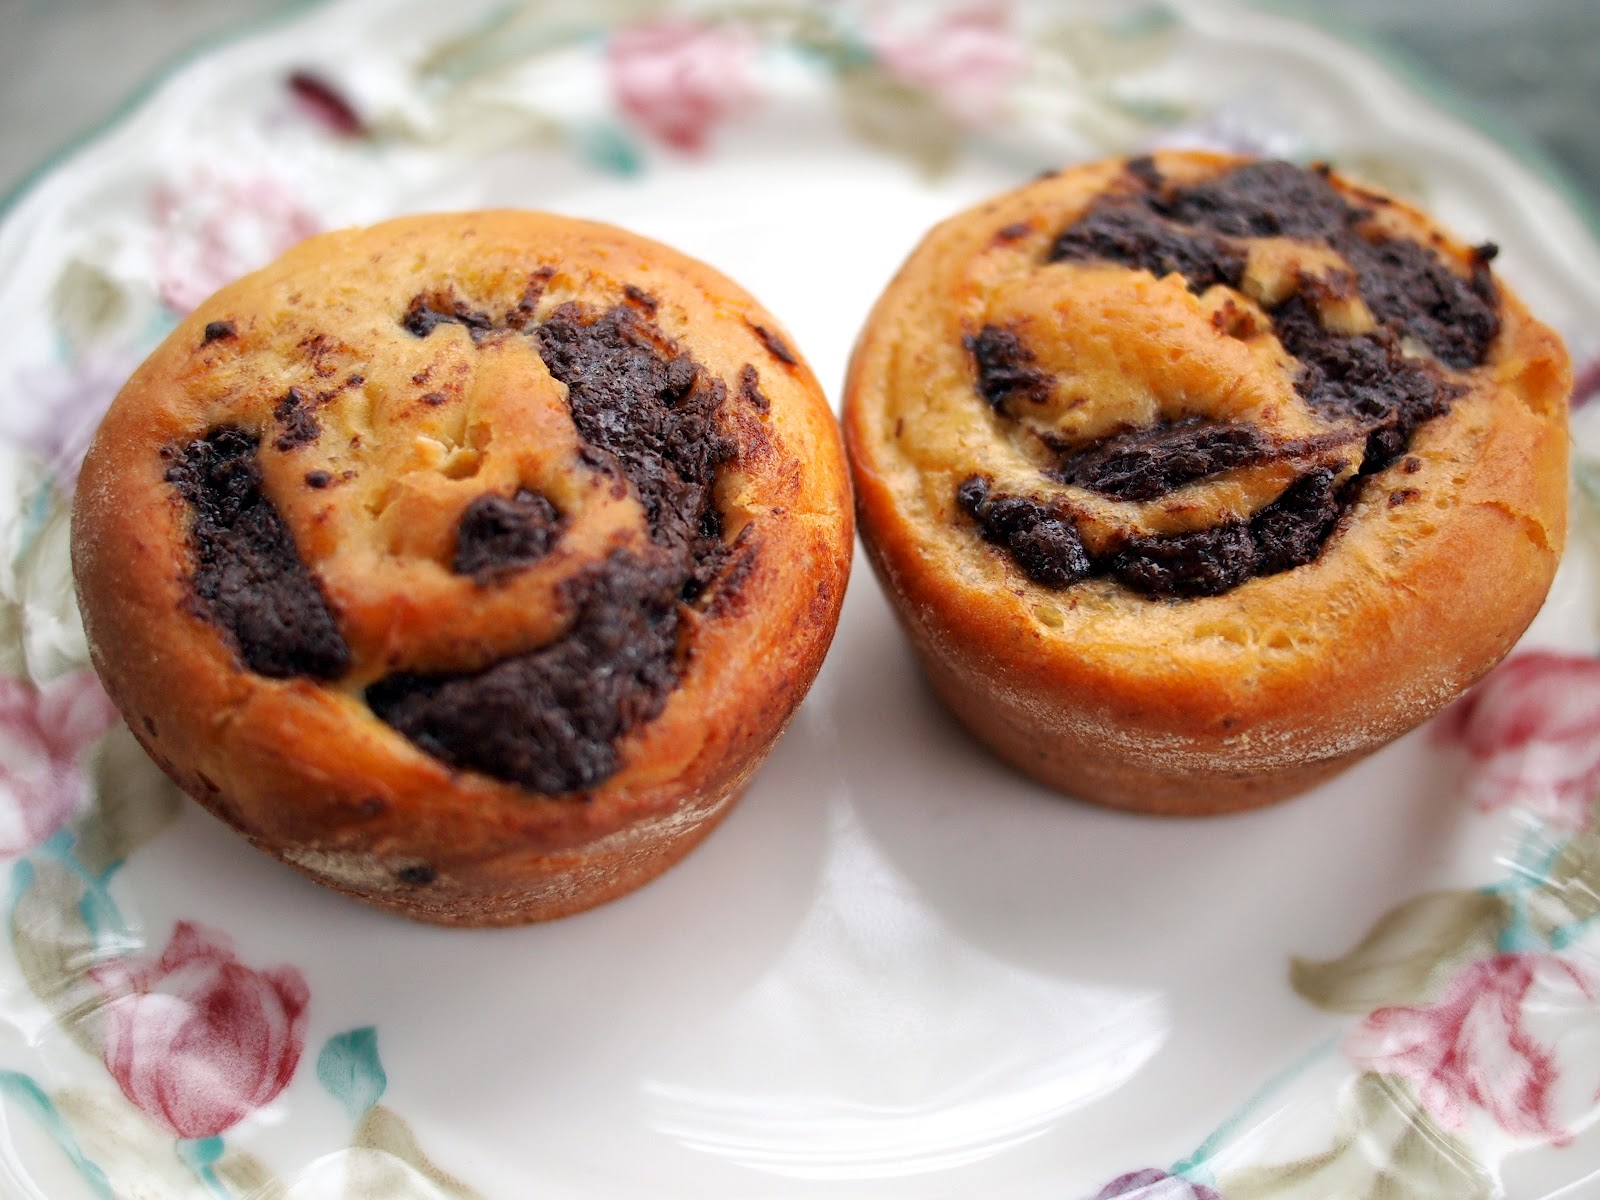
I had a bunch of very ripe bananas on my counter the other day. Normally, I would unravel the skin and store them in my freezer for smoothie days. But, I already had about 4 or 5 bananas in the freezer, so I didn't need to add anymore. Of course, the easy option is to make banana bread, and that's precisely what I did. However, this isn't your basic/boring banana bread. This is banana bread swirled with nutella via A Cup of Jo. Mmmm. Nutella. The best! This recipe calls for 2 loaves of bread, so I brought one to volleyball. They loved it. I also gave one to my little ol' neighbor, because she gave me a bunch of peonies from her yard. Well, I was walking my dogs the other day, and she ran out (as fast as she could) to let me know know how much she looooved the banana bread. She actually wants this recipe, too. So, you have several reviews right there letting you know how good is this bread! Please give it a try, and you won't be disappointed!
Ingredients:
3 large or 4 medium (2 cups mashed) bananas, yellow with brown speckles
1 cup brown sugar, packed
4 oz. (1/2 cup) unsalted butter, melted
1/2 cup milk
2 large eggs
2 tsp. vanilla extract
1 tbsp. rum, optional
3 cups all-purpose flour
2 tsp. baking powder
1 1/2 tsp. baking soda
1 1/2 tsp. salt
1/2 cup Nutella
First, preheat your oven to 350 degrees.
Next, take out two loaf pans and prep it by inserting parchment paper and lightly coat with cooking spray. Or, flour and oil it very well. Set aside.
Take a medium bowl and mash the bananas with a potato masher, and set aside. Take out another medium bowl, and combine the flour, baking powder, baking soda, and salt. Whisk together, and set aside.
Next, take out your standing mixer and mix the butter, milk, sugar, vanilla, rum (if using), and eggs. Gradually, add in the flour mixture to the butter mixture. Stir until just smooth, and then add in the bananas and stir until just combined.
Now, go ahead and microwave the nutella for about 20 seconds to soften. Drizzle about 2/3 of the nutella into the batter. Use a spatula to gently fold in the nutella, but don't overmix. You want to see the swirls when you cut into the banana bread once it's baked. Pour half the batter into one loaf pan, and pour the remaining batter into another loaf pan. Add the rest of the nutella on top of the batter, and swirl with a knife. Bake for about 45 minutes or until a toothpick comes out clean. Allow to cool in the pan, remove, and enjoy!
Showing posts with label bread. Show all posts
Wednesday, June 4, 2014
Sunday, February 16, 2014
Bertolli Ribollita con Crostini di Pane (Italian Soup with Bread)
My Mom started making this soup back in the nineties. I remember the first time she made it I was very hesitant to try it. I mean look at all the vegetables that are in the recipe. Shudder. But, I have to admit that the vegetables are nice and tender and you really can't tell they're in the soup. Plus, this recipe has a ton of flavor and it's just a nice warming dish to have on a cold and snowy day. The other great thing about this soup is you can add or subtract whatever ingredient you might like or not. If you don't like beans substitute pasta instead. Or, have both! Plus, it goes great with the bread. Enjoy!
Ingredients:
1/4 c Bertolli Extra Virgin Olive Oil, plus more for serving
1/4 c each chopped and trimmed fennel, celery, onions, and carrots
1 garlic clove, minced
1/4 tsp dried thyme
6 c chicken broth
1 can (28oz) Italian Plum Tomatoes, cut up
2 c. peeled & diced russet potatoes
1 can rinsed and drained cannellini beans
1 c. finely shredded Savoy cabbage or Swiss chard
1 c. diced trimmed zucchini
2 tbsp. each chopped fresh parsley and basil
2 cups Pasta (optional
Salt and Freshly ground pepper
8 slices (one per bowl) Italian bread
Combine the olive oil, fennel, celery, onions, carrot, and garlic and thyme in a large heavy saucepan. Cover & cook over medium low heat until the vegetables are very soft, about 15 minutes. Do not brown.
Then, stir in the chicken broth, tomatoes, potato, beans, & cabbage or Swiss chard. Heat to boiling. Reduce heat to low and simmer for 15 minutes. Add in the zucchini, parsley, and basil. If using add in the pasta. Cover and cook for about 10 minutes. Add salt and pepper to taste. Ladle into a bowl and serve with a piece of bread.
Ingredients:
1/4 c Bertolli Extra Virgin Olive Oil, plus more for serving
1/4 c each chopped and trimmed fennel, celery, onions, and carrots
1 garlic clove, minced
1/4 tsp dried thyme
6 c chicken broth
1 can (28oz) Italian Plum Tomatoes, cut up
2 c. peeled & diced russet potatoes
1 can rinsed and drained cannellini beans
1 c. finely shredded Savoy cabbage or Swiss chard
1 c. diced trimmed zucchini
2 tbsp. each chopped fresh parsley and basil
2 cups Pasta (optional
Salt and Freshly ground pepper
8 slices (one per bowl) Italian bread
Combine the olive oil, fennel, celery, onions, carrot, and garlic and thyme in a large heavy saucepan. Cover & cook over medium low heat until the vegetables are very soft, about 15 minutes. Do not brown.
Then, stir in the chicken broth, tomatoes, potato, beans, & cabbage or Swiss chard. Heat to boiling. Reduce heat to low and simmer for 15 minutes. Add in the zucchini, parsley, and basil. If using add in the pasta. Cover and cook for about 10 minutes. Add salt and pepper to taste. Ladle into a bowl and serve with a piece of bread.
Sunday, December 8, 2013
Holiday Dinner Rolls
For any holiday dinner the one thing I can't do without are rolls. Rolls not only are great as a side for dinner, but they're great the next day for turkey or ham sandwiches. I found this recipe from Sprinkle Some Sunshine, and they turned out perfectly. Unfortunately, I didn't have much left-over as I only made enough for lunch and dinner on Thanksgiving. But, I will definitely make them again and save a couple for left-overs. Everyone really enjoyed them, and I know you will, too. Enjoy!
Ingredients:
1 package regular dry yeast
1/4 cup warm water
3/4 cup milk, scalded
1/4 cup butter
1 egg
1 teaspoon salt
1/4 cup sugar
3 1/2 cups flour (approximately)
Set your oven to about 100 degrees. Take out a large bowl, and dissolve the yeast in warm water. The water should be about 105 to 110 degrees. Set aside for 10 minutes or until the yeast dissolves and puffs up. Next, pour milk in a medium bowl and microwave for a couple minutes. While the milk is hot; stir in the butter. Once the milk and butter has cooled some stir the egg, salt, and milk mixture into the yeast. Using a fork stir in sugar and 2 cups of the flour. This should form a batter. Now, add in enough flour to make dough easy to handle. I probably used an additional 2-3 cups of flour. Pour the dough onto a floured surface, and knead for several minutes. Place dough in a large greased bowl, and cover with a towel or plastic wrap. Place in the warm oven or an hour until it's doubled in size. It took about 2 hours for my dough to double in size. Then, remove the dough from the oven and punch it down. Shape the dough into rolls, and place in a greased 9x13 baking dish. It made about 15 rolls. Cover with a towel and place back in the warm oven to rise an additional hour. Remove from oven and then set the temperature to 350 degrees. Then, bake for 15-20 minutes or until a golden brown color. Remove from oven, and brush with melted butter.
Ingredients:
1 package regular dry yeast
1/4 cup warm water
3/4 cup milk, scalded
1/4 cup butter
1 egg
1 teaspoon salt
1/4 cup sugar
3 1/2 cups flour (approximately)
Set your oven to about 100 degrees. Take out a large bowl, and dissolve the yeast in warm water. The water should be about 105 to 110 degrees. Set aside for 10 minutes or until the yeast dissolves and puffs up. Next, pour milk in a medium bowl and microwave for a couple minutes. While the milk is hot; stir in the butter. Once the milk and butter has cooled some stir the egg, salt, and milk mixture into the yeast. Using a fork stir in sugar and 2 cups of the flour. This should form a batter. Now, add in enough flour to make dough easy to handle. I probably used an additional 2-3 cups of flour. Pour the dough onto a floured surface, and knead for several minutes. Place dough in a large greased bowl, and cover with a towel or plastic wrap. Place in the warm oven or an hour until it's doubled in size. It took about 2 hours for my dough to double in size. Then, remove the dough from the oven and punch it down. Shape the dough into rolls, and place in a greased 9x13 baking dish. It made about 15 rolls. Cover with a towel and place back in the warm oven to rise an additional hour. Remove from oven and then set the temperature to 350 degrees. Then, bake for 15-20 minutes or until a golden brown color. Remove from oven, and brush with melted butter.
Sunday, July 22, 2012
Chocolate Swirl Buns
So, I probably have more dessert recipes on this blog than anything else. But, there's nothing wrong with that, right? I mean a girl has to have her sweets. And, boy do I have my sweets. It's probably one of the things I love the most about being in the kitchen: baking. I love to make dough, cookies, brownies, ice cream, popsicles, cakes, etc. I love the smells and taking that first bite. It's just heaven to me. So, yesterday I decided to bake. It was cloudy. It was raining. And, I wanted something sweet. So, I decided to make these buns from smitten kitchen. The only bummer thing is that I ended up over-baking them a bit. Sigh. They're still good, though. I highly recommend this recipe. It is really easy and scrumptious. Enjoy.
Made 16 buns for me, but recipe says 12.
Ingredients:
Dough
1/2 cup (120 ml) milk, preferably whole
1/4 cup (50 grams) plus a pinch of granulated sugar
1 1/2 teaspoons (5 grams) active dry yeast
1 large egg, brought to room temperature
2 cups (250 grams) all-purpose flour, plus more for work surface
1/2 teaspoon table salt
3 tablespoons (45 grams) unsalted butter, at room temperature, plus additional for bowl and muffin tins
Filling
3 tablespoons (45 grams) unsalted butter, at room temperature
1/4 cup (50 grams) granulated sugar
1/2 pound (225 grams) semisweet chocolate
Pinch of salt
3/4 teaspoon ground cinnamon (optional)
Egg wash (optional)
1 egg
2 teaspoons (10 ml) heavy cream or milk
To make the dough, take a small bowl and add in the warm milk (110 to 115 degrees) and a pinch of sugar. Sprinkle in the yeast and let sit for about 5 minutes until the yeast foams. While the yeast is dissolving, take a medium sized bowl and whisk the eggs and 1/4 cup sugar. Slowly, whisk in the yeast mixture. Next, take the bowl from you standing mixture and stir the flour and salt with the paddle attachment. While mixture is on low, slowly add in the egg mixture. Mix well. Then, add in the butter. Mix well. Change out the paddle attachment to the dough hook. Let knead for about 10 minutes on low speed. Prepare a large bowl by spraying with cooking spray. The dough will be very sticky and stringy. That's okay. Form into a ball and place in the large bowl. Wrap with plastic wrap and place the bowl in a warm draft-free place (I prefer my oven set at 85 degrees) for about an hour or until the dough has doubled in size. My dough took about 2 hours to rise.
While the dough is rising, get your filling ready. I used semi-sweet chocolate chips so I didn't have to do any chopping. Throw your chocolate, salt, sugar, and cinnamon into a food processor. Process until relatively fine. Add in the butter and process until well incorporated. Set aside. Now, remove the dough from the oven (or wherever you had it) and punch it down. Turn out onto a floured surface and let rest for about 5 minutes. Then, roll out to about 11 inches wide and 20 inches long. Sprinkle the chocolate mixture all over the dough. Tightly roll into a log starting at the shorter end of the dough. It will form into a long log. Carefully slice the dough using a sharp serrated knife into 1 inch pieces. Place swirl side up into your greased muffin sheets. I had to use 2 muffin sheets because I ended up 16 buns. Place back in your draft-free/warm environment for another 30 minutes. I placed a towel over the buns. Remove the buns from the oven and set to 350 degrees. Once the oven is ready; add the buns and cook for about 15 to 20 minutes. Deb (from smitten kitchen) said the dough should register 185 to 190 degrees when they're ready. I think my thermometer might be off, because mine got up to 180 degrees and I placed them back in the oven for a couple minutes. At that point, I should have just left them out because I ended up overbaking them. Bleh. Lesson learned. Cool on a wire rack. enjoy!
Ingredients:
Dough
1/2 cup (120 ml) milk, preferably whole
1/4 cup (50 grams) plus a pinch of granulated sugar
1 1/2 teaspoons (5 grams) active dry yeast
1 large egg, brought to room temperature
2 cups (250 grams) all-purpose flour, plus more for work surface
1/2 teaspoon table salt
3 tablespoons (45 grams) unsalted butter, at room temperature, plus additional for bowl and muffin tins
Filling
3 tablespoons (45 grams) unsalted butter, at room temperature
1/4 cup (50 grams) granulated sugar
1/2 pound (225 grams) semisweet chocolate
Pinch of salt
3/4 teaspoon ground cinnamon (optional)
Egg wash (optional)
1 egg
2 teaspoons (10 ml) heavy cream or milk
To make the dough, take a small bowl and add in the warm milk (110 to 115 degrees) and a pinch of sugar. Sprinkle in the yeast and let sit for about 5 minutes until the yeast foams. While the yeast is dissolving, take a medium sized bowl and whisk the eggs and 1/4 cup sugar. Slowly, whisk in the yeast mixture. Next, take the bowl from you standing mixture and stir the flour and salt with the paddle attachment. While mixture is on low, slowly add in the egg mixture. Mix well. Then, add in the butter. Mix well. Change out the paddle attachment to the dough hook. Let knead for about 10 minutes on low speed. Prepare a large bowl by spraying with cooking spray. The dough will be very sticky and stringy. That's okay. Form into a ball and place in the large bowl. Wrap with plastic wrap and place the bowl in a warm draft-free place (I prefer my oven set at 85 degrees) for about an hour or until the dough has doubled in size. My dough took about 2 hours to rise.
While the dough is rising, get your filling ready. I used semi-sweet chocolate chips so I didn't have to do any chopping. Throw your chocolate, salt, sugar, and cinnamon into a food processor. Process until relatively fine. Add in the butter and process until well incorporated. Set aside. Now, remove the dough from the oven (or wherever you had it) and punch it down. Turn out onto a floured surface and let rest for about 5 minutes. Then, roll out to about 11 inches wide and 20 inches long. Sprinkle the chocolate mixture all over the dough. Tightly roll into a log starting at the shorter end of the dough. It will form into a long log. Carefully slice the dough using a sharp serrated knife into 1 inch pieces. Place swirl side up into your greased muffin sheets. I had to use 2 muffin sheets because I ended up 16 buns. Place back in your draft-free/warm environment for another 30 minutes. I placed a towel over the buns. Remove the buns from the oven and set to 350 degrees. Once the oven is ready; add the buns and cook for about 15 to 20 minutes. Deb (from smitten kitchen) said the dough should register 185 to 190 degrees when they're ready. I think my thermometer might be off, because mine got up to 180 degrees and I placed them back in the oven for a couple minutes. At that point, I should have just left them out because I ended up overbaking them. Bleh. Lesson learned. Cool on a wire rack. enjoy!
Sunday, June 17, 2012
Chocolate Chip Banana Bread
I was at Physical Therapy the other day, when a nice man came by the office giving away vegetables and bananas from his farm. Don't worry; he's a patient at the office and he was advertising his farm on his truck. So, I'm sure he is legit. :) Well, I picked out some yellow squash as that was all he had left. I also grabbed a bunch of bananas. The bananas were very ripe. And, I only like to eat bananas when they are barely green. So, I figured I would use these bananas to make banana bread. I've made this recipe once before, and I can't believe I haven't posted it on the blog yet. The bread comes out very moist. Plus, the chocolate chips give a nice flair to boring ol' banana bread. I really think you should give it a try. You won't regret it one bit. Enjoy!
Ingredients:
1 c sugar
1 stick butter, softened
1 1/2 c mashed bananas
2 eggs, room temperature
2 tsp vanilla
2 c all-purpose flour
1 1/2 tsp baking powder
1 tsp baking soda
1/2 tsp salt
1/4 tsp cinnamon
1/8 tsp nutmeg
1 cup semi-sweet chocolate chips
Pre-heat oven at 325.
Take your bowl from a standing mixer, and add in the butter and sugar. Beat on medium speed until light and fluffy. Add in the mashed bananas, vanilla, and eggs. Beat well. Take a small bowl and add in the flour, baking powder, baking soda, salt, cinnamon, and nutmeg. At medium-low speed; gradually add the dry ingredients into the banana mixture. Fold in the chocolate chips until well incorporated. Pour the batter into a greased and floured 9x5x3 loaf pan. Cover loosely with a tent of aluminum foil. Bake for 40 minutes. Remove foil from oven and bake for an additional 20 minutes or until the toothpick comes out clean. Remove from oven and let cool. Invert the loaf pan onto a plate. Banana bread should come out easily once cooled. Enjoy!
(click for printable recipe)
Ingredients:
1 c sugar
1 stick butter, softened
1 1/2 c mashed bananas
2 eggs, room temperature
2 tsp vanilla
2 c all-purpose flour
1 1/2 tsp baking powder
1 tsp baking soda
1/2 tsp salt
1/4 tsp cinnamon
1/8 tsp nutmeg
1 cup semi-sweet chocolate chips
Pre-heat oven at 325.
Take your bowl from a standing mixer, and add in the butter and sugar. Beat on medium speed until light and fluffy. Add in the mashed bananas, vanilla, and eggs. Beat well. Take a small bowl and add in the flour, baking powder, baking soda, salt, cinnamon, and nutmeg. At medium-low speed; gradually add the dry ingredients into the banana mixture. Fold in the chocolate chips until well incorporated. Pour the batter into a greased and floured 9x5x3 loaf pan. Cover loosely with a tent of aluminum foil. Bake for 40 minutes. Remove foil from oven and bake for an additional 20 minutes or until the toothpick comes out clean. Remove from oven and let cool. Invert the loaf pan onto a plate. Banana bread should come out easily once cooled. Enjoy!
(click for printable recipe)
Friday, June 8, 2012
Whole Wheat Bagels
There's something about home-made bread
that just makes me feel like a better person. Healthier. More
accomplished. A successful “home-maker” for making my house smell so
wonderful. A courageous soul for taking on the task.
Actually no courage was required here.
The bagel making process was surprisingly easy.
When they came out of the oven, they
were just shy of perfect, but who can complain on a first attempt. My
husband was drawn to the kitchen by the smell. He looked them over
with an approving nod and didn't hesitate when I told him they were
ready to try.
“They're a bit more brown than normal
bagels,” he said as he brought it to his mouth.
“Whole wheat flour,” I responded.
He grimaced (not quite the health nut I
attempt to be), but then later I noticed a few more bagels missing from the
finished batch. Apparently my healthy home-made bagels were pretty
good after all.
This recipe was taken from the “When Pigs Fly” blog at
the suggestion of my wonderful neighbor who guided the way with the
bagel-making fun.
Ingredients:
2 ¼ cup hot water (read the
directions on your yeast for exactly how hot... it makes a
difference!)
2 Tbsp. plus 1/3 cup honey, divided (local would be awesome... though mine was only from the local Kroger)
2 ¼ tsp. sea salt
5 cups whole wheat flour
2 tsp. INSTANT yeast (I had my yeast in 2 ¼ tsp. Packets; I guestimated here)
2 Tbsp. plus 1/3 cup honey, divided (local would be awesome... though mine was only from the local Kroger)
2 ¼ tsp. sea salt
5 cups whole wheat flour
2 tsp. INSTANT yeast (I had my yeast in 2 ¼ tsp. Packets; I guestimated here)
Directions:
-Measure out water and heat in
microwave to recommended temperature. (I measured with a meat
thermometer, but there are definitely better ways).
-Mix hot water, yeast, 2 tablespoons of
honey, and sea salt.
-Add in the flour one cup at a time,
mixing as you go with a spoon. When all of the flour is added, it
will be too thick for the spoon and it will be time to knead. At this
time, additional water may be necessary (it was for me) if the
mixture is too dry/not coming together into a dough. Conversely, if
it's too sticky, more flour may be added.
-When the dough is “slightly stiff,”
knead your heart out for 8-10 minutes. Wear a content Martha Stewart
smile while doing so.
-If making plain bagels, transfer dough
into a large bowl and cover with a towel. (I decided to make two
varieties of bagels at this point, splitting the dough in half into
two bowls. One remained plain bagels. The second – my sweet tooth's
rebellion against all the healthiness – became dark chocolate chip.
I kneaded that dough more to thoroughly mix in the chocolate chips.
Dried cranberries or blueberries would also be awesome. I was out of
craisins, which was my original intention.)
-Let the dough rise, covered for a few
hours until doubled in size.
-Pound the risen dough down after it's
doubled, and then divide into 12 balls (or 6 balls of each variety).
Let it rise again for 10 minutes.
-Bring water to boil in a large pot.
Mix in 1/3 cup honey (easier if you are patient and really wait for
it to boil). Return to a simmer.
-Preheat oven to 425 degrees.
-Form each dough ball into a bagel
shape, poking a hole in the middle, roughly 1 – 1 ½ inches in
diameter.
-Carefully drop 3-4 bagels at a time
into the simmering water depending on the size of your pot. They will
float at the top. Let them simmer for 30 seconds on each side, and
then place on a cookie sheet ,either greased or on parchment
paper. Be sure you wait until the water is simmering here. If it is still
slightly boiling, you will have pock-marked bagels. (My first three had this issue. Are you noticing
a patience issue here? Hmmm...)
-After all bagels have simmered in the
honey water, bake 20 minutes.
-Remove from oven, inhale, take pride
in your bagel-making prowess!
Happy baking!
Sunday, March 18, 2012
Crusty No-Knead Bread
Darn. I found a recipe that is simple to make and oh so good. And, it's bread. My weakness. Guys, this recipe is seriously easy and beautiful and delicious. And, you can do plenty of things to make it more interesting. Yesterday, I opted to try the plain version. But, today I decided to make an herb bread. I'll let you know tomorrow how it turns out. But, this plain bread was so freaking good. I mean; it really is amazing. I found this recipe from Simply So Good's blog. But, it sounds like the recipe originated from the New York Times. The only downfall to this recipe is you have to wait overnight before you can eat it. And, you need a cast iron dutch oven. The reason for this is that you need a heavy lid to keep it sealed shut. Even though you have to wait so long it's worth it!!! Try it and let me know what you think! Enjoy!

Ingredients:
3 cups flour
1 3/4 tsp salt
1/2 tsp instant yeast (or active yeast)
1 1/2 cups water (cold water is fine)
To make the bread all you do is take a large bowl and add in the flour, salt, and yeast. Stir together. Pour in the water and mix thoroughly with a spatula. The dough will look rather gooey and sticky. No worries. Place plastic wrap over the bowl. Set aside on your counter for 12 to 18 hours. The dough will rise overnight. After 12 hours or so, pour quite a bit of flour on your counter and even on your hands. The dough will be very sticky. Pour the dough out onto the counter and form into a ball. Place plastic wrap from earlier over the dough.
Preheat your oven to 450 degrees. Just so you know; you do not have to grease your dutch-oven. Once the oven is ready, place your dutch oven in and let it heat up for 30 minutes. Be sure to use your oven-mitts and take out the dutch oven. Add more flour to your hands, and carefully drop the dough into the dutch oven. Cover it with the lid. Place in the oven and cook for 30 minutes. Take it from the oven and then remove the lid. Bake for an additional 15 minutes.
Remove the pot from the oven. Carefully remove the bread from the dutch oven and set on a wire rack to cool. And, there you have it; glorious, easy, delicious crusty bread! One thing I found out is that if you cover the bread with foil it will make the bread soft. Probably best to just keep it out on the counter.
Now, if you want to add herbs, cheese, or what have you to the bread just make sure you add it to the flour mixture prior to adding in the water. For the herb mixture, I added fresh chopped rosemary, garlic salt, and Italian seasoning to the flour. Then, I poured in the water. I can't wait to try it tomorrow! Enjoy!
(Click here for printable recipe)
Ingredients:
3 cups flour
1 3/4 tsp salt
1/2 tsp instant yeast (or active yeast)
1 1/2 cups water (cold water is fine)
To make the bread all you do is take a large bowl and add in the flour, salt, and yeast. Stir together. Pour in the water and mix thoroughly with a spatula. The dough will look rather gooey and sticky. No worries. Place plastic wrap over the bowl. Set aside on your counter for 12 to 18 hours. The dough will rise overnight. After 12 hours or so, pour quite a bit of flour on your counter and even on your hands. The dough will be very sticky. Pour the dough out onto the counter and form into a ball. Place plastic wrap from earlier over the dough.
Remove the pot from the oven. Carefully remove the bread from the dutch oven and set on a wire rack to cool. And, there you have it; glorious, easy, delicious crusty bread! One thing I found out is that if you cover the bread with foil it will make the bread soft. Probably best to just keep it out on the counter.
(Click here for printable recipe)
Sunday, October 30, 2011
Cinnamon Sugar Pull Apart Bread
Yesterday was a cold, windy, and rainy day. It was a perfect day to stay in and do absolutely nothing. Because of this cold and dreary day; I had decided to make chicken and dumplings for dinner. And, while I was looking for this recipe I came across this one for Cinnamon Sugar Pull Apart Bread. It sounded delicious so I decided to bake this as well. I have to say baking anything that has cinnamon in it is so delightful. The house smelled so lovely. This bread tasted awesome. If you are home on a dreary day be sure to bake this bread. You won't regret it. Thanks to Joy the Baker for the recipe! Enjoy!
Ingredients
For the Dough:
2 3/4 cups plus 2 tablespoons all-purpose flour
1/4 cup granulated sugar
2 1/4 teaspoons (1 envelope) instant yeast
1/2 teaspoon salt
2 ounces unsalted butter
1/3 cup whole milk
1/4 cup water
2 large eggs, at room temperature
1 teaspoon pure vanilla extract
For the Filling:
1 cup granulated sugar
2 teaspoons ground cinnamon
1/2 teaspoon fresh ground nutmeg
2 ounces unsalted butter, melted until browned
To make the bread; mix the 2 cups flour, sugar, salt, and yeast in a mixing bowl. Next, take your butter and milk and melt over medium heat. Once the butter has melted, remove from heat and add the water and vanilla. Once the temperature of the milk mixture reaches 115 to 125 degrees pour this into your flour mixture. Stir with a dough hook. Add the eggs and mix well. Add the remaining 3/4 flour. The dough should be sticky. Place the dough into a well-oiled large bowl. Cover with plastic wrap, and place in a warm oven (85 degrees) for 1 to 2 hours. While the dough rises; incorporate the sugar, cinnamon, and nutmeg into a small bowl. Next, take 2 ounces of butter and melt until nicely browned. Set aside. Once the dough has doubled in size, remove from oven, punch down the dough, and knead in another 2 tbsp of flour. Let rest on the counter with a kitchen towel over the dough for about 5 minutes. Now, roll out the dough to about 20 inches in length and about 12 inches in width. Mine was only around 15 inches in length and about 10 inches in width. Now, brush the butter onto the dough. Then pour the brown sugar evenly onto the dough. Next, cut the dough vertically into 6 strips. Then layer the dough on top of each other and cut into 6 more strips. You should have 6 stacks of 6 squares. I didn't really have this, but I just went with it. Next, place the dough (like flip books) into your oiled and floured loaf pan. Place a kitchen towel over the bread and place in a warm oven and let rise for another 30 to 45 minutes. Remove from oven. Pre-heat oven to 350 degrees. Place bread in oven and let bake for about 30-35 minutes or until the bread has a nice dark, golden brown color. Remove from oven and let rest for another 20-30 minutes. Use a knife to run around the edge of the pan to help loosen the bread from the pan. Invert onto a plate. Turn the bread right-side up and serve.
Best eaten the same day, but will keep for 1 to 2 days as long as it is tightly wrapped. Enjoy!
(click here for printable recipe)
Wednesday, August 17, 2011
Iron Chef Chocolate: Sweet Rolls filled w/ Chocolate
For Iron Chef Chocolate; I tried three different recipes. First, I tried this Savory Chocolate Truffle. And, while it was really easy to make; it did not taste good. I thought it was too bitter, and it was difficult to scoop out the "dough" to make into little truffle balls. Next, I made these sweet rolls filled with chocolate. Boy, was I proud of these rolls when they came out of the oven. They looked so pretty and yummy. That I raced over to see my sister (prior to going to a party) just so she could try them. Plus, I wanted her to take the rolls to her friends so that I wouldn't eat them all. Because, if these stayed in my kitchen they would be gone by the next day. The third recipe that I tried were these Chocolate Gougere with Gorgonzola and Walnuts. Ugh. They were awful. I had to spit it out, and threw them all away. So, the consensus was that I should make the sweet rolls, but fill them with more chocolate. I ended up using nutella and semi-sweet chocolate to fill each roll.
The dough was quite easy to make, and doesn't take long at all. Just a couple hours. And, it's so much fun to fill the dough with chocolate. Plus, your house smells yummy while the dough is baking. And, your mouth will water once you get ready to bite into these delicious rolls. I ended up in 3rd with these rolls, which isn't too bad if I do say so myself. Enjoy. You won't regret it.
Ingredients:
5 cups of all-purpose flour
1 Tbs. dry yeast (I used fast-rise yeast and 1 1/2 packages which makes 1 tbsp)
1 teaspoon salt
3 eggs yolks
3 Tbs. sugar
1 1/2 cups of warm milk (I used 1% milk)
lemon zest from 1 lemon, 2-3 drops of lemon (I omitted this step)
3 Tbs. Butter (unsalted), melted
1/2 cup of powdered (confectioners’) sugar
Chocolate but varieties are endless-jam, nutella, cheese (I used nutella and semi-sweet chocolate chips)
First, take your instant yeast, sugar, 3 cups of flour and pour into a mixer. Next, take your measuring glass and pour in your milk. I microwaved my milk for about 1.5 minutes so that the milk has a temperature of about 100-105 degrees. Yes, I use a thermometer to make sure the milk is the right temperature. If it's too hot you could kill the yeast. If it's too cold then the yeast may not do anything thus the dough won't rise. Once the milk is the right temperature; attach your mixer (with a dough hook) to the stand and turn it to about medium-low speed; pour in the milk and add your 3 egg yolks. Let the mixture mix and gradually add in another 1-2 cups of flour. Also, at this stage add in your salt. I recently read somewhere that if you add in your salt directly to the yeast it could inhibit the yeast. So, I've started to wait to add the salt until after I've mixed it with the liquid. You need the dough to be sticky, but not too sticky that you can't roll it out onto your counter. I think I really did use the 5 cups of flour that the recipe calls for. Once the dough has been mixed to the right consistently (it starts pulling away from the bowl) turn it out onto a floured surface. I knead the dough for about 5 minutes. Place the dough into a large bowl that has been lightly oiled. Place plastic wrap on it and put it in a warm oven (around 80 degrees). Wait about an hour. Then, remove the bowl from the oven. And, turn out your dough. Knead for another 5 minutes. Roll the dough into a ball and place back into your bowl. Place into the oven and let it rise for an additional 20-30 minutes.
Once the dough has risen, remove from the oven. Next, roll out your dough. Use about a 2 inch cookie cutter; and cut into the dough. Take about a tablespoon of your choice of chocolate and place it in the middle of the dough. Roll up your dough and form it into a ball. This part can get kind of messy.
Place on a cookie sheet lined with parchment paper (or a silpat). Continue this until you are out of dough. It makes around 15-20 rolls. Place the cookie sheet into your warm oven (80 degrees) and let rise an additional 20 minutes. Remove the rolls from the oven. Pre-heat your oven to 350 degrees. Melt a couple tablespoons of butter into a bowl. Brush the melted butter onto your rolls. Once the oven is ready; put in your rolls. Let bake for about 15-30 minutes. I think mine baked for about 15-20 minutes. Or bake until the rolls have a nice golden color. Remove from oven, and brush again with your melted butter. You don't have to do that, but I did. Sprinkle with powdered sugar if you so desire.
It's best to eat these rolls the same day; but they were okay the next. Enjoy!
(click here for printable version)
The dough was quite easy to make, and doesn't take long at all. Just a couple hours. And, it's so much fun to fill the dough with chocolate. Plus, your house smells yummy while the dough is baking. And, your mouth will water once you get ready to bite into these delicious rolls. I ended up in 3rd with these rolls, which isn't too bad if I do say so myself. Enjoy. You won't regret it.
Ingredients:
5 cups of all-purpose flour
1 Tbs. dry yeast (I used fast-rise yeast and 1 1/2 packages which makes 1 tbsp)
1 teaspoon salt
3 eggs yolks
3 Tbs. sugar
1 1/2 cups of warm milk (I used 1% milk)
lemon zest from 1 lemon, 2-3 drops of lemon (I omitted this step)
3 Tbs. Butter (unsalted), melted
1/2 cup of powdered (confectioners’) sugar
Chocolate but varieties are endless-jam, nutella, cheese (I used nutella and semi-sweet chocolate chips)
It's best to eat these rolls the same day; but they were okay the next. Enjoy!
(click here for printable version)
Saturday, August 6, 2011
Cucumber Bread
I've had more success this summer growing cucumbers and red hot chili peppers than I have tomatoes. So far, my cucumber plant has produced 3 cucumbers. Since I had 2 cucumbers sitting in my fridge; I've been contemplating what to do with these vegetables. You see, I'm not the biggest cucumber fan. I'm not even sure why I'm growing them other than because of this recipe, maybe. I think I decided to plant cucumbers because I've had more success growing them than zucchini, yellow squash, etc. So, why not. I recently came across this recipe from Apron of Grace for cucumber bread. And, I thought to myself how perfect. I can use my cucumbers that are just hanging out in my fridge for bread! This recipe is super easy to make. Other than the buttermilk, I had all the ingredients. You'd be surprised how good cucumbers can make a bread. It tastes similar to banana bread but it's made with cucumbers instead of bananas. I highly, highly recommend this recipe. The bread is super moist and very good. Plus, it's a great way to use up 2 cucumbers just hanging out in your fridge. Enjoy!
Ingredients:
¾ cup Lard or Shortening
1 ½ cups Sugar
2 Eggs
1 ½ cups whole, shredded Cucumber
½ teaspoon Salt
2 cups All-Purpose/Unbleached Flour
1 teaspoon Baking Soda
1 teaspoon Baking Powder
¼ cup buttermilk
1 teaspoon Vanilla
Couple dashes of Nutmeg
Preheat your oven to 350 degrees. Set out your eggs and bring to room temperature. You don't have to do this but it's always a good idea.
First, take your 2 cucumbers and peel them. Next, shred your cucumbers on a hand-grater (or whatever kitchen gadget you so desire). I wasn't sure if I should de-seed the cucumbers. But, I just decided to grate them whole. I noticed that the cucumbers were very watery. So, I covered them in paper towels to help dry them. Gather your dry ingredients and place in a bowl. Set aside. Take your sugar and shortening and place in your standing mixer. Mix on medium speed until light and fluffy. Add in your eggs and mix till combined. Now, add in your dry ingredients, alternating with the buttermilk and the vanilla. Mix well. This is the point when I decided nutmeg would be a good addition. So, just sprinkle some nutmeg into the bowl if you so desire. Mix. Take a loaf pan and grease it.
Pour the batter into the loaf pan and bake in your oven for at least 45 minutes. I'm not sure if it's because my cucumbers were very watery, but my loaf took about 55 minutes to bake. So, just keep an eye on yours. Remove from oven and let the loaf cool in the pan. Then remove the loaf from the pan and place on a cooling rack. Cut yourself a slice, and enjoy!
(click here for printable recipe)
Ingredients:
¾ cup Lard or Shortening
1 ½ cups Sugar
2 Eggs
1 ½ cups whole, shredded Cucumber
½ teaspoon Salt
2 cups All-Purpose/Unbleached Flour
1 teaspoon Baking Soda
1 teaspoon Baking Powder
¼ cup buttermilk
1 teaspoon Vanilla
Couple dashes of Nutmeg
Preheat your oven to 350 degrees. Set out your eggs and bring to room temperature. You don't have to do this but it's always a good idea.
First, take your 2 cucumbers and peel them. Next, shred your cucumbers on a hand-grater (or whatever kitchen gadget you so desire). I wasn't sure if I should de-seed the cucumbers. But, I just decided to grate them whole. I noticed that the cucumbers were very watery. So, I covered them in paper towels to help dry them. Gather your dry ingredients and place in a bowl. Set aside. Take your sugar and shortening and place in your standing mixer. Mix on medium speed until light and fluffy. Add in your eggs and mix till combined. Now, add in your dry ingredients, alternating with the buttermilk and the vanilla. Mix well. This is the point when I decided nutmeg would be a good addition. So, just sprinkle some nutmeg into the bowl if you so desire. Mix. Take a loaf pan and grease it.
Pour the batter into the loaf pan and bake in your oven for at least 45 minutes. I'm not sure if it's because my cucumbers were very watery, but my loaf took about 55 minutes to bake. So, just keep an eye on yours. Remove from oven and let the loaf cool in the pan. Then remove the loaf from the pan and place on a cooling rack. Cut yourself a slice, and enjoy!
(click here for printable recipe)
Tuesday, July 12, 2011
Naan That May Be Pita
Well, technically, I made Naan, not flatbread. Naan is an Indian flatbread that is quite a lot like pita, but without the pocket. Usually. As you’ll read later, my first few Naan (Naans?) had sort of an identity crisis and thought they were pita (pitas?). But by the end we had everything sorted out. I used a recipe that I found on Mel’s Kitchen Café.
Ingredients
3-4 cups all-purpose flour
1 teaspoon salt
1/2 teaspoon active dry yeast
1 1/2 cups milk
1 teaspoon sugar
3-4 tablespoons, melted butter
1 teaspoon salt
1/2 teaspoon active dry yeast
1 1/2 cups milk
1 teaspoon sugar
3-4 tablespoons, melted butter
This recipe makes about twelve Naan, so I cut it in half. Start by heating your milk in the microwave (or on the stove if you’re all fancy and love to do dishes) until it’s just lukewarm. They say 110 degrees is ideal, but I’m not into measuring so I just guesstimated. Add the sugar and yeast to the milk and wait for 4-5 minutes until the mixture gets foamy. This means that the yeast is alive and well! Pour it into a large bowl and add the salt, plus about half the flour. Mix it up well until it’s combined and continue to add small amounts of flour until you have a soft ball of dough that is not sticky and pulls away from the sides of the bowl. Knead this for just a few minutes until the dough is smooth, and then store it in a lightly greased bowl covered loosely with saran wrap, for around 2 hours. As I’ve said before, the microwave seems to be the perfect spot for this.
Once the dough has risen, turn it out on a lightly floured surface and divide it into 12 equal pieces (or 6 if you cut the recipe in half). Form those pieces into balls. Cover these with a dry towel and let them rest again for another 30 minutes. I find this is the perfect time to let yourself rest on the couch as well.
Preheat the oven to 500 degrees and pop in your pizza stone to heat up as well. Here’s where I think my Naan got all pita-y. Make sure you patiently wait for the oven to fully preheat. I might have jumped the gun, and I suspect that’s why my first few Naan puffed up like pita pillows, while the last few stayed down like good Naan. Roll your dough out one at a time to about 6-8 inches wide, then put it on your hot pizza stone and spritz it with water. This is my other possible culprit, as I didn’t take the spritzing seriously in the beginning. Cook your Naan for about 2-4 minutes until it starts looking nice and brown with a few bubbles. If the whole thing puffs up, don’t panic. I just let it go and when I pulled it out of the oven, I just poked a hole in it and pushed out the air. Be careful and use a hot pad since the air will be hot, hot burning steam. As you set each Naan aside, brush the outside lightly with melted butter, and stack them on top of each other. They taste best when served still warm, so eat fast!
Maybe the puffing up means this is really pita, and not Naan, and I’m sure the Naan purists out there are shaking their heads and clucking their tongues. But in the end, it tasted really darn good. And that’s all we pleasure-seeking heathens and charlatans really care about anyway.
(Click here for printable recipe)
Saturday, May 28, 2011
Cinnamon Bread
1/2 c whole milk (I just used 1%)
4 tbsp (1/2 stick) unsalted butter, cut into 1/2-inch pieces
1 envelope instant yeast
1/2 c warm water (110 degrees)
1/3 c sugar
2 lg eggs
1 1/2 tsp salt
3 1/4- 3 3/4 cups unbleached all-purpose flour, plus more for dusting work surface
Filling:
1/4 c sugar
5 tsp ground cinnamon
Milk for brushing
Glaze:
1 lg egg
2 tsp milk
First, you need to heat the milk and butter in a small saucepan until the butter melts. Cool until warm (110 degrees). While the milk mixture cools, sprinkle yeast over warm water in a bowl of a standing mixer fitted with the paddle. Beat in the sugar and eggs and mix at low speed to blend. Then, add the salt, the lukewarm milk mixture, and 2 cups of flour. Mix at medium speed until thoroughly blended...about a minute. Switch to your dough hook, and add 1 1/4 cups of flour. Knead at medium-low speed, adding more flour a little at a time if the dough sticks to the sides of the bowl, until the dough is smooth and comes away from the sides of the bowl. About 10 minutes.
Then, turn the dough onto your work surface. Squeeze the dough with a clean and dry hand. If the dough is still sticky, then add some more flour. Transfer the dough to a very lightly oiled large bowl. I used spray. Cover the bowl with plastic wrap and place in a warm air-free area (I use my oven) for several hours. The dough should double in size. I set my oven to around 75 degrees.
After the dough has risen, remove from oven and punch down the dough. Turn the dough onto your unfloured work surface. Let the dough rest for an additional 10 minutes.
Now, for the filling mix the sugar and cinnamon in a small bowl. Grease the sides and bottom of a 9x5 loaf pan.
Press the dough neatly into an evenly shaped 8x6 rectangle. With the short side facing you, roll the dough with a rolling pin into an evenly shaped 18x8 rectangle. Flour the work surface if the dough sticks. Brush the dough liberally with milk. Then, sprinkle the filling evenly over the dough leaving a 1/2-inch border on the far side. Now, starting at the side closest to you , roll up the dough, pinching the dough gently with your fingertips to make sure it is sealed. To keep the loaf from stretching beyond 9 inches, push the ends in occasionally with your hands as your roll the dough. When you finishing rolling, pinch the seams tightly to secure it. With the seam-side facing up, push in the center of both ends. Firmly pinch the dough at either end together to seal the sides of the loaf.
Place the loaf seam-side down in the prepared pan; press lightly to flatten. Then cover the top of the pan loosely with plastic wrap and set aside to rise. I put mine back into the oven. Let rise until the dough is 1 inch above the top of the pan, which is about 1 1/2 hours.
(Click here for printable recipe)
Wednesday, January 26, 2011
Herbed No-Knead Bread
I’m not usually one for fads. The whole “jeggings” thing is not gonna happen with me. The amazing berry acai diet passed me by (despite the persistent Facebook ad campaign). And remember in the 80’s when everyone was wearing jellies? I wasn’t. But No-Knead Bread is a fad I can really (and literally) sink my teeth into. It turns bread baking from a quaint hobby practiced by Martha Stewart wannabes to something that can be done by those of us who have jobs. And lives. Fresh baked bread is a joy, and any fad that makes it attainable is fine by me.
The best part about this recipe is that it’s so simple. Wait, the best thing is that it’s so cheap. Oh, and that it tastes so good. Well, just try it and see what your favorite part is.
Ingredients
3 cups all purpose flour
¼ teaspoon instant yeast
1 ¼ teaspoon salt
1 5/8 cup lukewarm water
(For herbed variation)
2 teaspoons Italian herb mix
½ teaspoon garlic powder
A few notes about the ingredients.
FLOUR: You can get all fancy with flour, and if you do a little online research you’ll see that bread bakers are pretty snobby about what they use. But for your first forays into the no-knead world, plain old all purpose works just fine.
YEAST: There are lots of kinds of yeast out there. For this one the best is instant or quick-rise yeast.
WATER: The temperature of the water is pretty critical. If the water is too hot or too cold it can kill the yeast. So make sure it’s just warm.
Before you start the bread making process, you should realize that while your “hands-on” time is pretty minimal, the actual time that the dough needs to rise is considerable. So don’t think you can start this before dinner and have fresh bread immediately. It needs to rise at least 12 hours for the first rising and about 2 hours for a second rising.
Combine the flour, yeast, salt, herbs and garlic powder. Pour in the water and stir until you get a sticky, shaggy dough. Cover the dough loosely with plastic wrap and let it rise for at least 12 hours, or overnight in a warm spot (I like to put it in the microwave). After the dough is risen, dust your hands and a work surface (like your counter) with flour. Pull the dough out of the bowl and sprinkle more flour on top. It will be sticky and some will desperately want to stay with the bowl. Get what you can but don’t obsess over it. Form the dough into sort of a rectangular loaf shape. Fold it over a few times, still in the rectangle. Don’t worry too much about the shape; as long as it’s loaf-like it will be fine. Put the dough in a greased loaf pan, cover it with a towel, and let it rise for another 2 hours.
Preheat the oven to 450 degrees. Using a sharp knife, slice the top of the bread, just a little, down the middle from short end to short end. This will help the bread crack along a straight line and just looks nice. You can also brush the top of the loaf with an egg white wash if you want a glistening top, but I do without. Bake the loaf for 30-35 minutes. It should be nice and brown on the outside, and if you dump it out of the pan and knock on the bottom, it should sound hallow.
Storing the bread still has me a little stumped. If you leave it out, as die-hard bread makers suggest, it tends to get extremely hard. Still tasty, but hard. If you put it in a plastic bag, it definitely gets softer and chewier. If anyone figures out the best way to keep the bread fresh, let me know. In the meantime, enjoy the bread. As well as the impressed looks you’ll get from family and friends. Hmmm, maybe that’s the best part…
(Click here for printable recipe)
Tuesday, January 18, 2011
Parmesan Herb Popovers
Onomatopoeia refers to words that sound like what they are, like “Oink” or “Bleep” or “Chitty Chitty Bang Bang.” But is there a word for words that describe what something literally does? A lot of people don’t know what a Popover is, but you can figure out what it does just by the name. You bake it using a special pan and the bread pops over the top and puffs up. It’s kind of like an eggy muffin and can be sweet or savory. When it’s done it kind of looks like an ice cream cone with a big tasty scoop of ice cream on top. Parmesan-Herb ice cream, in this case.
I asked for a popover pan for Christmas after seeing some delicious looking recipes, and this one, from Jane’s Sweets and Baking Journal, did not disappoint. It isn’t particularly difficult, and looks (and tastes) pretty impressive!
3 and 1/2 cups milk
4 cups All-Purpose flour
1 and 1/2 tsp. kosher salt
1 tsp. baking powder
6 large eggs, at room temperature
1 and 1/2 cups grated parmesan cheese
2 Tbsp. dried mixed herbs (I used an Italian mix.)
1/2 tsp. crushed garlic
4 Tbsp. unsalted butter, cut into 12 equal chunks
This recipe makes twelve, and the typical popover pan only has six cups. If you don’t have lots of people eating, I would recommend cutting the recipe in half because each popover is pretty big and filling. They also don’t keep particularly well and are best eaten while still warm.
In a separate bowl, mix the flour, salt and baking powder. Heat the milk in a saucepan until it’s just lukewarm (don’t let it boil). Take it off the heat. Beat the eggs in a large bowl for about 3 minutes until they are pale and foamy. If you have a wire whisk attachment for your mixer use it. Add in the warm milk and mix briefly.
Add in the flour mix gradually (it helps to have someone assist you) and continue mixing at a low speed. Once all the flour is in, raise the speed to medium and beat for two minutes. Then let the mix rest in the bowl at room temperature for an hour. In the meantime, mix the parmesan, herbs and garlic together in a bowl. I didn’t have fresh garlic and just used garlic powder (not garlic salt) and it was fine. Of course, fresh is always best.
Preheat the oven to 450 and grease the popover cups (including the top of the pan) and put the pan on a baking sheet to catch anything that might “pop over” and spill. Fill each cup almost to the top with batter. Sprinkle the cheese and herb mix over the top generously, and put a butter chunk on top of that. I found that flat pads of butter worked best, and don’t press it down into the batter, just rest it on top.
Bake for 15 minutes, then turn the oven down to 375 and bake for about 30 minutes more until they turn a deep golden brown on top. Do NOT open the oven while they are cooking, especially in the beginning. As soon as you take them out, poke the top with the tip of a sharp knife so they don’t get all soggy inside, and serve them warm! Make sure your guests are careful when they open the popovers, as they will be filled with steam. If you don’t have a popover pan, you can still make these with a jumbo muffin pan, but they just won’t be as dramatic or popovery. Enjoy!
(Click here for printable recipe)
Tuesday, August 31, 2010
Iron Chef Coffee: Coffee-Stout Bread
Iron Chef strikes again, and this was a big one. Richmond Magazine chose our secret ingredient – look for the article coming soon! This was Iron Chef: Coffee.
What would happen, we wondered, when all of that caffeine entered our systems, when every recipe utilized coffee beans? Would this be a giddy, twitchy Iron Chef? Would we be running in circles? Would we be falling up stairs? Maybe. But that just added to the excitement, right?

I couldn’t help but set the mood for myself in my corn meal. Can you see my coffee cup?

Ingredients:
1/2 cup hot strong brewed coffee (100° to 110°)
1/2 cup hot Guinness Stout (100° to 110°)
1 package dry yeast (about 2 1/4 teaspoons)
1 cup whole wheat flour
1/4 cup toasted wheat germ
1 1/2 cups bread flour
1 1/8 teaspoons salt
Cooking spray
1 tablespoon cornmeal
1/2 cup hot strong brewed coffee (100° to 110°)
1/2 cup hot Guinness Stout (100° to 110°)
1 package dry yeast (about 2 1/4 teaspoons)
1 cup whole wheat flour
1/4 cup toasted wheat germ
1 1/2 cups bread flour
1 1/8 teaspoons salt
Cooking spray
1 tablespoon cornmeal
Make coffee, and heat stout on the stovetop. When both are hot, combine both ingredients in a large bowl. Add yeast into coffee mixture, stir, and allow 5 minutes to stand and dissolve. Add whole wheat flour and wheat germ to coffee mixture. Stir well, and then cover and let stand at room temperature for thirty minutes.
After mixture has become slightly bubbly (the original recipe called this sponge-like), lightly add 1 ¼ cups bread flour and salt. Add the bread flour a little bit at a time, while stirring until a soft dough forms. Bring dough onto a floured surface and knead until smooth and elastic (roughly 8 minutes). Add remaining bread flour 1 tablespoon at a time as dough becomes sticky. After kneading, place dough in a bowl coated with cooking spray. Turn to coat. Cover, and let rise a second time in a warm place for one hour.
Punch down dough. Cover and let rise again in a warm place for another hour. Punch down dough, and let rest for five minutes. Shape dough into an 8-inch (roughly) oval, and place on a baking stone sprinkled with 1 tablespoon cornmeal (see pic above). Lightly coat the surface of dough with cooking spray. Cover and let rise in a warm place one last time for 30 minutes.
Pre-heat oven to 400 degrees. Cut a quarter inch slash down the center. Bake at 400 degrees for 20 minutes until it sounds hollow when tapped.
Personally, I can say my house smelled amazingly, as did my car en route to the Iron Chef party. Though it wasn’t a winner for the night, this is definitely a recipe I’ll try again.
Happy cooking!
Monday, March 22, 2010
Almost No Fat Banana Bread
I know what you’re thinking…”There’s fat in banana bread? But I thought bananas were good for me!” Well that depends on how you use them…banana split? Not so good for you. Almost No Fat Banana Bread? Not only a pretty darn good snack, but it gets bonus points for not (banana) splitting your pants.
Ingredients:
1 ½ cups all-purpose flour
¾ cup white sugar
1 ¼ teaspoons baking powder
½ teaspoon baking soda
½ teaspoon ground cinnamon
2 egg whites
1 cup banana, mashed
¼ cup applesauce
1 teaspoon vanilla (optional)
Preheat the oven to 350 degrees and use spray Pam to grease an 8x4 inch loaf pan. Stir together the flour, sugar, baking powder, baking soda and cinnamon. Add all the remaining ingredients.
Ingredients:
1 ½ cups all-purpose flour
¾ cup white sugar
1 ¼ teaspoons baking powder
½ teaspoon baking soda
½ teaspoon ground cinnamon
2 egg whites
1 cup banana, mashed
¼ cup applesauce
1 teaspoon vanilla (optional)
Preheat the oven to 350 degrees and use spray Pam to grease an 8x4 inch loaf pan. Stir together the flour, sugar, baking powder, baking soda and cinnamon. Add all the remaining ingredients.
Now for the helpful hint section. Learn from my mistakes - always separate your egg whites in a separate bowl so you don't mess up the dry ingredients. Make sure your bananas are good and ripe before you start – they should be brown on the outside and probably past the point where you’d chow down on them. Two bananas equal a cup, give or take. Be sure to really mash those bananas – the first time I made this, my bananas weren’t quite ripe enough and I was lazy and didn’t mash them thoroughly and ended up with chunks of banana throughout the bread. Not a bad thing taste-wise, but it didn’t look too appetizing. I added the vanilla to this recipe, because personally, I think everything tastes better with a dash of high quality vanilla. I prefer Watkins brand, but it’s pricey and not available in the grocery store. I used White House apple sauce (plain, with no added flavorings) the first time I made this and Motts the second time because it was all I could find. I prefer White House…it just seems thicker and less watery.
Back to the directions...don't stir the batter too much - just until it's all combined. Pour it into the prepared pan. Bake for 50 to 55 minutes, until a toothpick inserted into center of loaf comes out clean. Turn out onto wire rack and allow to cool before slicing.
The real key to this bread is patience…the “crust” tastes a little on the rubbery side at first. Not a winning sales pitch, but just wait! The older it gets, the better it gets. I’m usually not one for eating “old” food, but trust me…this bread just starts to reach its peak two to three days after baking.
Here’s the best part – each slice is a measly 127 calories and only .2 grams of fat! You can work off those few calories as you walk to the kitchen for another slice.
(Click here for printable recipe)
The real key to this bread is patience…the “crust” tastes a little on the rubbery side at first. Not a winning sales pitch, but just wait! The older it gets, the better it gets. I’m usually not one for eating “old” food, but trust me…this bread just starts to reach its peak two to three days after baking.
Here’s the best part – each slice is a measly 127 calories and only .2 grams of fat! You can work off those few calories as you walk to the kitchen for another slice.
(Click here for printable recipe)
Subscribe to:
Posts (Atom)