Showing posts with label fish. Show all posts

Monday, June 23, 2014

Salmon with Fennel, Citrus & Chiles

Fresh salmon is so delicious that you don't even have to do much to it to make it mouth-watering. This recipe is a great example of that. You get a lot of just pure salmon flavor, bumped up a bit by citrus, fennel and some spicy chiles. I made this once before when blood oranges were in season, and although it's good with regular oranges, the blood oranges were definitely better. They have a much brighter, more tart flavor that fused with the fennel and salmon better, so if you can find blood oranges, I recommend using those. This is a really simple recipe (found in Bon Appetit) that only requires a little prep, and some slow roasting time in the oven, and before you know it you're eating some spectacular-tasting salmon. 


1-2 lb. skinless salmon filet
Salt & pepper
1 fennel bulb
1 blood orange (or navel orange)
1 lemon
1 Fresno chile or jalapeño
Fresh dill sprigs
1/4-1/2 cup olive oil
Sea salt

First, preheat your oven to 275 degrees. Place your salmon in a glass baking dish and season it with salt & pepper. If you have skin it's not a big deal, just put it skin-side down and make sure to remove it before serving. Now it's time to prep your fruits and veggies. Thinly slice the fennel bulb, orange, lemon and chile. You can do this with a nice sharp knife, or if you are like the Hubs and are obsessed with the mandoline, that works for the fennel and chile, not so much for the citrus. Once you've sliced everything up, arrange the fennel, chile and citrus plus four sprigs of fresh dill over the top of the salmon. The first time we made it, we followed the directions and put this on the bottom but the result was really tasty fennel, and absolutely no flavor in the salmon. We switched it around this time and that helped. Season one more time and then pour the olive oil all over the top. The original called for 3/4 cup of oil but that just seemed like a ton to us. 

Now, bake for about 30-40 minutes. We went for the full 40 this time and it was perfect. Sprinkle the salmon with sea salt before enjoying. We also found it helped to squeeze some of the citrus over the top of the salmon. Hope you enjoy the clean, simple flavor!


Thursday, April 25, 2013

Grilled Swordfish

Leave it to humans to be competitive enough to see a giant fish with a WEAPON attached to its face, and think, “Hmmm. I bet I could kill that and eat it.” I don’t know who was the first person on Earth to take on that challenge and prevail, but I have to admit that I’m pretty glad they did. Swordfish is a meaty fish. There’s a reason why they call it swordfish steak. But even though it’s really meaty, it also has a delicate flavor. It takes on marinades well, and I really love it with citrus. The few times we had it when I was a child, my mom just made it with lemon juice, salt and pepper and it was excellent. I found this simple lime-based marinade on The Stay at Home Chef and wanted to try it out. We only left our swordfish in the marinade for about 20 minutes, and I do wish we had gone the whole recommended hour. Even so, it was really good, it just could have imparted more flavor given a little more time. I served it with a great side of Spicy Corn Salad (you can get the recipe here) and it made a really delicious dinner that felt somewhat light, yet filling.


Ingredients
2 limes, juiced
2 tablespoons red wine vinegar
¼ cup olive oil
1 tsp salt
¼ tsp pepper
½ tsp basil
½ tsp cayenne pepper (or more to taste)
2 swordfish fillets

Simply whisk all the marinade ingredients together and pour it into a Ziploc bag with your swordfish. Marinate it for an hour (don’t be impatient like me!). And then grill it! It should take about 5-7 minutes a side, depending on how thick your cut is. When it’s done, it should flake easily with a fork. And there you have it. Here’s hoping that you conquer the swordfish yourself someday soon. 

Monday, April 8, 2013

Lemon-Garlic Shrimp and Grits

One of my all time favorite meals growing up was Fried Fish and Grits. We had wonderful neighbors across the street who would go fishing, and bring my parents back some of the fish they caught. This made me so happy, because I knew my mother would be making that dish. Well, as an adult one of my favorite dinners is Shrimp and Grits. I remember the first time I had Shrimp and Grits. I was working at a golf course in Charleston, South Carolina. After a late day at the clubhouse; my co-workers and I went out to dinner at a local restaurant. Everything on the menu sounded delicious, but I decided to give Shrimp and Grits a try. I remember my first bite: I thought I had died and gone to heaven. It was so delicious. Now, I'm unsure why I've never tried making this at home until now. But, this recipe was easy to make and very good. I wouldn't say this is restaurant gourmet delicious, but it's a solid recipe and I urge you to give it a try. I mean a 5 star recipe on The Food Network has to mean something, right? Enjoy!

Ingredients:
3/4 cup instant grits (I used Quaker Oats Instant Grits)
Kosher salt and freshly ground black pepper
1/4 cup grated parmesan cheese (I omitted this step)
3 tablespoons unsalted butter
1 1/4 pounds medium shrimp, peeled and deveined, tails intact
2 large cloves garlic, minced
1/4 tsp cayenne pepper (optional)
1/4 tsp Cajun season (optional)
Zest of a lemon (optional)
Juice of 1/2 lemon, plus wedges for serving
2 tablespoons roughly chopped fresh parsley

Follow the directions on the Quaker Instant Grits box. If you have parmesan cheese on hand add this at the end. I also added a tablespoon of butter once the grits finished cooking. Set aside and keep warm.

Pat dry the shrimp and season with salt and pepper. I also seasoned the shrimp with Cajun Seasoning and the Cayenne pepper.  Take out a non-stick skillet and add two tablespoons of butter. Set the burner to medium heat. Sprinkle in the lemon zest. Add the garlic and shrimp. Cook until the shrimp is pink about 4 to 5 minutes. Next, add in the lemon zest and parsley. Spoon the grits into a bowl and add in the shrimp with some of the juice. Enjoy.

Asian Grilled Salmon and Pineapple

First off, can we all just agree that grilled pineapple is kind of amazing? There’s just something magical about pineapple when it’s warmed up and maybe even a little caramelized. Ok, now that we’ve got that out of the way, let’s talk about salmon and pineapple together. I’ll admit it sounds a little weird. I’m not a big fruit and fish person, although I know it’s been done many times, and a lot of people really love it, it’s just not my jam. But this actually turned out to be good. The Hubs really liked it, I thought it was just fine. It was pretty sweet, but the touch of char and the sesame oil kept it from being too cloying. I think it could have used a touch more soy sauce because it felt like it needed that pop of salt. Especially the rice. I found the recipe on Half Baked Harvest and she actually served it as lettuce wraps, which we did not do. I’m sure that would be fine, but we thought it was an extra step that wasn’t really needed. She also had a honey glaze that we skipped. Maybe that would have made it better, but I worry that it might have taken the sweetness over the top. If you’re interested in that, follow the link to the original recipe above. Anyway, if you are into fruit on your fish, I definitely think you should try this.


Ingredients
1/4 cup honey
1/3 cup soy sauce
1/3 toasted sesame oil
1 tablespoon fresh ginger, grated
2 cloves garlic, grated
1 teaspoon wasabi powder (optional)
4 green onions, sliced, plus more for garnish
1 tablespoon sesame seeds
1 cup uncooked brown rice
1/2 of a medium size pineapple

In a small bowl mix the honey, soy sauce, toasted sesame oil, ginger, garlic and wasabi powder together, whisking until the wasabi powder has dissolved. Then stir in the green onions and sesame seeds. Put your salmon into a large Ziploc bag and then pour about ¼ of the marinade over it and put it in the fridge for about 30 minutes.

In the meantime slice your pineapple into long spears (remove the rind and the core, of course) and toss half of it with about two tablespoons of the marinade. The other half is yours to do with what you will! Heat up your grill and start with the pineapple. Grill it about 3-4 minutes a side. Put your salmon on the grill, skin side up, and grill for 3-4 minutes (depending on the thickness of your salmon). Flip it and baste with the reserved marinade and cook another 2-3 minutes.

While you’re grilling also make your rice. When it’s done you’ll want to mix in about 4 tablespoons of the reserved marinade. Personally, we thought the rice was rather blah. It could have used a little salt, or maybe it was because it was brown rice instead of white and we are terrible white rice people. Not sure. Anyway, once it’s all done, cut your pineapple into cubes. Serve the salmon over your rice and spoon some pineapple on top! 

Thursday, January 10, 2013

Tuna Melt Bites

Before the holidays, I found myself with a little bit of time off. And despite my long to do list and ambitious plans of what I’d get done, I did little more than hang out around the house and make cookies. What was most difficult about being home during the week, however, was lunch. I am not normally much of a lunch planner. Either I have a Slimfast shake (when I’m being good) or go out around my office (when I’m not). At home on the weekends, the husband and I usually have a late breakfast and a somewhat early dinner and skip lunch altogether. Thus, our house is not exactly the haven of lunch-type foods. So I stuck my head in our overstuffed pantry to see what I could make and heard the stack of canned tuna calling my name.

I’ve always been a fan of canned tuna, by my aforementioned husband is not. So, a few cans have been sitting, abandoned, in my pantry for awhile now. I pulled one out and decided to make an impromptu tuna salad based on what I had around the kitchen. It turned out really tasty! And since I didn’t want to just eat the tuna salad cold, I decided to use up some ciabatta (my favorite kind of baguette) and make little mini tuna melts. They were so easy, made with on-hand ingredients, and filled me up.


1 can Tuna in water, drained
1 celery stalk, diced small
2 Tbsps red onion, diced small
1 pickle spear, diced small
1 ½ Tbsp mayonnaise
1 Tsp Dijon mustard
Pinch of salt
1/8 Tsp cayenne (optional)
1 Tbsp fresh dill (optional
A few slices of Baguette
Sliced cheddar

It’s really simple. Preheat the oven to 400, then just mix the ingredients together. If it seems like it needs a little more mayo to hold everything together, just add it. Taste and add salt (or any other spice) as needed. I tried adding a little Italian spice mix to it once and didn’t like the way it turned out. But dill was great, and even a little lemon juice adds some brightness.

Once you have the salad made, spoon it out onto your slices of baguette. Try to balance the bread and tuna ratio. Top with a slice of cheese. I used cheddar but use any kind you like (pepperjack, maybe?). Then bake for about 10 minutes. Keep an eye on it. You want the cheese to melt and get a little bubbly without burning, and the bread should get a little crunchy but still soft in the middle. And that’s it! A nice, simple but delicious lunch, even for the most lunch-challenged people among us. 

Wednesday, January 9, 2013

Salmon with Lemon Dill Dressing

I’m constantly on the look out for simple, yet flavorful meals. Because despite my best efforts, there are nights where I have to work late, or my husband does, or where I’m just too beat to spend much time on a meal. Those are the nights where we end up ordering something unhealthy like Chinese or pizza, unless I have a simple, quick meal on hand to make. This salmon recipe that I found on Drizzle and Drip fits the bill perfectly. It’s very quick and easy to make, with ingredients that for the most part you would generally have on hand, and best of all—it packs a lot of fresh, delicious flavors. Lemon and dill with a perfectly cooked salmon are the perfect complements to each other.


2-4 salmon filets
olive oil
½ cup sour cream
1 tbsp mayonnaise
1 ½ tbsp finely chopped dill
juice of 1/4 of a lemon
ground black pepper and salt to taste

The original recipe calls for crème fraiche, but I think sour cream worked well as a substitute, and if you wanted to make it healthier, I don’t think a low-fat sour cream would hurt it. You could also cut the mayonnaise entirely, in my opinion. I did cut the recipe down some because it made way too much for just two people. All you really need is a tablespoon or two at most for each fillet.

Simply mix together the sour cream, mayo, dill, lemon juice and salt and pepper in a small dish and set it aside. Rub salmon lightly with olive oil and season with salt and pepper. Pan fry it over medium high heat, starting with the skin side down for 2 minutes. Flip it over for 3 minutes, then back on the other side for the last two minutes. If you like your salmon cooked completely through (shame on you!) you might have to cook it longer.

After that, just serve with a dollop of dressing on top. It is bright and lemony with lots of dill flavor to complement the unfussy salmon. And it’s so easy! 

Thursday, December 27, 2012

Tilapia Meuniere

Man, I just love a delicious sauteed fish. I feel like I'm starting to get a little better at cooking fish. Maybe it's because I'm finding really yummy recipes. I used to think the only time I could eat decadent, smooth, tasty fish was at fancy restaurants,but thanks to this recipe from Barefoot Contessa I don't need to drop $30 for a decadent fish. Now, I can make it at home for about $8. This recipe is super easy and very tasty. I highly, highly recommend that you give her recipe a try. Enjoy!


Ingredients:
1/2 cup all-purpose flour
kosher salt and freshly ground black pepper
4 fresh sole fillets (I used tilapia), 3 to 4 ounces each
6 tablespoons unsalted butter
1 teaspoon grated lemon zest
6 tablespoons freshly squeezed lemon juice (3 lemons)
1 tablespoon minced fresh parsley

Take out your fish and pat dry with a paper towel. Sprinkle salt on one side of each fish. Take a plate and add the flour, salt, and pepper. Add the fish to the flour and shake off any excess flour. Take out your saute pan and set it to medium heat. Add 3 tablespoons butter. Once the butter starts to brown in the pan; add two of the 4 fish. Lightly brown one side; gently turn over the fish and cook for an additional 2 minutes. Add some of the lemon zest on top of each fish, and then add the lemon juice to the pan. Gently remove the fish from the pan and place on a plate. Pour the juice from the pan on top. Warm in a 200 degree oven, and do the above to the remaining 2 fish. Remove the fish from the oven and serve. Enjoy.

Friday, December 7, 2012

Barbecued Mahi Mahi

Someone recently told me that Mahi Mahi is actually dolphin. I was pretty sure they were wrong, but also quite horrified to think that all this time I had been eating Flipper. Turns out it’s dolphinfish, which is not the same thing as a dolphin at all. I saw a photo and it’s not even cute, so don’t worry. I can see why people prefer to call it Mahi Mahi though, to avoid the confusion. Anyway, the point is that Mahi Mahi is not dolphin but it IS very delicious. It’s a sturdier white fish, more like salmon in texture and meatiness. It holds up really well to spice and big flavor, so I knew this recipe would be a tasty one. I found it on the blog Ezra Pound Cake. I decided not to do the pesto on top, and it was really good without it. If anything, I’d maybe add a bit more of the dark brown sugar, just another half teaspoon or so. The sweetness went really well with this fish.


Ingredients
2 Tbsps Spanish Paprika
1 Tbsp Ancho Chile Powder
2 Tsps Cumin
2 Tsps Dark Brown Sugar
1 Tsp Chile de Arbol powder
1 Tsp Kosher Salt
1 Tsp Ground Black Pepper
4 8 oz Mahi Mahi filets
Olive Oil

First of all, I could not find the Chile de Arbol powder, so I went with a Mexican Chile powder. Not sure that it made much difference. This is super easy to make. Just mix together all the spices in a small bowl. Lightly oil the fish on both sides, then sprinkle the spice mixture over one side of the filets. Make sure the filets are covered, but shake off excess spice mixture.

Heat up the grill and grill the filets rub side down first. It should only be about 2 to 3 minutes per side before they are done and ready to eat. We grilled them alongside asparagus, which took about the same time. Really simple, flavorful, and healthy as well. 

Friday, March 30, 2012

Simple Salmon and Grilled Asparagus "Fries"


Sometimes, nothing beats a simple meal. I’m all for trying complicated, multi-step recipes with a laundry list of ingredients on a quiet Saturday. Occasionally, Steve and I will make our own pasta, which is an event. In fact, I’ve been known to pass over certain recipes because they look too simple. But this salmon is quite delicious with a really simple, improvised marinade. It took us awhile to find the right way to cook it but now Steve is a salmon searing star! And I would honestly eat these grilled asparagus spears over French fries any day. Crispy, salty goodness, and way more healthy. I’m convinced even veggie haters would love them (I’m looking at you, Emily!). This is something you can easily throw together any weeknight when you’re too tired to try something complicated, and yet it’s elegant and tasty enough to have when you’re entertaining company.


Salmon Marinade
¼ cup olive oil
¼ cup soy sauce
1 tsp sesame oil
½ tsp onion powder
½ tsp garlic powder
¼ tsp cayenne (optional)
pinch of salt
2-4 salmon fillets

I honestly eyeball this marinade completely. It's not one of those that has to be perfect. If you just get equal parts oil and soy sauce and a little bit of everything else, you're good. Mix all the ingredients aside from the salmon in a resealable plastic bag. It doesn’t have to be completely mixed, but just make sure the spices aren’t stuck to the side of the bag or something. Then put in your salmon, seal the bag with as little air as possible, and let them marinate in the fridge. As with most marinades, the longer you leave it in, the better. I tend to think 1-2 hours is the best.

We’ve started using the 2-2-2 method for cooking salmon, and it has been turning out perfectly for us. Keep in mind that salmon is generally not supposed to be cooked to a light pink all the way throughout. The chef recommended cooking of salmon is usually medium, so that the center is hot but not fully cooked. (Cooking it so it’s light pink throughout is akin to cooking your steak well-done).

Heat a little oil in a skillet and when it’s hot, start with your skin side down for two minutes. Move it just a little after about 30 seconds just to make sure it’s not sticking. Then flip it and cook for another two minutes, using the same technique. Finally, flip it back once more (skin side down) and cook for about 2 minutes more. It’ll be more if the salmon is thicker, less when it’s thinner. You can actually tell how it’s cooking by looking at the side of the salmon—that’s what the inside will look like. Now you're ready to grill the asparagus!

Bunch of asparagus spears
Olive oil
Salt
Pepper
Garlic powder

Grilling asparagus is kind of a revelation. The little bit of char is just perfect. Start by chopping the bottoms off your asparagus (that part is hard and chewy). Next, put the asparagus on a plate or in a rectangular Tupperware. Drizzle with oil. You don’t need to go crazy, just enough that will cover the asparagus when you mix it up. Sprinkle on kosher salt and pepper. I say for this, don’t be stingy. But you know how salty you like things so adjust accordingly. Also sprinkle on garlic powder. Use your hands to mix it up and make sure all the asparagus is coated. Heat up your grill and use tongs to place the asparagus directly on it. Make sure you go across the grate so that you don’t lose spears! Cook them for about 4-6 minutes, rotating them so that no sides get burnt, but they do get a little char. You know they are done when they are a little bendy, but not limp. Pull them off the grill and serve with your salmon. If they even make it that far. Anyway, as you can see this is super fast, very simple and incredibly tasty as well. 

(click here for printable recipe)

Tuesday, March 20, 2012

Barramundi w/ Strawberry Mango Salsa

Doan came in second at Iron Chef Strawberry for her Salmon and Strawberry Mango Salsa. It was deeelicious. I really think she would have won if it weren't for Cara's clever Biscuits with Strawberry and Chipotle jam. I've been wanting to make Doan's Strawberry Salsa ever since, and tonight I finally made it. And, it was just as tasty as I remembered. Doan said she just seasoned her salmon with salt and pepper and seared it in a pan with butter. I'm not a big fan of salmon, so I used the barramundi in my freezer. I ended up using this recipe from Good Taste Foods' blog. It was seriously yummy. Why does butter have to make everything so much better? Sigh. But, I'm definitely going to keep both of these recipes in my pocket. I really think you will enjoy this dish. And, it tasted even better with my strawberry mojito. Enjoy!


Ingredients for Strawberry Salsa:
¾ cup of OJ or half of a fresh orange
1 Jalepeno pepper diced w/ or without seeds depending on your spice level.
2 tablespoons of red onion diced
1 pint of strawberries, sliced
2 tablespoons of lime juice or juice of ½ to 1 whole lime.
1 teaspoon of minced ginger
1 tablespoon of honey
1 whole fairly ripped mango diced.
1 tablespoon cilantro
Pinch of salt


To make the salsa; mix all the above ingredients in a medium sized bowl. I let it sit in my fridge for about an hour so all the juices absorbed.


Ingredients for Fish:
4 Barramundi fillets
2oz butter
2 teaspoons of Paprika
2 teaspoons of Cajun Spice

Brush both sides of the fish with the butter. Take the paprika and cajun spice and combine in a small bowl. Sprinkle the mixture on both sides of the fish. The recipe doesn't necessarily call for this, but go ahead and add a couple tablespoons of butter in your sautee pan. Heat the pan to medium. Once the pan is nice and warm, add in your fish. Cook the fish on each side for four minutes or until it's cooked through. Place your fish on a plate and pour some of the strawberry mango salsa on top. Enjoy!


(Click here for printable recipe)

Monday, July 18, 2011

Seared Tuna with Asian Slaw and Wonton Crisps

I love raw tuna. There, I said it. I especially love it when it’s served with something crunchy—the texture just plays off the tuna so well. Kona Grill (it’s a chain, I know, I’m sorry) serves my favorite raw tuna dish in Richmond: crispy wontons with sesame seared tuna and a wasabi aioli. I could literally eat it every single day. Pretty much the only things stopping me are the probability of mercury poisoning and my desire to avoid Short Pump traffic. So when I was home in Indiana last summer and my brother said he wanted to make a seared tuna dish with crispy wontons, I was fully on board. And he did not disappoint. In fact, I asked him to make it again the last time I visited and then I took the next logical step and asked for the recipe. Well, he and his wife Amber don’t really do recipes so much. I’m not sure how that works, but as long as they keep feeding me tasty meals they can do whatever they like. They told me the ingredients and I went from there. So what follows is my recipe for the delicious, fabulous, recipe-less tuna.


Sushi-grade Tuna (Ahi if you can get it)
Wonton wrappers
Garlic salt
Oil for frying

For the tuna marinade:
¼ cup soy sauce
2 tbsp. sesame oil
1 tbsp. mirin
1 tbsp. rice wine vinegar
1 tbsp. honey

For the Asian slaw:
3 cups shredded Napa cabbage
1 cup shredded red cabbage
½ cup thinly sliced red onion
½ cup thinly sliced carrot
1 cup mayonnaise
3 tbsp rice wine vinegar
2 tbsp sesame oil
2 tsp chili oil

I like to make the Asian slaw first so that the flavors can develop a little more while you’re making everything else. You’ll want to slice everything as thinly as possible, especially the red onion. A really sharp knife will make this easier. And don’t make the mistake of buying baby carrots like I did; that made it more of a challenge to get the shredded texture I was looking for. Mix the mayo, sesame oil, rice wine vinegar and chili oil in a separate dish, making sure that they are completely combined. Then pour it over the bowl with the veggies, stir it all up, and put it in the fridge while you start on the tuna.

Because you are serving the tuna basically rare, you need to get really high quality tuna. We got ours at Fresh Market. It’s expensive, but it’s worth it! We also got the wontons and Napa cabbage there since they can sometimes be hard to find at Kroger. My brother marinates the tuna in soy sauce and then covers it with black and white sesame seeds. It’s good that way, but we decided to try something new this time and really liked it as well. Plus it’s a lot less messy without the seeds. Mix the soy sauce, sesame oil, mirin (which is an Asian sweet cooking wine), rice wine vinegar and honey in a quart Ziploc bag, and then add the tuna. Marinate it for about 20 minutes. If you leave it too long, then the flavors will overpower the taste of the tuna. You also want to let it marinate at room temperature, otherwise when you sear the tuna it will be really cold in the middle.

I would do the wontons next. Cut them diagonally into triangles, and then set up a plate with a few paper towels on it for the finished wontons. Next fill a skillet with vegetable or peanut oil, about an inch deep and heat it up. Be careful to watch the heat on this, if it gets too hot it can burst into flames and that is a very, very bad thing. Once the oil is hot enough (test it by sprinkling a drop of water—if it sizzles, it’s ready), put one wonton triangle into the oil. I would just start with one because they go quick and you don’t want to throw a bunch in there and burn them up. Let it fry on one side for 20-30 seconds, then use your tongs to turn it to the other side. Once it’s turning a light brown, take it out because it will continue to cook. Basically, I would test it a few times and  you’ll get a feel for how long it takes. Once you have a few crisps done, sprinkle them with garlic salt. Don’t wait too long or the salt won’t stick. Make a lot of the crisps—even if you don’t use them all with the tuna, they are tasty on their own.

Alright, now time for the tuna. Put a little oil in a skillet and get it hot. We like our tuna mostly rare so the cooking is merely a formality, but if you like yours more done you can sear it a little longer. We basically seared the tuna for about 20 seconds on the top and bottom and that’s it. Then slice it thin and serve! The best way to eat this is to take a crispy wonton, put a little Asian slaw on it, and a slice of tuna, and pop the whole thing in your mouth! It gets messy, but that’s part of what makes it so good. Besides, what’s the point of making a restaurant quality meal at home if you can’t get a little on your chin?   


(Click here for printable recipe)

Sunday, March 27, 2011

Cilantro Lime Tilapia

So, I've been doing a pretty good job at sticking with my healthy eating plan for this new year. I'm very happy that Sara suggested this blog (Ginas' Skinny Recipes) that she's been following. I've already posted one recipe from this blog, and here's a second one. I've been trying to eat more fish as well, and this particular recipe was a stand out. It's actually a recipe for shrimp, but I just can't bring myself to spend $10-15 on a bag of shrimp. At least not yet. So, I adapted this recipe to apply to Tilapia instead. I think it still worked really well. As you can probably tell from previous postings I have a thing for cilantro and lime. But, this recipe is really good and really fast. I highly recommend it. Enjoy!

Ingredients:
2 tsp olive oil
2 lb shrimp, shelled and deviened (I used Tilapia)
6 cloves garlic, crushed
1/2 cup chopped fresh cilantro
1 lime
salt and pepper

These are my instructions for cooking my fish. Basically, the shrimp cooks a lot faster than fish. So, instead of 3-5 minutes cook it for about 2 minutes on each side.

First take a medium to large frying pan and pour the olive oil into it. Set your heat on medium to medium-high. Next, salt and pepper your fish or shrimp. Place in frying pan and sautee for about 3-5 minutes on one side and then flip it. Add the crushed garlic at this point into the pan. Cook for another 3-5 minutes. Take the pan off the heat and sprinkle your lime juice over the fish. Add the cilantro and toss it together. Serve hot.

4 Weight Watchers Points (Shrimp)
5 Weight Watchers Points (Tilapia)

(Click here for printable recipe)

Wednesday, February 23, 2011

Iron Chef Nuts Winner: Macadamia Nut Crusted Tilapia

As soon as I bit into Morgan’s dish for Iron Chef Nuts, I knew it was a recipe I’d be making as often as possible. And I had a good idea that it would end up being the winner of the night (which it was). We make a lot of Parmesan Tilapia at home, and this recipe is similar in style, but has a completely different, delicious taste. It’s crunchy and melty all at once. The nut flavor is pronounced but it doesn’t overwhelm. I made this the very next weekend after tasting it, and will definitely be putting it in the regular rotation of meals. I suggest you do the same.

I did find that the topping made by this recipe was way too much for our four filets of fish. Being a fan of the “more is more” philosophy, I still used it all, and I would definitely say that this is one of those situations where you are better served to use less topping. So for the recipe below, I’ve taken the liberty of cutting down the amount of nuts to what seems appropriate to me. But you can find the original recipe here on All Recipes if you want to try it for yourself.


Ingredients
4 (6 ounce) tilapia
6.5 ounces macadamia nuts
1 tablespoon soy sauce
2 cloves garlic
1 teaspoon hot sauce
1 tablespoon brown sugar
1 tablespoon olive oil
1 teaspoon black pepper

We buy large packages of individually frozen tilapia at Kroger because they are so convenient and easy to just thaw out when we need them. I would recommend buying the name brand though, not Kroger brand (they tend to taste fishy). And obviously, if you want to buy fresh that will always taste the best. The macadamia nuts I found were dry roasted. I would have gotten regular roasted nuts if I could find them, though.

So, simply mix the nuts, soy sauce, garlic, hot sauce, brown sugar, olive oil and black pepper in a food processor (or blender, but the processor works better in my opinion) until they reach your desired consistency. You could go for a smoother puree, or a slightly crunchier one (which I recommend). Spread this mixture over the top of the tilapia filets, covering them completely. Again, if you end up with some mixture left over, don’t be afraid to throw it away.

The recipe calls for you to broil the fish for 15 minutes, but thanks to the reviewers and my own knowledge of broiling, I realized that would be a big mistake and end in burninating (yes, burninating) the fish. Instead, I baked it at 400 degrees for ten minutes. At the very end, I turned on the broiler for a minute or two, while keeping an eye on it, to give the top a golden crust. And that is that! It’s ridiculously simple for something so good. Congrats on your win, Morgan!

(Click here for a printable recipe)

Wednesday, January 26, 2011

Grilled Tilapia with Mango Salsa


This is my first post of the new year, and one of my resolutions is to try to eat better, and hopefully lose some weight in the process. I've been trying some recipes out of my cooking light cookbook, and this particular dish I cooked up was one I adapted from that cookbook. I did think the fish was a wee bit bland, but the mango salsa helped give it some flavor. The fish was really easy to make, and I got to use my new cast-iron grill in the process. I cheated a bit and used mango salsa from a local grocery store.

Ingredients
Store-bought Mango Salsa
Tilapia
Salt
Pepper
Cooking Spray

Sprinkle salt and pepper all over the tilapia fish. Generously, spray pan with cooking oil. Cook on medium heat for about 3-5 minutes on both sides. Pour mango salsa over tilapia, and enjoy!

(Click here for printable recipe)

Tuesday, March 30, 2010

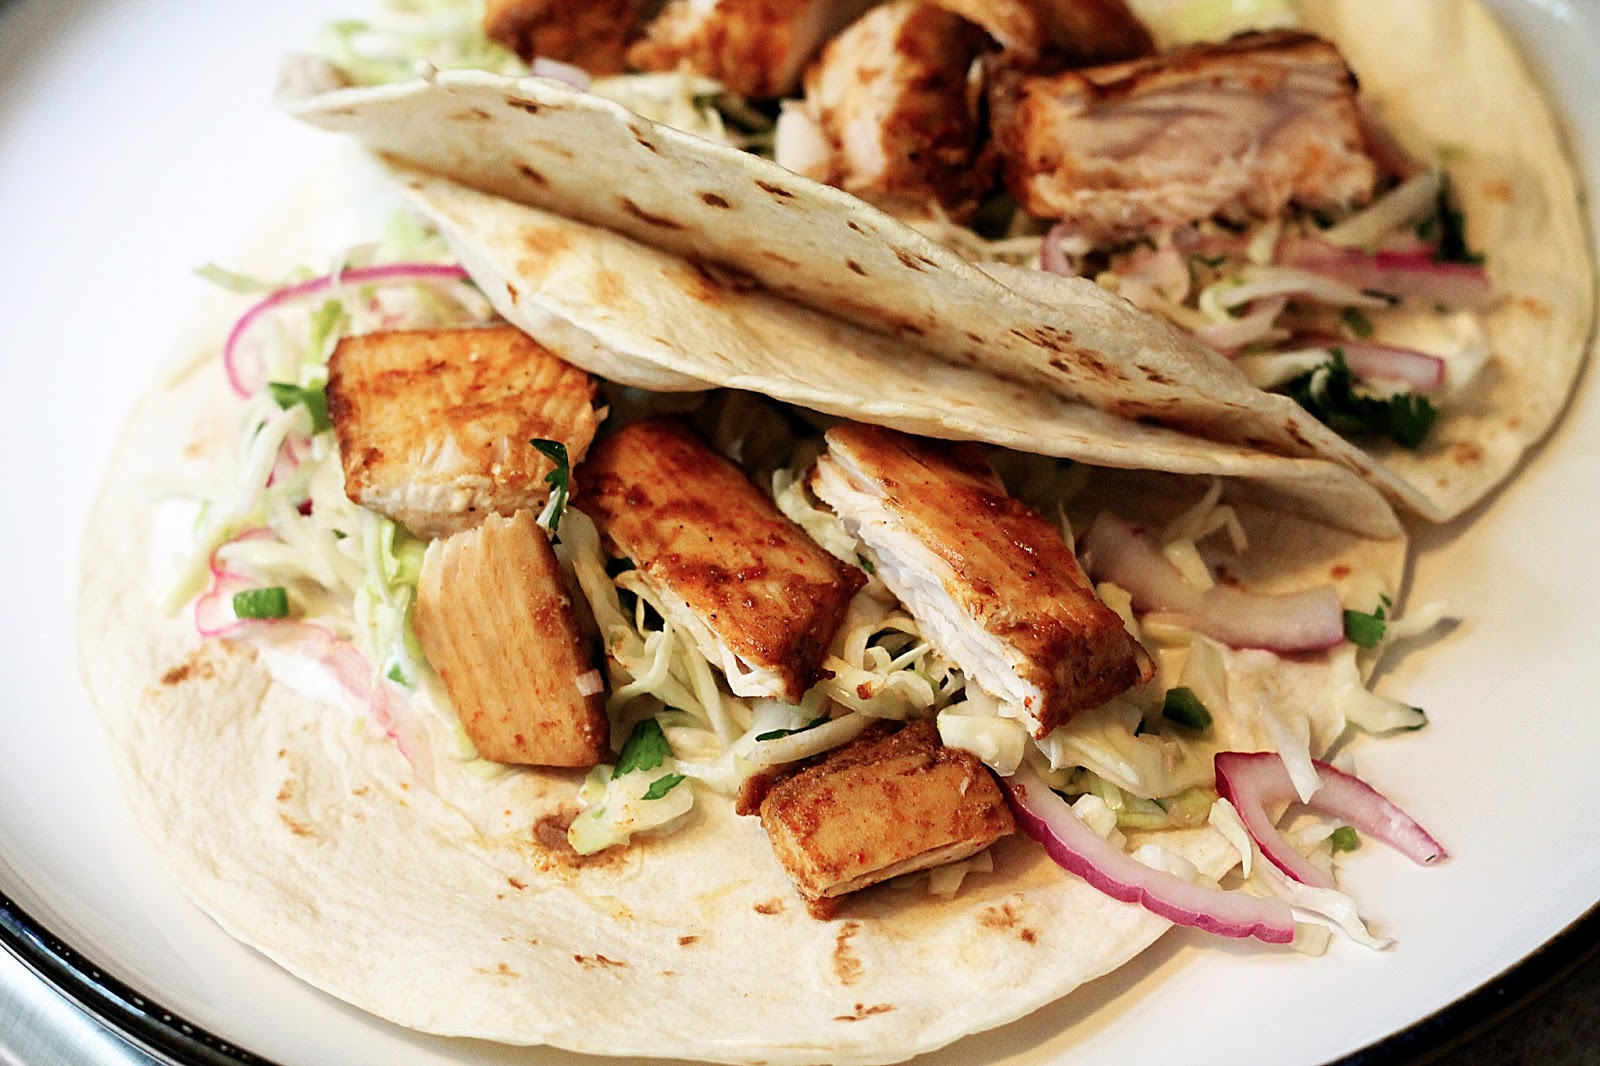
Fish Tacos with Southwest Slaw, Chipotle Pico de Gallo & Mexican Cream

My favorite part about having to go out to LA for work every once in awhile is the fresh fish. Well, maybe the stocked minibar first, but after that, it’s definitely the fresh fish. Growing up in Indiana we didn’t really do fresh fish, unless we caught it ourselves (which we sometimes did). So to me, LA is a magical wonderland of sushi and tuna tartare and fish tacos. Let me tell you, fish tacos are hard to do right. I’ve gotten some here in RVA that have been pretty bad (I’m looking at you, Cha-Cha’s.) But this recipe I found on Epicurious is truly fantastic. Not sure it can match eating fish tacos on the sandy beaches of LA, but it’s close.


When you’re making this meal, the first thing you want to do is mix up the slaw. I’d say do it 2 to 3 hours before serving so the flavors really sink in.


Southwest Slaw
2 cups fine-shredded green cabbage
2 tsp lime juice
2 tsp honey
2 tbsp minced red onion
2 tsp minced jalapeños
2 tsp chopped cilantro
Salt, to taste


I use prepackaged slaw mix, which works fine. I also add more lime juice and use a whole jalapeno. Simply mix this all together and stick it in the fridge. Next you can mix up the Mexican Cream, which is really just a limey sour cream.


Mexican Crema
1/2 cup Mexican sour cream
1/2 tsp finely grated lime zest
2 tsp lime juice

Mexican crema is apparently slightly milder than sour cream, but I just use regular sour cream and it’s pretty good. I actually don’t eat the Chipotle Pico because I’m not a huge fan of tomatoes. But Steve eats it and enjoys it, so you may too. We make ours pretty spicy, but you can control that with the amount of chipotle you put in. I do recommend saving the extra chipotle and adobo sauce that’s in the can—there are a lot of recipes you can use it in.

Chipotle Pico de Gallo
1 cup medium-dice tomatoes (seeded before dicing)
4 tsp minced red onion
1/2 tsp red wine vinegar
1 chipotle pepper, minced
Salt, to taste
1 tbsp cilantro

Mix all these up, and you can use them right away or refrigerate. Now, on to the main dish—the fish tacos!


Fish Tacos
2 lb mahi-mahi
1/2 cup vegetable oil
3 tbsp lime juice
5 tsp chili powder
1 1/2 tsp ground cumin
1 1/2 tsp ground coriander
1 1/2 tsp minced garlic
Salt, to taste


One pound of mahi-mahi was plenty for just the two of us, but if you’re having a larger crowd, two is a good amount. You can also use tilapia, but it’s a little more delicate. Cut the mahi-mahi into small slices (from 2 pounds, it should be around 16 slices). I don’t recommend going too small or it will be hard to turn the fish without it falling apart. Combine all the other ingredients well and coat the fish in it. Make sure you don’t leave the fish in the marinade too long, because the lime juice will make it tough. We cook the fish on the broiler, about two minutes each side until it’s cooked through and flaky. Take the fish out and throw your tortillas right on the oven rack with a watchful eye. It won’t take long to heat them up and make them soft. Then assemble your tacos and enjoy! It’s a nice, light meal that is still filling. If you want to make it even healthier, lose the sour cream (although I think it’s worth the extra calories). This is definitely a recipe I’m going to make whenever I start dreaming about those fish tacos out in LA.


(Click here for printable recipe)

Friday, March 19, 2010

Parmesan Crusted Tilapia

The Italians have two Cardinal rules. The rules that, when broken, have old Italian grandmothers rising from their graves to deliver a solid slap across your cheek and a cringe-inducing glare. Rule number one: you do not cheese your fish. Rule number two: you do NOT cheese your fish.

Well, I cheesed my fish. And it’s goooood.

This is what my husband, Steve, calls “our easiest adult meal.” It’s also one of my favorites. I can’t say it’s healthy, but you could do worse. And it’s seriously easy. I’m talking, under ten minutes easy.

Ingredients (for two generous portions):
3-4 tilapia filets (we get the individually frozen kind in bulk so we always have them)
Old bay
½ cup shredded Parmesan (not grated!)
¼ cup butter, softened
3 Tbsps Mayo
1 Tbsp Lemon juice
¼ Tsp Basil
¼ Tsp Pepper
1/8 Tsp Onion powder
1/8 Tsp Celery Salt
¼ Tsp Paprika
¼ Tsp Garlic powder
1/8 to ¼ Tsp Cayenne pepper (to taste)
¼ cup Panko bread crumbs

You can use any breadcrumbs you like, but I personally feel that Panko has the best crunch. You can find it in the specialty Asian section.

First take out your filets and generously sprinkle both sides with Old Bay. Then, in a small bowl, soften your butter. How much or little you soften your butter really makes a difference. If it’s completely melted, you’ll have a harder time spreading the mixture on your fish later. If it’s two hard, you won’t be able to mix it completely. I put it in the microwave for about 45 seconds and it’s perfect. Add your Parmesan, followed by all the rest of the ingredients. Put in the breadcrumbs last so they don’t soak up all the butter and get soggy. Mix all the ingredients together very well.

Steve has perfected the cooking process on these, so I can tell you with certainty that these times are dead on (at least for our oven). Put your filets on a broiler and broil for 2 minutes. Flip quickly and carefully and broil for 1-½ minutes.

Now comes the fun part. The schmearing. Not smearing. Trust me—once you do it, you know it’s a schmear. If you’ve done it right, it’s thick enough that it won’t fall off the fish as you schmear it on top. You probably will have to use your fingers. This is ok. Don’t be afraid. You’ve already got zombie Italian grandmothers chasing after you with open palms, nothing worse can happen to you. Make sure you’ve completely covered the fish, and then pop it back in. Broil for 1-½ minutes and then start watching through the oven door. You can actually see it browning. Once it’s brown enough for you (which will be less than 30 seconds) pull it out and serve. I’m telling you, it’ll make you unbelievably glad you cheesed your fish.

(Click here for printable recipe)