Showing posts with label healthy. Show all posts

Tuesday, August 26, 2014

Asian Fried Chicken Salad

Oh, Applebee’s. I remember in my hometown for awhile, Applebee’s was actually a decent choice for a restaurant (it was the Midwest). When my friend turned 21, it was the logical place to take her and we spent the night testing the limits of a newbie bartender (I had the the worst, and strongest, Long Island Ice Tea of my life.) But today, Applebee’s is not a place I would visit under normal circumstances. Especially since Richmond has so many great non-chain restaurant options. Still, I wanted to try this copycat salad, which I found on a blog named “Tastes Better From Scratch.” It looked good whether it came from “the neighborhood” or not.

It turned out great, surprisingly. Nice crispy chicken that could have maybe used a touch more salt. The slaw and salad mix was different, but a nice way to add crunch without going full slaw. And the dressing was really good. Sweet with an Asian flair. I liked that it was a meal salad so that was a good way to get us to eat relatively healthy (fried part aside). It was a lot of steps though, so I don’t think this would go into my “easy dinner” pile.


Ingredients
1 egg
1/2 cup milk
1/2 cup flour
1/2 cup cornflake crumbs (I used Parmesan Herb crumbs)
1 tsp salt
1/4 tsp pepper
1 chicken breast
3 cups vegetable oil, for frying
3 cups chopped romaine lettuce
Bag of rainbow or broccoli slaw
            -OR-
1/2 cup chopped red cabbage
1/2 cup chopped napa cabbage
1 carrot, shredded

1 green onion, chopped
1/4 cup chopped cucumber (optional)
1 Tbsp sliced almonds (optional)

Dressing
3 Tbsp honey
1 1/2 Tbsp rice wine vinegar
1/4 cup mayonnaise
1 tsp Dijon Mustard
1/8 tsp sesame oil

Start by whisking your dressing ingredients together in a small bowl, making sure they mix completely. Refrigerate this until you’re ready to use it. Get out two more small bowls (lots of dishes, sorry) and in one beat the egg and milk together. In the second mix the flour, crumbs, salt and pepper. Cut your chicken into long thin strips, as evenly as you can.

In a large saucepan over medium high heat, preheat your oil. I don’t think you need the full 3 cups of oil, just enough to make about a half inch in the pan. Heat the oil to about 350 degrees. One by one, dip your chicken strips in the egg mixture, and then the flour mixture, making sure they get completely coated, then CAREFULLY put them into the oil. Don’t just plop them in or you’ll have hot oil going everywhere and that’s a danger to everyone. I did about 4 chicken strips in each batch so I could watch them. You want to fry for about four minutes, turning over halfway through to get a good golden brown on the crust. Then set them aside on a paper towel.

Ok, that’s most of the work. Now you just have to mix together the salad ingredients, add the chicken on top and pour some of the dressing over the whole thing. It’s a great meal, and you don’t have to deal with the strange folks eating at Applebee’s to enjoy it.

Wednesday, February 12, 2014

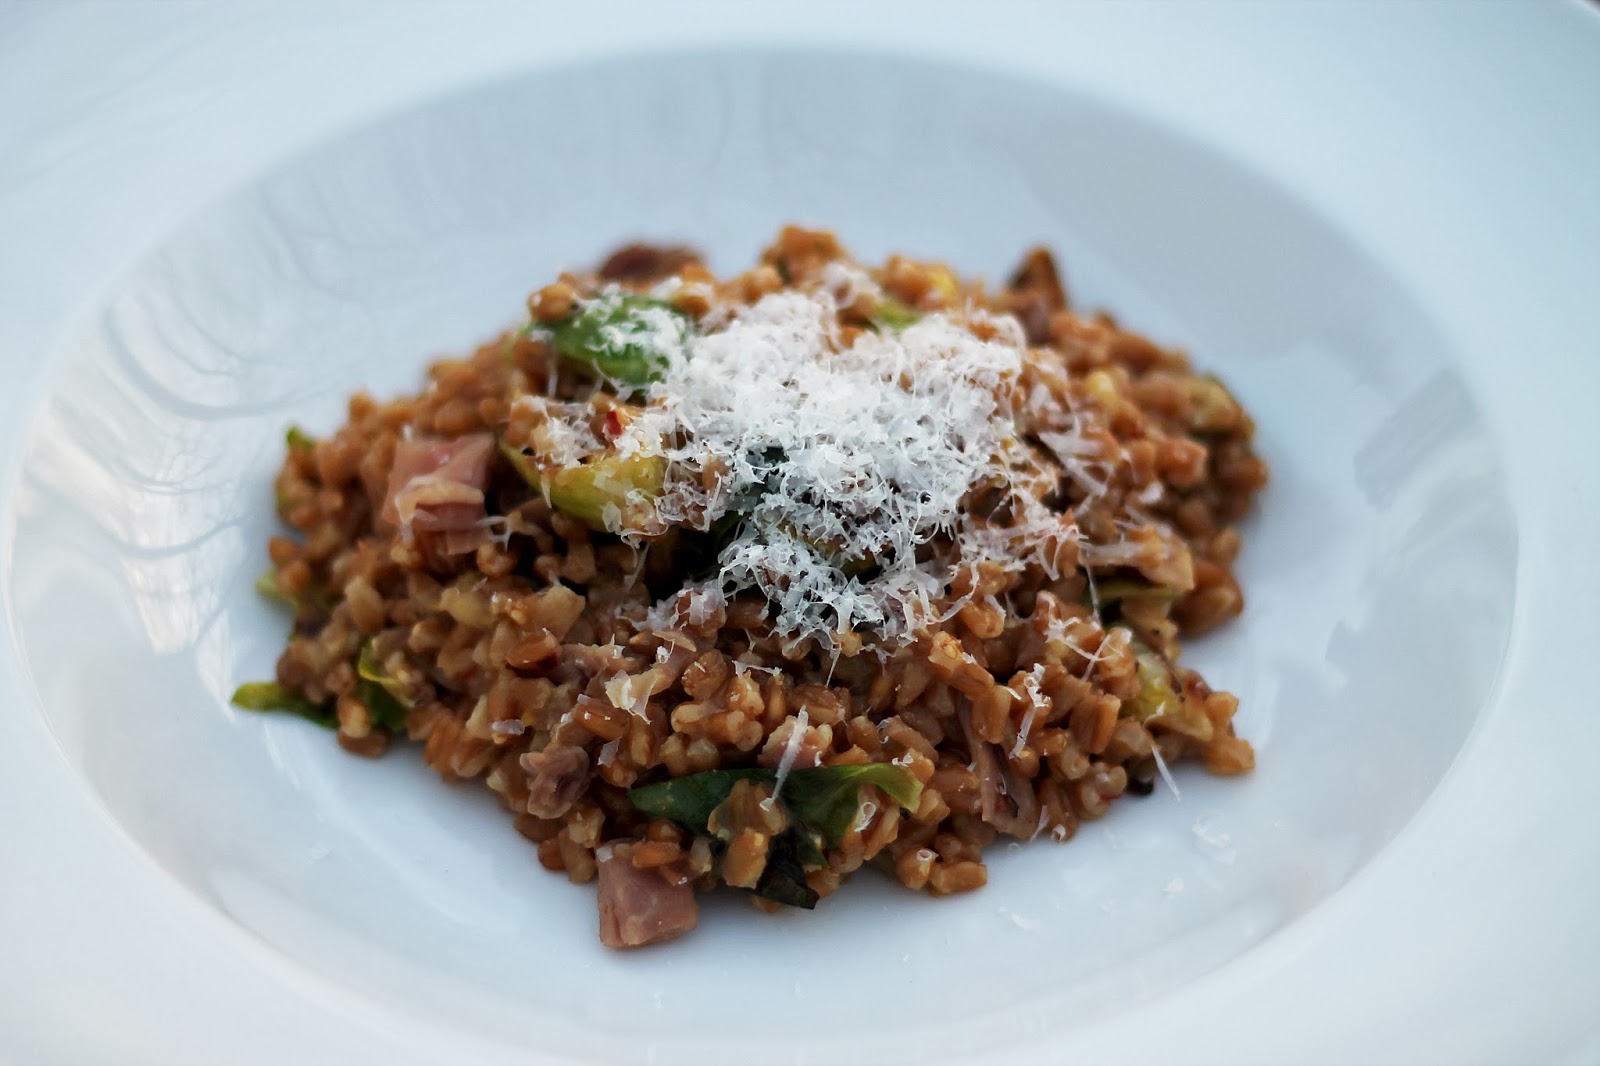
Brussels Sprouts & Prosciutto Farro Risotto

Ah, the dreaded Brussels sprout! This vegetable is single-handedly responsible for billions of children sitting at the table refusing to eat until their parents gave up and sent them to bed. Not even broccoli enjoys such a sordid history of disgust. But Brussels Sprouts are enjoying a mini-revival in the foodie-scene. These tiny cabbages are popping up on menus everywhere, and after tasting this recipe (which I found on Domesticate Me) they will be popping up in my home quite frequently as well. Plus, there’s the added bonus of feeling like this is a pretty nutritious meal. Farro AND Brussels sprouts, come on. (And prosciutto, I know, that kind of hurts my healthy argument). We loved this recipe, and even though it took awhile to make, it was worth it. Creamy, nutty, with the salt from the prosciutto and the great burst of flavor when you get a piece of Brussels sprout, this will be a big hit with your family (yes, even the kids.)


Ingredients
4 Tbsps olive oil, divided
8-1s Brussels sprouts, washed and quartered
1 pinch salt
1 teaspoon crushed red pepper flakes
1 large shallot, minced
2 cloves garlic, minced
1¼ cups farro
½ cup dry white wine
4 cups low-sodium chicken stock
3 ounces prosciutto, diced
1 teaspoon fresh lemon zest
¼ cup grated Parmesan cheese, plus extra for garnish

We soaked our farrow for about two hours in cold water before we made this. I have no idea if it had any effect but I was afraid not to do it. If you want to go rogue and unsoaked, I’ll keep you in my thoughts.

Start by pouring your chicken stock or broth into a saucepan and bring it to a simmer. You’ll want to keep it at that simmer throughout this process. Go to your Brussels sprouts next. In a skillet, heat about 2 tablespoons of olive oil and add in the sprouts. Sprinkle in the salt and red pepper flakes and cook until they are lightly browned and tender. It only took about ten minutes for us. Watch the heat, because although you want them browned, you don’t want to burn them. But definitely make sure they get tender.

You can start the next step while you’re cooking the Brussels sprouts if you are able to multitask. If not, no worries. Some of us like to be methodical and there’s nothing wrong with that! In your Dutch oven or large saucepan, heat 2 more tablespoons of olive oil and add your shallots. Saute for about 3 minutes over medium heat before adding the garlic and cooking that for another minute. Next, stir in the farro and toast for 3 minutes, making sure it gets coated in olive oil and doesn’t burn.

Turn the heat to low before deglazing the pan with your white wine, scraping up any brown bits. Once the wine is completely absorbed, pour in one cup of the warm chicken stock. Keep it simmering and stir occasionally until the farro almost completely absorbs the liquid. This took some time, much longer than it usually takes when we make risotto. But it eventually happened, so have faith and be patient! Continue this process, adding a half-cup of stock at a time until you’ve added it all and the farro is al dente. It has more tooth than a risotto, which I like, but if you want it to be softer, you could try adding more broth (I think: I confess this is just a theory).


Once all the stock is absorbed, add in the Brussels sprouts and most of the prosciutto (if you are saving some for serving). Stir until the sprouts are heated through and then stir in the lemon zest and Parmesan. You shouldn’t need more salt but taste it and add pepper if you want and then serve! I hope you like it as much as we did, and redeem those wonderful Brussels sprouts.

Monday, January 13, 2014

Mushroom Parmesan Farro

I have a sixth sense. And right now it's telling me that you want to ask something... it's becoming clearer... you want to know..."What in tarnation is farro, anyway?" Did I get it? Yeah, I thought so. Ok, so, good question. I really didn't know what farro was either until recently, but here is the lowdown. Farro is a grain, basically a kind of wheat, similar to barley. You can buy it (from a higher end grocery store like Fresh Market or Whole Foods) and it comes in three kinds: whole, semi-pearled and pearled. Whole is the most nutritious, but takes the longest to cook. I used whole for this recipe and based on how good it tasted, I think I would stick with whole. It's always good to have something healthy also taste great! I found this recipe on Cusineous, and only modified it to add mushrooms to make it more of a robust meal, and I used part chicken broth and part water instead of all water, for flavor. I was the most worried that the Hubs wouldn't be into it at all, but he really enjoyed it. It was a lot like risotto, very creamy, very homey. It had a bit more "tooth" than risotto does, a little more chewy, but I liked that. It really filled me up and that full feeling lasted for a while, so it's not only healthy, it keeps you satisfied. If you are looking for a healthy meal, give farro a shot!


1 cup farro
3 cups liquid (I did 2 cups chicken broth and 1 cup water, but use any ratio you like.)
8 garlic cloves, minced
1 cup (give or take) mushrooms, roughly chopped
2 tbsps olive oil
1/4 cup grated parmesan cheese
1/4 cup chopped parsley
Salt & Pepper to taste

So, we weren't exactly sure if we were supposed to soak the farro or not. Some people say soak overnight, some say just cook it, so we hedged our bets and soaked it in cold water for about an hour. I don't think you need to do this step, it just might lower the amount of time you need to cook your farro. Maybe. Do it if it makes you feel better. Then add the farro and liquid (chicken broth and water in any ratio you desire as long as it makes 3 cups) to a pot, cover and bring to a boil. Then turn it down to simmer and simmer until the farro has absorbed all the liquid. For us it took about 45 minutes. About 10 minutes before your farro is done, you can start the rest. In a pan over medium heat, heat your oil and add the mushrooms. I also like to salt the mushrooms just a touch. Cook them for around 7 minutes until the mushrooms start to get golden brown, then add in your garlic. Cook that for another couple minutes, making sure the garlic doesn't brown or burn. Then add the farro, cheese and parsley and stir. Add some pepper and taste to see if it needs more salt (ours didn't) and then serve right away. Like risotto, it doesn't do well just sitting out for awhile, so keep that in mind. I hope you will love it and give farro a chance!

Thursday, February 7, 2013

Grilled Cabbage with Spicy Lime Dressing

Ok, I know what you're thinking. Cabbage. Cabbage? But don't judge. Don't give up on this humble veggie without giving it another, newer (and tastier) try. I've always been a fan of raw cabbage, although I know that puts me in the minority. In fact, as a kid I remember we used to ask my mom for the cabbage core whenever she was making cole slaw. If you've never tried the core, please do. It's a little like a radish without the bite. Very tasty. But I digress. I saw this recipe for grilled cabbage on The Kitchn and knew that I wanted to try it immediately. I also knew that I would meet with some resistance from the Hubs, but I thought the spicy lime dressing might bring him around. Well, he admitted he had his doubts, but in the end said that he was "pleasantly surprised." Hey, I'll take it. This is a great, flavor-packed side dish that is surprisingly filling, considering it's pretty much just cabbage. The dressing is very citrusy, but pairs nicely with the mellow cabbage and the garlic and cilantro also stood out. If I had one complaint it would be that I didn't get spiciness from this at all, so next time I might add a jalapeno to the dressing. We used half a head of cabbage for two people, but I'm including the recipe for the whole head below. 


Ingredients
1/4 cup lime juice (2-3 limes)
1/4 cup extra virgin olive oil
1 teaspoon fish sauce
2 garlic cloves, pressed or minced
1/4 cup cilantro leaves
1/2 teaspoon salt
1/2 teaspoon cayenne
1/4 teaspoon sugar
1 head green cabbage
Grapeseed or canola oil

For the dressing, whisk all the ingredients except the cabbage together in a small bowl. The original recipe said to "whizz" them in a food processor, but to be honest, I didn't feel like dirtying up my whole Cuisinart just for this little bit of dressing. So I used my trusty garlic press and I feel like it turned out just fine. Set the dressing aside and prepare your cabbage. Get rid of the outer layers of tough leaves until you get to the tasty good cabbage inside. Cut it into 8 wedges and brush the edges with oil. To grill it, put the wedges on for about 5 minutes or so with the cover closed until the edges start to get some good color. Flip them on the other edge and cook for another 5-7 minutes with the cover closed. We kept the cabbage relatively crisp in the center, but if you want to soften it up even more just cook it for longer.  Then just pour the dressing over the wedge and serve with a knife. Give cabbage a chance! You might find yourself pleasantly surprised as well.

Thursday, January 17, 2013

Chicken Curry Soup

With the cold, rainy weather plaguing Richmond in the last two weeks, one thing is for sure: it’s full on Soup Season. Seriously, I think Winter should be late November through December, and then Soup season can be January and February. Maybe even March. Anyway, my seasonal suggestions aside, I made a really awesome soup last night. I found this Chicken Curry Soup on Will Cook For Friends and instantly knew it was right up my alley. Spicy, brothy, no beans—yeah that hits all my checkmarks. My only gripe about the soup, and it’s a small one, is that it probably could have used a few more vegetables. I know, that doesn’t sound like me, but it did need just a little bit more, maybe a daikon or some root vegetable. I thought it was delicious, my husband did too, and I’m looking forward to having the leftovers again soon!


Ingredients
1 Tbsp olive oil
2 boneless, skinless chicken breasts
1 tsp. cumin
1 tsp. cinnamon
1/4 tsp. allspice
1/2 tsp. kosher salt
1 large yellow onion
1 serrano chile (optional)
5-6 cloves garlic, minced
2 TBSP curry powder
1/2 tsp. freshly grated ginger
1/4 cup honey
4 cups low-sodium chicken broth
1/2 cup fresh cilantro, chopped
2 limes, juiced
Salt to taste
White or brown rice, for serving

The original recipe called for bone in chicken breasts, but I didn’t want to have to deal with shredding it off the bone, although I’m sure that brings more flavor. I didn’t feel like the chicken was lacking in any way, though. Start by trimming any excess fat off your chicken. In a small bowl, mix cumin, cinnamon, allspice and kosher salt, and sprinkle the mixture over the chicken, rubbing it in well. Heat your oil over medium heat and sear the chicken on each side, about 3-4 minutes a side. Then set it aside.

Add your onions and serrano into the pot and sauté for around 3 minutes. The original recipe didn’t call for serrano, but I wasn’t convinced the curry powder would bring enough heat. Well, the soup ended up pretty spicy (in a good way) so I would say if you’re not into that, leave out the serrano.

After about 3 minutes, add in the garlic, ginger and curry powder and mix well for about another minute before stirring in the honey and chicken broth. I use Swanson’s 100% fat free broth to make it even healthier. Put your chicken back in the broth and bring it to a boil, then turn the heat to low and simmer covered for about 30-40 minutes. If you use bone-in chicken it will need to go longer than breasts will to cook all the way through.

Once the chicken is done, pull it out and shred it, then return it to the pot along with your lime juice and cilantro. Taste it and salt it accordingly. If it’s not spicy enough, add in some cayenne pepper. If it’s too spicy, you can bring it down with some more honey or coconut milk. Serve it over a half-cup of rice. Happy Soup Season! 

Friday, December 7, 2012

Barbecued Mahi Mahi

Someone recently told me that Mahi Mahi is actually dolphin. I was pretty sure they were wrong, but also quite horrified to think that all this time I had been eating Flipper. Turns out it’s dolphinfish, which is not the same thing as a dolphin at all. I saw a photo and it’s not even cute, so don’t worry. I can see why people prefer to call it Mahi Mahi though, to avoid the confusion. Anyway, the point is that Mahi Mahi is not dolphin but it IS very delicious. It’s a sturdier white fish, more like salmon in texture and meatiness. It holds up really well to spice and big flavor, so I knew this recipe would be a tasty one. I found it on the blog Ezra Pound Cake. I decided not to do the pesto on top, and it was really good without it. If anything, I’d maybe add a bit more of the dark brown sugar, just another half teaspoon or so. The sweetness went really well with this fish.


Ingredients
2 Tbsps Spanish Paprika
1 Tbsp Ancho Chile Powder
2 Tsps Cumin
2 Tsps Dark Brown Sugar
1 Tsp Chile de Arbol powder
1 Tsp Kosher Salt
1 Tsp Ground Black Pepper
4 8 oz Mahi Mahi filets
Olive Oil

First of all, I could not find the Chile de Arbol powder, so I went with a Mexican Chile powder. Not sure that it made much difference. This is super easy to make. Just mix together all the spices in a small bowl. Lightly oil the fish on both sides, then sprinkle the spice mixture over one side of the filets. Make sure the filets are covered, but shake off excess spice mixture.

Heat up the grill and grill the filets rub side down first. It should only be about 2 to 3 minutes per side before they are done and ready to eat. We grilled them alongside asparagus, which took about the same time. Really simple, flavorful, and healthy as well. 

Wednesday, May 23, 2012

Turkey Stuffed Peppers

After being a poor contributor in the past, I have decided to try to actually do something about that. It seems to be easier to make writing down what I cook a point since I don't do much these days except, well, be at home doing home stuff. I think cooking falls in that category! Last night I made a variation of a stuffed peppers recipe after reading about 4 or 5 different recipes, none of which appealed to me. The last time I made stuffed peppers of any kind, it was with Stove Top stuffing and probably about 5 years ago? The ex-boyfriend didn't like rice--should have known then that it wasn't meant to be. Anyway, onto the main event!


Ingredients:
5  bell peppers (can use any you prefer, red or yellow, etc. I used green)
1  lb Italian seasoned ground turkey
1  small onion
2  jalapenos (optional)
2  to 3 cloves of garlic, more to your liking
1/2 cup uncooked white rice
2  to 3 cups shredded mozzarella cheese (I used 2 cups but think 3 would be better)
2  8 ounce cans tomato sauce
Olive oil 

The spices I hardly measure, but did my best to keep track. You can tweak the amounts if needed:
Salt and pepper to taste (I used about 1/4 teaspoon salt and 1/2 teaspoon pepper)
About 1/2 teaspoon or so of Paprika
1/2 teaspoon of Cayenne pepper (Joe and I like a little kick but this is optional as well)

Directions: Place rice in a pot with about a cup of water and cook until water is absorbed. Meanwhile, chop off the tops of the peppers and gut them. Rinse and set aside. Dice the onion and jalapenos, and finely chop the garlic. For less spice, remove all seeds and insides from jalapenos.
Heat olive oil in a pan, add the chopped goodies and garlic. Saute for about 2/3 minutes. Add ground turkey to the pan. Cook until no longer pink. The ground turkey can come already seasoned which I prefer. It just adds something to the meat. If you have regular ground turkey, you can always add Italian seasonings to the mix.

Remove from heat. Add 1 can tomato sauce, cooked rice, spices, and cheese. Mix it all up! Leave enough cheese to sprinkle on top of the stuffed peppers. Lightly grease a baking dish. Fill peppers with stuffing, and place in the baking dish, pour the other 8 ounce can of tomato sauce over the peppers. Bake at 350 degrees for about an hour until peppers are tender. Sprinkle the mozzarella cheese left aside on tops of the peppers and bake for an additional 10 minutes until cheese is melted. Serve with garlic bread, or any choice of sides. Yum!


(Click for printable recipe)

Wednesday, May 16, 2012

Thai Style Pork Lettuce Wraps

I bought a pound of pork that I ended up not needing. Normally what would have happened is I would have left said pork in the fridge, totally forgetting about it, until one day I open the fridge and something grabs me by the face and pulls me to a horrifically green, meaty demise.

Not wanting to meet (no pun intended) this grisly fate, I went in search of something to make with a pound of ground pork. I found a recipe for Thai Pork Stir Fry on The Whole Kitchen and thought it sounded tasty. But since I am trying to eat a little healthier these days (a LITTLE) I decided to adapt it to make lettuce wraps instead of stir fry, so I chopped all the vegetables a lot smaller. This turned out really great! It had lots of flavor, a good amount of spice and a really satisfying crunch. My only complaint would be that it was a touch oily, but I think that could easily be helped by draining off the meat.

Ingredients
1 lb lean ground pork
1/2 red onion, diced
1 large carrot, diced
1 bell pepper, diced
2 tsp olive oil, divided
1 shallot, diced
1 jalepeno, diced
2 cloves garlic, minced
2 Tbsp fish sauce, divided
1 Tbsp fresh ginger, grated, divided
2 Tbsp cooking sherry
1 Tbsp honey
1 Tbsp hoisin sauce
2 Tbsp chili garlic sauce
1/2 cup cilantro, chopped
Lettuce for wraps

As always, make your life easier by prepping the ingredients. This is where prep bowls really come in handy. Start by chopping the red onion, carrot and pepper and putting them in a bowl. Chop the jalapeno (seed it if you are not a spice fan) and shallot and put them in a bowl. In a bigger bowl put in the ground pork and add one tablespoon of fish sauce and half of the ginger. Mix it around using your hands (this is much more pleasant if the pork is not straight from the fridge). Set this aside, and in your last prep bowl mix up the sauce. The remaining fish sauce, ginger, sherry, honey, hoisin and chili garlic sauce goes here. This may seem like a lot of chili garlic sauce, but it really melded nicely with the other flavors and although the end result was spicy, it certainly wasn’t overly so. Mix them well and set aside. Now, you are ready to cook.

With a teaspoon of oil, sauté the carrot, pepper and onion over medium high heat for about 4 minutes and then put it back in the bowl. Next sauté the jalapeno and shallot with another teaspoon of oil over medium low heat for about 5 minutes. Add the garlic and stir for about 30 seconds before adding the meat mixture. Bring the heat back to medium and brown the meat. Make sure it’s fully cooked and then carefully pour off some of the oil. Add the vegetables back in, followed by the sauce. We decided to keep the mixture on the heat for a little bit longer, another 3-5 minutes to let the sauce thicken further. Finally, add in the cilantro and take the mixture off the heat. Serve spooned into lettuce cups. My husband liked it so much he wants me to make even if I don’t accidentally find myself with an extra pound of ground pork. 

Monday, May 14, 2012

Simple Salmon Salad with Lemon Dijon Vinaigrette


Last week I marinated some salmon for dinner, not remembering that I would be eating alone that evening. I decided to make it all anyway, and since then I’ve had a couple cold salmon fillets staring at me every time I opened the fridge. I’m actually a pretty big fan of cold salmon. It’s not cold pizza, but it'll do in a pinch. I would have totally eaten them cold if I hadn’t been struck from the heavens with a wonderful idea. I put it on a salad.

It turned out fantastic, actually, as far as salads go. I admit I was a little afraid of the vinaigrette. Especially when I mixed it up and tasted it and it went KRA-KAW! in my mouth. But over the lettuce it wasn’t so strong, and it balanced all the flavors out quite nicely.

Ingredients
Your favorite lettuce (I used butter lettuce)
Fresh Basil
Leftover cold salmon, flaked
Thinly sliced red onions

2 Tbsps Olive Oil
Juice and zest from one lemon
1 Tbsp Dijon Mustard
Salt & Pepper to taste

Just to shake things up a little, I sliced my lettuce into strips. It makes it a little easier to eat, and I know it doesn’t really make it taste any different, but sometimes it seems like it. I also julienned the basil. Toss all the salad ingredients together first. Then mix the vinaigrette ingredients in a bowl and whisk until fully combined. I’ve also heard that you  could mix it in a canning jar and then just shake the jar, but whisking with a fork worked for me. Don’t dump the entire vinaigrette on the salad! First, just pour some of it over the salad and toss. Then see if you need more. I definitely didn’t need all of the dressing since it’s pretty strong. 

I think this dressing would be great with any salad toppings or meat. It has a great brightness and a lot of flavor. 


(Click for printable recipe)

Friday, March 30, 2012

Simple Salmon and Grilled Asparagus "Fries"


Sometimes, nothing beats a simple meal. I’m all for trying complicated, multi-step recipes with a laundry list of ingredients on a quiet Saturday. Occasionally, Steve and I will make our own pasta, which is an event. In fact, I’ve been known to pass over certain recipes because they look too simple. But this salmon is quite delicious with a really simple, improvised marinade. It took us awhile to find the right way to cook it but now Steve is a salmon searing star! And I would honestly eat these grilled asparagus spears over French fries any day. Crispy, salty goodness, and way more healthy. I’m convinced even veggie haters would love them (I’m looking at you, Emily!). This is something you can easily throw together any weeknight when you’re too tired to try something complicated, and yet it’s elegant and tasty enough to have when you’re entertaining company.


Salmon Marinade
¼ cup olive oil
¼ cup soy sauce
1 tsp sesame oil
½ tsp onion powder
½ tsp garlic powder
¼ tsp cayenne (optional)
pinch of salt
2-4 salmon fillets

I honestly eyeball this marinade completely. It's not one of those that has to be perfect. If you just get equal parts oil and soy sauce and a little bit of everything else, you're good. Mix all the ingredients aside from the salmon in a resealable plastic bag. It doesn’t have to be completely mixed, but just make sure the spices aren’t stuck to the side of the bag or something. Then put in your salmon, seal the bag with as little air as possible, and let them marinate in the fridge. As with most marinades, the longer you leave it in, the better. I tend to think 1-2 hours is the best.

We’ve started using the 2-2-2 method for cooking salmon, and it has been turning out perfectly for us. Keep in mind that salmon is generally not supposed to be cooked to a light pink all the way throughout. The chef recommended cooking of salmon is usually medium, so that the center is hot but not fully cooked. (Cooking it so it’s light pink throughout is akin to cooking your steak well-done).

Heat a little oil in a skillet and when it’s hot, start with your skin side down for two minutes. Move it just a little after about 30 seconds just to make sure it’s not sticking. Then flip it and cook for another two minutes, using the same technique. Finally, flip it back once more (skin side down) and cook for about 2 minutes more. It’ll be more if the salmon is thicker, less when it’s thinner. You can actually tell how it’s cooking by looking at the side of the salmon—that’s what the inside will look like. Now you're ready to grill the asparagus!

Bunch of asparagus spears
Olive oil
Salt
Pepper
Garlic powder

Grilling asparagus is kind of a revelation. The little bit of char is just perfect. Start by chopping the bottoms off your asparagus (that part is hard and chewy). Next, put the asparagus on a plate or in a rectangular Tupperware. Drizzle with oil. You don’t need to go crazy, just enough that will cover the asparagus when you mix it up. Sprinkle on kosher salt and pepper. I say for this, don’t be stingy. But you know how salty you like things so adjust accordingly. Also sprinkle on garlic powder. Use your hands to mix it up and make sure all the asparagus is coated. Heat up your grill and use tongs to place the asparagus directly on it. Make sure you go across the grate so that you don’t lose spears! Cook them for about 4-6 minutes, rotating them so that no sides get burnt, but they do get a little char. You know they are done when they are a little bendy, but not limp. Pull them off the grill and serve with your salmon. If they even make it that far. Anyway, as you can see this is super fast, very simple and incredibly tasty as well. 

(click here for printable recipe)

Monday, March 5, 2012

Chicken Lettuce Wraps Take 2

The last time I made chicken lettuce wraps they turned out pretty good. But not really so good that I felt the desire to make them again. I’m not sure why. But when I saw this recipe for PF Chang’s style chicken lettuce wraps over at Iowa Girl Eats, I was inspired and made a double batch to take to a party. They were delicious! Much more flavorful than the other recipe, and they make great leftovers too. I’ve already made them twice so if that is the test of a good recipe, they pass.


Ingredients:
1lb ground chicken breast
1/2 medium onion, minced
salt & pepper
2 large cloves garlic, minced
1 inch nob fresh ginger, peeled & minced
1 Tablespoon sesame oil
2 1/2 Tablespoons soy sauce
1/2 Tablespoon water
1 Tablespoon peanut butter
1/2 Tablespoon honey
1 Tablespoons + 1 teaspoon rice vinegar
2 teaspoons chili garlic sauce
3 green onions, chopped
1/2-8oz can sliced water chestnuts, drained & chopped
Lettuce leaves, rinsed and patted dry

Cook and stir the chicken, onion and some salt & pepper in a hot skillet until the chicken is just about done. Toss in your garlic and ginger and cook a little longer, until there is no pinkness to the chicken.

While you’re doing this (or before if it’s easier), combine the sesame oil, soy sauce, water, peanut butter, honey, rice vinegar and chili garlic sauce in a microwaveable bowl. Microwave for about 30 seconds to melt the peanut butter a little bit. Whisk it up to combine (the whisk helps with the peanut butter) and then pour over the chicken. Add a touch more pepper and stir it all together. Add in the onions and water chestnuts and cook about 2 more minutes. You could probably add in any veggies you want, but the water chestnuts give a really nice crunch to it.

And that’s really it. You could sprinkle some chopped peanuts on top, but we didn’t. I found some butter lettuce to serve with it, and was a little disappointed in the flimsiness of the leaf. Honestly, good old iceberg works better. This is definitely a recipe that I will come back to again and again. Hope you do as well! 


(Click here for printable recipe)

Tuesday, January 10, 2012

Arugula Salad with Bacon Vinaigrette

It’s January, and with the New Year comes a lot of new resolutions to start exercising, lose weight, and eat healthier. If you know me at all, you know that these are all challenges for, especially the “eat healthier” part. But I’m making an attempt, and that’s why I tried this salad. I’ll admit, a bacon vinaigrette probably isn’t the MOST healthy thing I could have chosen, but come on. Baby steps.

All in all, it was pretty good. In the future I would add a little more seasoning to the dressing, since it was pretty bland. But I love the hot ingredients and dressing with the arugula. The original recipe (from The Pioneer Woman) called for spinach, and I made a second version for my husband with romaine so I’m sure this will work for any lettuce you love.


Ingredients:
Arugula
Bacon
1 red onion, sliced thinly
Mushrooms
Black pepper
Parmesan Reggiano (optional)

Dressing:
3 Tbsps. Reserved bacon grease
3 Tbsps. Red wine vinegar
2 Tsps sugar
½ Tsp Dijon mustard
Dash Salt

Start by frying up your bacon. I made the mistake of trying to get fancy and using some pancetta, but it did not make enough grease for the dressing, so I would recommend sticking with bacon. (We ended up cutting up some bacon to add to it). When that is nice and crispy, remove to a paper towel and remove all but about 2 Tbsps of the grease to a small saucepan. Now start caramelizing your onions over medium-low heat. This should take awhile, around 20 minutes. We didn’t let ours go that long because we like ours slightly less brown. Remove the onions and set aside, then brown your mushrooms over medium heat. Don’t let them get completely soft, just enough so that they are well browned. In the meantime, whisk together the ingredients for the dressing over medium heat until they are combined and heated through. No need for this to simmer; it just needs to be warm.

Now simply assemble the salad with the lettuce, bacon, onions and mushrooms. Pour the warm bacon dressing over the top and toss to coat. Then give it a dose of cracked pepper and if you want, grate a little Parmesan Reggiano over the top. There you have it. Maybe not the healthiest salad in the world, but at least it’s a small step in the right direction. 

(click here for printable recipe)

ps. 200th post! Woohoo!

Wednesday, May 18, 2011

Chicken Lettuce Wraps

In Richmond, Spring barely exists. It often feels like we just skip right from cold weather to hot, hot, hot. We should just retire the name Spring and call it Sprummer. But even if the weather isn’t as transitional as we would like, what we eat can be. This is a great, light meal for Sprummer. It’s filling without being heavy, and it’s healthy so we can fit into all our Sprummer clothes.

I found this recipe on Pass the Sushi, and unfortunately I had thought we had hoisin sauce, but we didn’t. So instead, we added some spicy Szechuan sauce and sesame oil, and just kind of adjusted the recipe to taste. It actually turned out great—a happy accident. So, I’ll share the recipe as it was originally, but feel free to play with it and taste along the way. You could use any ground meat you want—but chicken and turkey are healthy options.


Ingredients
1 tablespoon canola oil
1 lb ground chicken (or any other ground meat)
1 medium shallot, diced small
1 garlic clove, minced
3 scallions
2 large stalks lemongrass-tender pale inner core only, minced
1/2 cup chopped cashews
1 teaspoonful seasoned rice vinegar
1/4 cup hoisin sauce
1 tablespoon soy sauce
1 1/2 teaspoonful garlic chili sauce
small handful of cilantro, chopped
lettuce leaves

Pull out your Wok if you have one, or a deep skillet pan if you don’t, and heat the oil over medium heat. We used olive oil because we didn’t have canola oil and I’m not sure it made a difference. Toss in the shallot and garlic and cook quickly for 15 seconds before adding the chicken. Stir and break up the meat until it’s cooked through, and drain any grease that comes up.

Add the cashews, scallions, rice vinegar, hoisin, soy sauce and chili sauce. Also the lemongrass if you have it. We couldn’t find it at Kroger. You could also throw in water chestnuts if you’re feeling crazy. This is where we added sesame oil, which I really like and think added a lot, but it’s something that needs to be used sparingly. Toss it all around and cook for another 2-3 minutes until everything is coated. Then take it off the heat and sprinkle the cilantro. Serve in clean lettuce leafs. We used just green leaf lettuce because that’s the best that Kroger had, but butter lettuce or bibb lettuce is probably the best if you have it. Iceberg can also work in a pinch.

Anyway, this was a great meal, healthy and surprisingly husband approved. Next hot Sprummer night when you’re looking for a light meal, try it! 

(Click here for printable recipe)