My Mom started making this soup back in the nineties. I remember the first time she made it I was very hesitant to try it. I mean look at all the vegetables that are in the recipe. Shudder. But, I have to admit that the vegetables are nice and tender and you really can't tell they're in the soup. Plus, this recipe has a ton of flavor and it's just a nice warming dish to have on a cold and snowy day. The other great thing about this soup is you can add or subtract whatever ingredient you might like or not. If you don't like beans substitute pasta instead. Or, have both! Plus, it goes great with the bread. Enjoy!
Ingredients:
1/4 c Bertolli Extra Virgin Olive Oil, plus more for serving
1/4 c each chopped and trimmed fennel, celery, onions, and carrots
1 garlic clove, minced
1/4 tsp dried thyme
6 c chicken broth
1 can (28oz) Italian Plum Tomatoes, cut up
2 c. peeled & diced russet potatoes
1 can rinsed and drained cannellini beans
1 c. finely shredded Savoy cabbage or Swiss chard
1 c. diced trimmed zucchini
2 tbsp. each chopped fresh parsley and basil
2 cups Pasta (optional
Salt and Freshly ground pepper
8 slices (one per bowl) Italian bread
Combine the olive oil, fennel, celery, onions, carrot, and garlic and thyme in a large heavy saucepan. Cover & cook over medium low heat until the vegetables are very soft, about 15 minutes. Do not brown.
Then, stir in the chicken broth, tomatoes, potato, beans, & cabbage or Swiss chard. Heat to boiling. Reduce heat to low and simmer for 15 minutes. Add in the zucchini, parsley, and basil. If using add in the pasta. Cover and cook for about 10 minutes. Add salt and pepper to taste. Ladle into a bowl and serve with a piece of bread.
Sunday, February 16, 2014
Snickers Bar Stuffed Chocolate Chip Cookies
Friday was Valentine's Day. Since I didn't have a Valentine to treat; I decided to bake some cookies for my friends instead. Sally's Baking Addiction is seriously becoming my go-to cookie recipe source. I'm loving all the recipes I made, and this one is no exception. Anyway, I chose this particular cookie recipe, because who doesn't love chocolate chips? And, adding a snickers stuffed in the center just elevates the chocolate chip cookie to the next level. I did try the cookie right out of the oven, and it just tasted like a really good chocolate chip cookie. However, a couple hours later I tried the cookie again, and you could definitely taste the snickers. So, I would recommend waiting a half hour or so before biting into one of these scrumptious cookies. And, my 5 Valentine's definitely approved of this cookie! Enjoy!
Ingredients:
2 cups + 2 tbsp all-purpose flour
1/2 tsp baking soda
3/4 cup (1.5 sticks) salted butter, softened (I used unsalted and added 1/2 tsp salt)
1 cup light brown sugar
1/2 cup sugar
1 egg, at room temperature
1 egg yolk, at room temperature
2 tsp vanilla exract
1 cup semi-sweet chocolate chips
8 fun-sized Snickers bars, cut into 4 pieces each (you may need more depending on how many cookies you get)
First take out a medium bowl and add in the flour, baking soda, and salt (if using unsalted butter). Stir and set aside. Next, add the butter and sugars to your standing mixer bowl and cream together. Then, add in the egg, egg yolk, and vanilla. Reduce the speed of your standing mixer to low and gradually add in the flour mixture. Then, add in the semi-sweet chocolate chips. Stir well. Place the bowl in the fridge for about 30 minutes up to 24 hours.
Before assembling the cookies, make sure you pre-heat your oven to 325. To assemble the cookies take a small pat of cookie dough and flatten then add the snickers piece. Take another pat of cookie dough and add on top of the snickers portion. Roll together and place on cookie sheet. I got about 30 cookies out of the dough. Bake in the oven for about 10-12 minutes or until the edges of the cookie turn a golden brown. Remove from oven, and place on a cooling rack. I advise waiting about 30 minutes or so before biting into the cookie, but I understand if it's too tempting. Enjoy!
Ingredients:
2 cups + 2 tbsp all-purpose flour
1/2 tsp baking soda
3/4 cup (1.5 sticks) salted butter, softened (I used unsalted and added 1/2 tsp salt)
1 cup light brown sugar
1/2 cup sugar
1 egg, at room temperature
1 egg yolk, at room temperature
2 tsp vanilla exract
1 cup semi-sweet chocolate chips
8 fun-sized Snickers bars, cut into 4 pieces each (you may need more depending on how many cookies you get)
First take out a medium bowl and add in the flour, baking soda, and salt (if using unsalted butter). Stir and set aside. Next, add the butter and sugars to your standing mixer bowl and cream together. Then, add in the egg, egg yolk, and vanilla. Reduce the speed of your standing mixer to low and gradually add in the flour mixture. Then, add in the semi-sweet chocolate chips. Stir well. Place the bowl in the fridge for about 30 minutes up to 24 hours.
Before assembling the cookies, make sure you pre-heat your oven to 325. To assemble the cookies take a small pat of cookie dough and flatten then add the snickers piece. Take another pat of cookie dough and add on top of the snickers portion. Roll together and place on cookie sheet. I got about 30 cookies out of the dough. Bake in the oven for about 10-12 minutes or until the edges of the cookie turn a golden brown. Remove from oven, and place on a cooling rack. I advise waiting about 30 minutes or so before biting into the cookie, but I understand if it's too tempting. Enjoy!
Wednesday, February 12, 2014
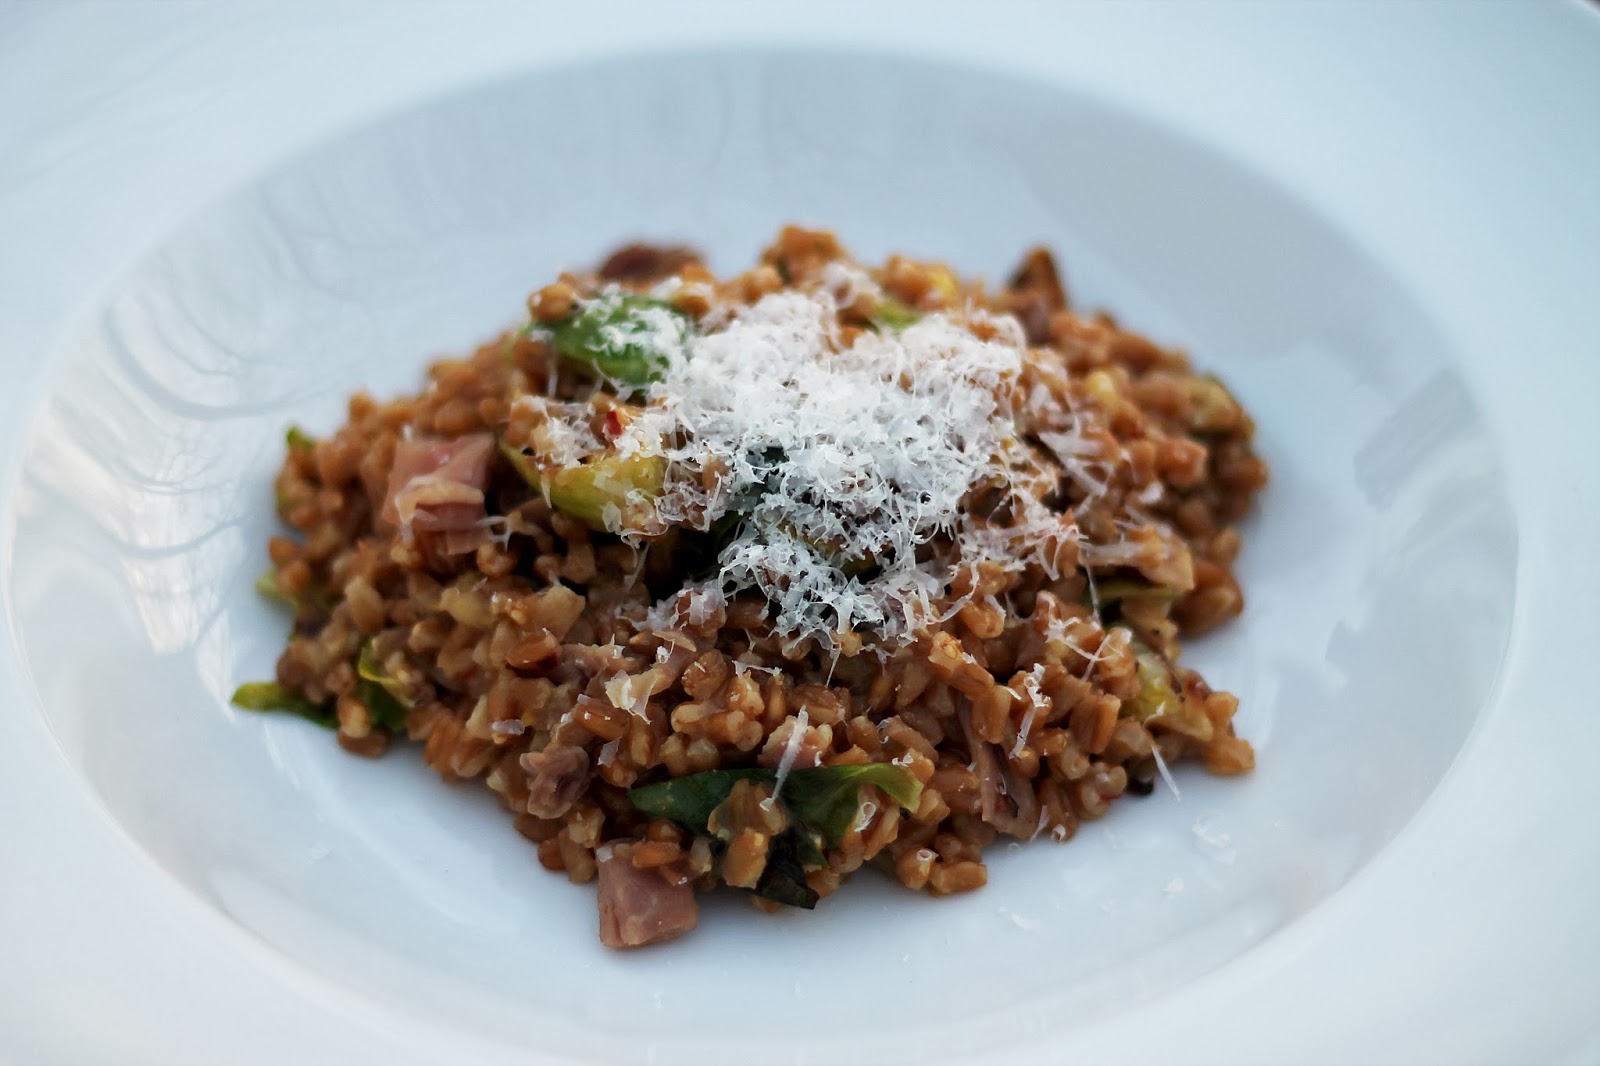
Brussels Sprouts & Prosciutto Farro Risotto
Ah, the dreaded Brussels sprout! This vegetable is
single-handedly responsible for billions of children sitting at the table
refusing to eat until their parents gave up and sent them to bed. Not even
broccoli enjoys such a sordid history of disgust. But Brussels Sprouts are
enjoying a mini-revival in the foodie-scene. These tiny cabbages are popping up
on menus everywhere, and after tasting this recipe (which I found on
Domesticate Me) they will be popping up in my home quite frequently as well. Plus,
there’s the added bonus of feeling like this is a pretty nutritious meal. Farro
AND Brussels sprouts, come on. (And prosciutto, I know, that kind of hurts my
healthy argument). We loved this recipe, and even though it took awhile to
make, it was worth it. Creamy, nutty, with the salt from the prosciutto and the
great burst of flavor when you get a piece of Brussels sprout, this will be a
big hit with your family (yes, even the kids.)
Ingredients
4 Tbsps olive oil, divided
8-1s Brussels sprouts, washed and quartered
1 pinch salt
1 teaspoon crushed red pepper flakes
1 large shallot, minced
2 cloves garlic, minced
1¼ cups farro
½ cup dry white wine
4 cups low-sodium chicken stock
3 ounces prosciutto, diced
1 teaspoon fresh lemon zest
¼ cup grated Parmesan cheese, plus extra for garnish
We soaked our farrow for about two hours in cold water
before we made this. I have no idea if it had any effect but I was afraid not
to do it. If you want to go rogue and unsoaked, I’ll keep you in my thoughts.
Start by pouring your chicken stock or broth into a saucepan
and bring it to a simmer. You’ll want to keep it at that simmer throughout this
process. Go to your Brussels sprouts next. In a skillet, heat about 2
tablespoons of olive oil and add in the sprouts. Sprinkle in the salt and red
pepper flakes and cook until they are lightly browned and tender. It only took
about ten minutes for us. Watch the heat, because although you want them
browned, you don’t want to burn them. But definitely make sure they get tender.
You can start the next step while you’re cooking the
Brussels sprouts if you are able to multitask. If not, no worries. Some of us
like to be methodical and there’s nothing wrong with that! In your Dutch oven
or large saucepan, heat 2 more tablespoons of olive oil and add your shallots.
Saute for about 3 minutes over medium heat before adding the garlic and cooking
that for another minute. Next, stir in the farro and toast for 3 minutes,
making sure it gets coated in olive oil and doesn’t burn.
Turn the heat to low before deglazing the pan with your
white wine, scraping up any brown bits. Once the wine is completely absorbed,
pour in one cup of the warm chicken stock. Keep it simmering and stir
occasionally until the farro almost completely absorbs the liquid. This took
some time, much longer than it usually takes when we make risotto. But it
eventually happened, so have faith and be patient! Continue this process,
adding a half-cup of stock at a time until you’ve added it all and the farro is
al dente. It has more tooth than a risotto, which I like, but if you want it to
be softer, you could try adding more broth (I think: I confess this is just a
theory).
Once all the stock is absorbed, add in the Brussels sprouts
and most of the prosciutto (if you are saving some for serving). Stir until the
sprouts are heated through and then stir in the lemon zest and Parmesan. You
shouldn’t need more salt but taste it and add pepper if you want and then
serve! I hope you like it as much as we did, and redeem those wonderful Brussels
sprouts.
Tuesday, February 11, 2014
Asian Pear and Arugula Salad with Goat Cheese
Don't you just love arugula? It's such a great lettuce and goes great with a wide variety of accompaniments. I love it with blue cheese, parmesan, grapes, white beans, fennel, beets, etc. I thought I'd give this recipe a try from Food and Wine. They accompany arugula with pear, pumpkin seeds, and goat cheese. However, since I didn't have pumpkin seeds I used pistachios instead. I also used Giada's lemon dressing from this recipe. This is a seriously delicious recipe. Give it a try and I think you will love it. Enjoy!
Ingredients:
1/4 c extra-virgin olive oil
2 tbsp fresh lemon juice
1 tsp honey
1/2 tsp chopped thyme
Salt and freshly ground pepper
5 oz baby arugula
3 Asian pears (or d'Anjou) - peeled cored and very thinly sliced
1/2 c salted roasted pumpkin seeds
3 oz fresh goat cheese, crumbled
Sea salt, for sprinkling
In a small bowl; whisk together the olive oil, lemon juice, honey, thyme, salt, and pepper. Take out a large bowl, and add the arugula with the pear slices and pumpkin seeds. Add the dressing and toss well. Then, add the crumbled goat cheese and sprinkle some sea salt if desired.
Monday, February 3, 2014
Spicy Thai Steak "Salad"
I’ve actually already made this recipe three times, but just
finally got around to taking the photo. That gives you an idea of how good this
is, as well as how lazy I am when it comes to winter food photos. (It’s just so
hard to get a good photo when it’s dark out!) Oh, and then I realized that this
time I forgot to add the cilantro and chives, so now my photo isn’t even
accurate. OY VEY!
Anyway, I’m not sure how this qualifies as a salad, but I’m
keeping that in the title because it makes me feel all healthy and stuff. There’s
really nothing salad-y about it. It’s seared meat, onions, spicy chiles and a
very flavorful citrusy-umami sauce. You could serve it over lettuce, I suppose,
but it’s really quite tasty over rice instead. I found it on food52, although I
made a few modifications and added a little sesame oil because I’m in love with
it.
Ingredients
1pound steak (flank, top sirloin)
1 to 2 chilies (I used fresno, but use whatever spice-level
you like)
3 cloves garlic, minced
1 Tbsp sugar
4 Tbsps fish sauce
4 Tbsps fresh lime juice
1 Tbsp sesame oil
1 medium onions, thinly sliced
1 packet chives, sliced into 1-inch lengths
1 handful cilantro, roughly chopped
I know this goes against everything in your cheftastic
being, but do NOT season the meat. I know, it’s crazy, but there’s actually
enough salt in the marinade. So, start by searing the steak in a pan or on a
grill to your desired doneness. You can use olive oil or if you love sesame oil
the way I do, that’s also an option. Let the steak rest while you make the
marinade.
Thinly slice your chiles and then cut the slices in half. Seed it if you are a big baby about heat. Add the chiles, garlic, lime juice, fish sauce, sugar and sesame oil to a large bowl and stir to make sure you dissolve the sugar. Add in the onions, chives and cilantro and toss well. Thinly slice your steak (against the grain!) and add the slices to the bowl as well. Stir everything thoroughly and then stick it in your fridge to marinate for a half hour. I also stirred mine about every ten minutes. Not sure that helped anything, but it made me feel useful. Then serve over rice. Keep in mind that your steak mixture will be cool, so you may want to use rice that is cool or room temperature as well.
Friday, January 31, 2014
Short Rib Ravioli with Mushroom Sauce
I believe you can read the stages
of someone’s cooking based on pasta. Think about it. When you’re just starting
out, making spaghetti probably involves dry pasta and a jar of sauce. As you
progress, your next step is to make your own sauce. Then, you might start
making your own pasta. The next stage, in my opinion, is making your own
complicated pasta. Ravioli for example. This is generally not something that
your average home cook attempts. But as you get more serious about cooking,
it’s definitely something you want to try. Well, the Hubs and I reached this
stage recently, and while it certainly is worth the trouble, I have to be
honest: it IS trouble. They make ravioli look so easy on Iron Chef, but in real
life it’s a whole situation. Make the filling, mix the pasta, roll it out, form
the raviolis, cook the raviolis, make the sauce, and finally… devour. To quote
the Hubs, “5 hours, 10 pots, pans, and plates used during the prep. Stand
mixer, pasta roller, two burners and the oven. Consumed in under 10 mins, and I
would do it all again.”
This is not easy, but it’s really good, and satisfying on a culinary level. Plus it’s just damn homey. I mean, it doesn’t get much more homey than braised meat inside pasta, covered with a rich, meaty mushroom sauce. A little fresh parmesan on top. This is living.
Short Rib Filling
2 lbs boneless short ribs
1 tsp olive oil
Salt & pepper, to taste
1 leek, chopped
4 cloves garlic, minced
1 carrot, diced
2 celery stalks, diced
1 cup dry red wine (I used merlot)
6 sprigs thyme, divided
4 cups beef broth
We got the idea for this recipe from the Busy in Brooklyn
blog, but used Tyler Florence’s pasta recipe for the dough. Start this early in
the day since it needs to cook for 3 hours before it’s ready to put in the
ravioli. Season the short ribs with salt and pepper. Heat up your handy Dutch oven
and drizzle in a little olive oil before searing the short ribs on all sides.
Remove them from the pot and toss in the leek, garlic, carrot and celery. Saute
for 5-7 minutes and then deglaze the pan with the red wine. Add the short ribs
back into the pot and pour in the broth, 4 sprigs of thyme, and a little salt
& pepper. Bring the pot to a boil, before covering and putting it in the
oven for 3 hours at 300 degrees. Don’t forget to wrap a little foil around your
lid handle to protect it.
After the meat has cooked for three hours, remove it from
the pot and shred it, getting rid of the bones and any large fatty pieces. Use
a sieve to strain the cooking liquid from the vegetables and add those to the
meat. Remove and toss the sprigs of thyme. You’ll use the reserved cooking
liquid for the sauce, so keep it. You can put it in the freezer for about
twenty minutes to let the excess fat congeal, then skim it off. Or, if you are
like me, you can get a $10 gadget that is made to separate fat from gravy and
use that. It’s pretty magical. Either way, get rid of the fat and then set the
liquid aside to use in the sauce.
Pasta
3 cups all-purpose flour
1 teaspoon salt
4 eggs
2 tablespoons olive oil
1-2 Tbsps water
1 yolk & 2 Tbsps water, for egg wash
Using your stand mixer with the dough hook, combine the
flour and salt before adding the eggs one at a time. Continue to mix as you
drizzle in the olive oil and then add a little water until the dough starts to
form into a ball. Then sprinkle some flour on a work surface and knead the
dough for a few minutes until it becomes smooth and elastic. Finally, wrap it
in plastic and let it (and you) rest for about a half hour.
We cut the dough into fourths to form our noodles. Dust the
counter and the dough with flour. You want to do this often to keep the dough
from getting sticky. Roll it through the pasta machine on it’s widest setting a
few times, then slowly reduce the setting, running the pasta through twice each
time. Tyler’s directions said to go until the machine was on its lowest setting
but we only went to 7 (ours goes to 9) and it was really thin. Use your judgment.
Lay out the sheet of pasta on the (floured) countertop and
brush the surface with the egg wash. Put about a tablespoon of filling on half
the pasta sheet in tight little piles two inches apart. Fold the other half of
the past sheet over the top of the filling. Try to get the air out of the
pockets around the filling and make a seal. May God help you with this because
it was impossible for us. Finally, cut each pocket into squares using a crimper
or plain old knife. These stick like crazy so if you are not cooking them
immediately be sure to dust them in cornmeal or flour.
To cook the ravioli, get a big pot of salted water boiling
and cook them a few at a time. They float to the top when they are done.
Tyler’s instructions said to cook them 10-15 minutes, but I only had to cook
mine about 4-6 minutes. Remove from the water with a slotted spoon. Make sure
to have the sauce done and ready as soon as the raviolis are done because they
get cool super fast.
Mushroom Sauce
2 large shallots, peeled and sliced
3 cloves garlic, minced
6 cups chopped assorted mushrooms (I just used baby bella)
1 tbsp flour
To make the sauce (last part, promise), sauté the shallots
and garlic for a few minutes, making sure not to burn the garlic. Then add in
the mushrooms and cook over high heat until the liquid evaporates. Sprinkle in
the flour and mix it in, sautéing until the mushrooms start to get some nice
golden color. Then add in the cooking liquid, 2 sprigs of thyme, and a little
salt and pepper. Cook a few more minutes until it reduces and thickens. Then
pour it over the ravioli, grate a little fresh parmesan on top, and enjoy! The
eating process is much quicker than the cooking process but very delicious.
We actually ended up making about 15 raviolis and using the
rest of the dough to make noodles. Then we mixed the leftover meat into the
mushroom sauce to top the noodles. This was also a delicious way to eat it, and
practical since we had so much leftover meat.
Monday, January 20, 2014
Spicy Chicken Tacos
We have a LOT of taco recipes on this blog. Obviously, my co-hort and I love tacos. Add this recipe to the list of delicious taco recipes. I found this recipe from The Pioneer Woman's blog. She says this is her brother's recipe, but it doesn't really matter because it turned out great. I didn't follow her/his recipe exactly. I didn't fry up the tacos, and I used Mrs. Renfros Habanero and Mango salsa (which is VERY spicy, by the way). I also sliced up some avocado and added cilantro. Overall, I think it turned out great. If you want to know how the Pioneer Woman does it then click on this link. Enjoy!
Ingredients:
16 whole Corn Tortillas
4 whole Boneless, Skinless Chicken Breasts, Cut into pieces
Salt, Cumin, Chili Powder to taste (or use taco seasoning)
2 tbsp Canola Oil
2 cans (4 oz) Diced Green Chilies
1/2 cup chopped cilantro
1 whole avocado sliced
Mrs. Renfros Mango and Habanero Salsa
Season chicken liberally with the spices above. Next, take out a large skillet, and add the oil. Heat to medium-high and add in the chicken pieces. Cook for a couple minutes, and then add in the canned green chilies. Stir. Cook until the chicken is completely done. Turn off heat and set aside. Take out your corn tortillas and heat on the skillet for a couple seconds over medium. Remove and add to the plate. Top the tortilla with the chicken, sliced avocado, cilantro, and salsa. Do this for the remaining tacos and enjoy.
Ingredients:
16 whole Corn Tortillas
4 whole Boneless, Skinless Chicken Breasts, Cut into pieces
Salt, Cumin, Chili Powder to taste (or use taco seasoning)
2 tbsp Canola Oil
2 cans (4 oz) Diced Green Chilies
1/2 cup chopped cilantro
1 whole avocado sliced
Mrs. Renfros Mango and Habanero Salsa
Season chicken liberally with the spices above. Next, take out a large skillet, and add the oil. Heat to medium-high and add in the chicken pieces. Cook for a couple minutes, and then add in the canned green chilies. Stir. Cook until the chicken is completely done. Turn off heat and set aside. Take out your corn tortillas and heat on the skillet for a couple seconds over medium. Remove and add to the plate. Top the tortilla with the chicken, sliced avocado, cilantro, and salsa. Do this for the remaining tacos and enjoy.
Sunday, January 19, 2014
Chewy Chocolate Chunk Cookies
I've posted a couple chocolate chip cookies on this blog. You can't have too many, right? I've posted a thin and crispy chocolate chip cookie recipe, a nutella chocolate chip cookie, and now this chewy chocolate chip cookie recipe. I found this recipe from Sally's Baking Addiction, and she offered up a lot of great tips on how to get cookies to come out chewy. She suggests using one egg and an egg yolk and a little corn starch. She also suggests instead of rolling them into balls to roll them so they stand tall. Overall, I think these cookies were a huge hit, and I will definitely make them again. Enjoy!
Ingredients:
2 and 1/4 cups (280 grams) all-purpose flour, measured correctly
1 teaspoon baking soda
1 and 1/2 teaspoons cornstarch
1/2 teaspoon salt
3/4 cup (1.5 sticks or 170 grams) unsalted butter, melted
3/4 cup (150 grams) light brown sugar, loosely packed
1/2 cup (100 grams) granulated sugar
1 large egg + 1 egg yolk*
2 teaspoons vanilla extract
1 cup (180 grams) chocolate chips or chocolate chunks
Take out a large bowl and toss in the flour, baking soda, cornstarch, and salt. Set aside. Next, take out a medium bowl and melt the butter. Then, whisk in the sugars and stir well. Next, whisk in the egg and egg yolk. Stir well. Finally, whisk in the vanilla. Stir well. Then, fold the wet mixture into the dry mixture and mix together. Now, fold in the chocolate chips. The dough will be very sticky because of the melted butter, but just try to get the chips as well incorporated as you can. Cover the dough with plastic wrap and chill for at least 2 hours and up to 3 days.
When you're ready to bake; take out the dough from the fridge and allow to soften for 15 minutes. Pre-heat your oven to 325, and line the cookie sheets with parchment paper or silpat. Roll the dough so they're taller rather than wider. Bake the cookies for 11-12 minutes. The cookies will come out of the oven looking soft and underbaked. Allow the cookies to cool on the cookie sheet for 10 minutes. Then, move cookies to wire rack to cool completely.
Ingredients:
2 and 1/4 cups (280 grams) all-purpose flour, measured correctly
1 teaspoon baking soda
1 and 1/2 teaspoons cornstarch
1/2 teaspoon salt
3/4 cup (1.5 sticks or 170 grams) unsalted butter, melted
3/4 cup (150 grams) light brown sugar, loosely packed
1/2 cup (100 grams) granulated sugar
1 large egg + 1 egg yolk*
2 teaspoons vanilla extract
1 cup (180 grams) chocolate chips or chocolate chunks
Take out a large bowl and toss in the flour, baking soda, cornstarch, and salt. Set aside. Next, take out a medium bowl and melt the butter. Then, whisk in the sugars and stir well. Next, whisk in the egg and egg yolk. Stir well. Finally, whisk in the vanilla. Stir well. Then, fold the wet mixture into the dry mixture and mix together. Now, fold in the chocolate chips. The dough will be very sticky because of the melted butter, but just try to get the chips as well incorporated as you can. Cover the dough with plastic wrap and chill for at least 2 hours and up to 3 days.
When you're ready to bake; take out the dough from the fridge and allow to soften for 15 minutes. Pre-heat your oven to 325, and line the cookie sheets with parchment paper or silpat. Roll the dough so they're taller rather than wider. Bake the cookies for 11-12 minutes. The cookies will come out of the oven looking soft and underbaked. Allow the cookies to cool on the cookie sheet for 10 minutes. Then, move cookies to wire rack to cool completely.
Monday, January 13, 2014
Mushroom Parmesan Farro
I have a sixth sense. And right now it's telling me that you want to ask something... it's becoming clearer... you want to know..."What in tarnation is farro, anyway?" Did I get it? Yeah, I thought so. Ok, so, good question. I really didn't know what farro was either until recently, but here is the lowdown. Farro is a grain, basically a kind of wheat, similar to barley. You can buy it (from a higher end grocery store like Fresh Market or Whole Foods) and it comes in three kinds: whole, semi-pearled and pearled. Whole is the most nutritious, but takes the longest to cook. I used whole for this recipe and based on how good it tasted, I think I would stick with whole. It's always good to have something healthy also taste great! I found this recipe on Cusineous, and only modified it to add mushrooms to make it more of a robust meal, and I used part chicken broth and part water instead of all water, for flavor. I was the most worried that the Hubs wouldn't be into it at all, but he really enjoyed it. It was a lot like risotto, very creamy, very homey. It had a bit more "tooth" than risotto does, a little more chewy, but I liked that. It really filled me up and that full feeling lasted for a while, so it's not only healthy, it keeps you satisfied. If you are looking for a healthy meal, give farro a shot!
1 cup farro
3 cups liquid (I did 2 cups chicken broth and 1 cup water, but use any ratio you like.)
8 garlic cloves, minced
1 cup (give or take) mushrooms, roughly chopped
2 tbsps olive oil
1/4 cup grated parmesan cheese
1/4 cup chopped parsley
Salt & Pepper to taste
So, we weren't exactly sure if we were supposed to soak the farro or not. Some people say soak overnight, some say just cook it, so we hedged our bets and soaked it in cold water for about an hour. I don't think you need to do this step, it just might lower the amount of time you need to cook your farro. Maybe. Do it if it makes you feel better. Then add the farro and liquid (chicken broth and water in any ratio you desire as long as it makes 3 cups) to a pot, cover and bring to a boil. Then turn it down to simmer and simmer until the farro has absorbed all the liquid. For us it took about 45 minutes. About 10 minutes before your farro is done, you can start the rest. In a pan over medium heat, heat your oil and add the mushrooms. I also like to salt the mushrooms just a touch. Cook them for around 7 minutes until the mushrooms start to get golden brown, then add in your garlic. Cook that for another couple minutes, making sure the garlic doesn't brown or burn. Then add the farro, cheese and parsley and stir. Add some pepper and taste to see if it needs more salt (ours didn't) and then serve right away. Like risotto, it doesn't do well just sitting out for awhile, so keep that in mind. I hope you will love it and give farro a chance!
1 cup farro
3 cups liquid (I did 2 cups chicken broth and 1 cup water, but use any ratio you like.)
8 garlic cloves, minced
1 cup (give or take) mushrooms, roughly chopped
2 tbsps olive oil
1/4 cup grated parmesan cheese
1/4 cup chopped parsley
Salt & Pepper to taste
So, we weren't exactly sure if we were supposed to soak the farro or not. Some people say soak overnight, some say just cook it, so we hedged our bets and soaked it in cold water for about an hour. I don't think you need to do this step, it just might lower the amount of time you need to cook your farro. Maybe. Do it if it makes you feel better. Then add the farro and liquid (chicken broth and water in any ratio you desire as long as it makes 3 cups) to a pot, cover and bring to a boil. Then turn it down to simmer and simmer until the farro has absorbed all the liquid. For us it took about 45 minutes. About 10 minutes before your farro is done, you can start the rest. In a pan over medium heat, heat your oil and add the mushrooms. I also like to salt the mushrooms just a touch. Cook them for around 7 minutes until the mushrooms start to get golden brown, then add in your garlic. Cook that for another couple minutes, making sure the garlic doesn't brown or burn. Then add the farro, cheese and parsley and stir. Add some pepper and taste to see if it needs more salt (ours didn't) and then serve right away. Like risotto, it doesn't do well just sitting out for awhile, so keep that in mind. I hope you will love it and give farro a chance!
Tuesday, January 7, 2014
Carrot Apple Ginger Juice
Watch out, world! I got a juicer for Christmas. Don't be afraid, I promise that I won't become one of those "juicing people." I still like for most of my meals to involve chewing. But that doesn't mean that I won't be experimenting with some interesting juices in the future. I have a recipe saved that involves beets, spinach and celery. Not so sure about that one. But this Carrot Apple Ginger Juice turned out great, especially considering it was my first attempt. I even got the Hubs to drink it and enjoy it (he doesn't know that he'll be trying the beet-spinach juice as well). It was sweet in a really natural, nice way with a little zip from the ginger. I'll be honest that it didn't smell great. The ginger really has an astringent scent to it when it's juiced, and so the drink smelled a little like carrot-scented cleaning fluid. But it tasted great. Really. Did I just unsell you from trying it? I hope not. You can find recipes for this juice all over the internet, I'll just tell you what I did.
Ingredients
6 carrots
4 apples (I used Cameo)
1 inch nob of ginger (if it's your first time, start with a little less)
I peeled the carrots, but left the peel on the apples. However, I did remove the core and seeds of the apple. I know they say you can put the whole apple in, but seeds have trace amounts of cyanide in them. Although it's completely fine and your body can process it, I just have some sort of aversion to putting cyanide in my body willingly...so I removed the seeds. Totally up to you. You should also peel the ginger. Then, juice away! I had no idea how violent the juicer is. That is something you definitely don't want to get your fingers in. Anyway, this made 800 mL of juice (about 27 ounces) which made for a nice big glass for two. And if my recipe calculator is correct it's only about 100 calories which is awesome. Much healthier than juice you buy at the store. Hmm... maybe I'm turning into a juice-person after all!
Ingredients
6 carrots
4 apples (I used Cameo)
1 inch nob of ginger (if it's your first time, start with a little less)
I peeled the carrots, but left the peel on the apples. However, I did remove the core and seeds of the apple. I know they say you can put the whole apple in, but seeds have trace amounts of cyanide in them. Although it's completely fine and your body can process it, I just have some sort of aversion to putting cyanide in my body willingly...so I removed the seeds. Totally up to you. You should also peel the ginger. Then, juice away! I had no idea how violent the juicer is. That is something you definitely don't want to get your fingers in. Anyway, this made 800 mL of juice (about 27 ounces) which made for a nice big glass for two. And if my recipe calculator is correct it's only about 100 calories which is awesome. Much healthier than juice you buy at the store. Hmm... maybe I'm turning into a juice-person after all!
Thursday, January 2, 2014
Tomatillo Ranch Chicken
I’ve never had a tomatillo before. I guess I always put them
in the tomato category, and as you know, I’m not a big fan of tomatoes. Plus,
tomatillos are just weird. The husk, the green color, and when you cut them
open, the inside isn’t what you’d expect at all. But the photo for this recipe
made me forget all my tomatillo prejudices. I saw it on Le Crème De La Crumb,
and it looked absolutely mouthwatering. The sauce has this great greenish hue
to it with chopped cilantro and a creamy texture. It’s a little like Ranch
dressing, but more tart and with a fantastic Mexican flair. The Hubs commented
that it feels a bit more like a dressing (like, for salad) than it does a
sauce, and that’s true, but it was still wonderful paired with the juicy
grilled chicken and served over rice. And it’s opened my eyes to the
possibility that the tomatillo might be worth my time after all. I also think
this would be a great recipe for kids.
1 cup mayo
½ cup buttermilk
1 package hidden valley ranch dressing mix
5 cloves garlic
1 cup cilantro
4 tomatillos, husked and chopped
½ teaspoon lime juice (or juice from 1/2 lime)
3-6 boneless skinless chicken breasts
The directions are SO easy. The only difficult part is
remembering to marinate the night before. I suspect it would be ok if you
forget, but it really does make the chicken so juicy, so it’s very worth it.
Simply put all the ingredients (except the chicken) into a blender and puree
until smooth. Personally, I have trouble getting the garlic to puree, so you
might want to mince that before putting it in. The garlic came through
strongly, so if you’re not a fan, you might want to cut back. Put your chicken
breasts in a Ziploc bag and pour in a third of the sauce to marinate them in.
Marinate overnight, then remove the breasts, toss the marinade and grill until
cooked all the way through (time depends on the size and thickness of the
breasts). You could also bake on 375 for about 25 minutes, but the char from
the grill is really nice. Serve over rice and spoon the remaining
(non-marinade) dressing over the chicken. If you have any dressing left over
you might try it on a salad as well!
Subscribe to:
Posts (Atom)