Sunday, November 14, 2010

Seared Chicken Breast with Quick Pan Sauce


Some nights I really don't want to cook. Or, it would be really nice to make something that is super easy and quick. Especially on those nights when I'm just too exhausted to put in the effort of making something homemade. But, homemade is always better, right? Right. So, I went searching for a quick chicken recipe, and came across this one. The nice thing about this particular recipe is that the site includes several different pan sauces you can make. I chose a Rosemary and Dijon sauce. Seriously, this recipe was very easy and very quick. Just how I like it on those nights when you just want to kick back and take it easy. Hope you like it!

Ingredients:
4 skinless chicken breasts
kosher salt and freshly ground pepper
flour for dredging
Ingredients for pan sauce (See below)
3 tbsp unsalted butter
1 tbsp olive oil

Pan Sauce
1/2 cup orange juice
1 teaspoon Dijon mustard
1/2 teaspoon minced fresh rosemary
1 Tablespoon brown sugar

First thing I did was wrap the chicken breast in plastic wrap and pounded the chicken with a meat tenderizer. I wanted to thin it out a bit before searing it.
Next, take some salt and freshly ground pepper and sprinkle it onto the chicken (both sides) generously. Take about 1/2 cup of flour and put it onto a plate. At this point, you can go ahead and combine your ingredients for the pan sauce. Set aside.
Now, go ahead and take a skillet and heat 2 tbsp of the butter and the oil over medium heat. Dredge the chicken breast in the flour and shake off any excess flour. Go ahead and turn up the heat to medium-high. When the pan is good and hot, add the chicken breast. Go ahead and flour however many more breasts you are making and add to the pan. Let cook for about 4-5 minutes. Do not touch it. Then, beginning with the first breast you had added to the pan turn it over and cook for an additional 4-5 minutes.
At this point, I turned on the oven to about 125 degrees and I took my chicken breast and placed it on a plate. I placed the plate into the oven so that the chicken would stay warm. Now is the time, to prepare the pan sauce. You will add the ingredients for the pan sauce directly to the skillet and bring it to a boil. Keep stirring while scraping up the brown bits from the bottom of the pan until the sauce thickens. Go ahead and add the last tablespoon of butter. Spoon the sauce over the chicken. Serve immediately.

(Click here for printable recipe)

Angel Food Cake


In my family it's always been a tradition to have mom make a birthday cake. Whatever birthday cake we want she'll make it. Dad always chose German Chocolate Cake, my sister would mix it up from pies to yellow cake with chocolate icing, and I, too, would mix it up. But, one cake I've chosen as my birthday cake on more than one occasion has been Angel Food Cake. Sometimes, my mom will make a strawberry whip to go with it, and it's delicious. Angel Food Cake can be a temperamental cake to bake. I don't always get it right, but when I do boy is it good. This particular cake was good, but I thought I overbaked it by a couple minutes. It was a tad on the dry side. Trust me, you do not want a dry Angel Food cake. Give it a try, and I'm sure it won't be the last time you bake this particular cake.

This recipe was adapted from The New Best Recipe cookbook.

Ingredients:
1 cup sifted plain cake flour
1 1/2 cup sifted sugar
12 large egg whites (1 3/4 cups plus 2 tbsp) at Room Temperature
1 tsp cream of tartar
1/4 tsp salt
1 1/2 tsp vanilla extract
1 1/2 tsp juice from 1 lemon (optional)
1/2 tsp almond extract

First you want to move your oven rack so that it's near the bottom half of your oven. Preheat your oven to 325 degrees. You will need a large tube pan, with a removable bottom.
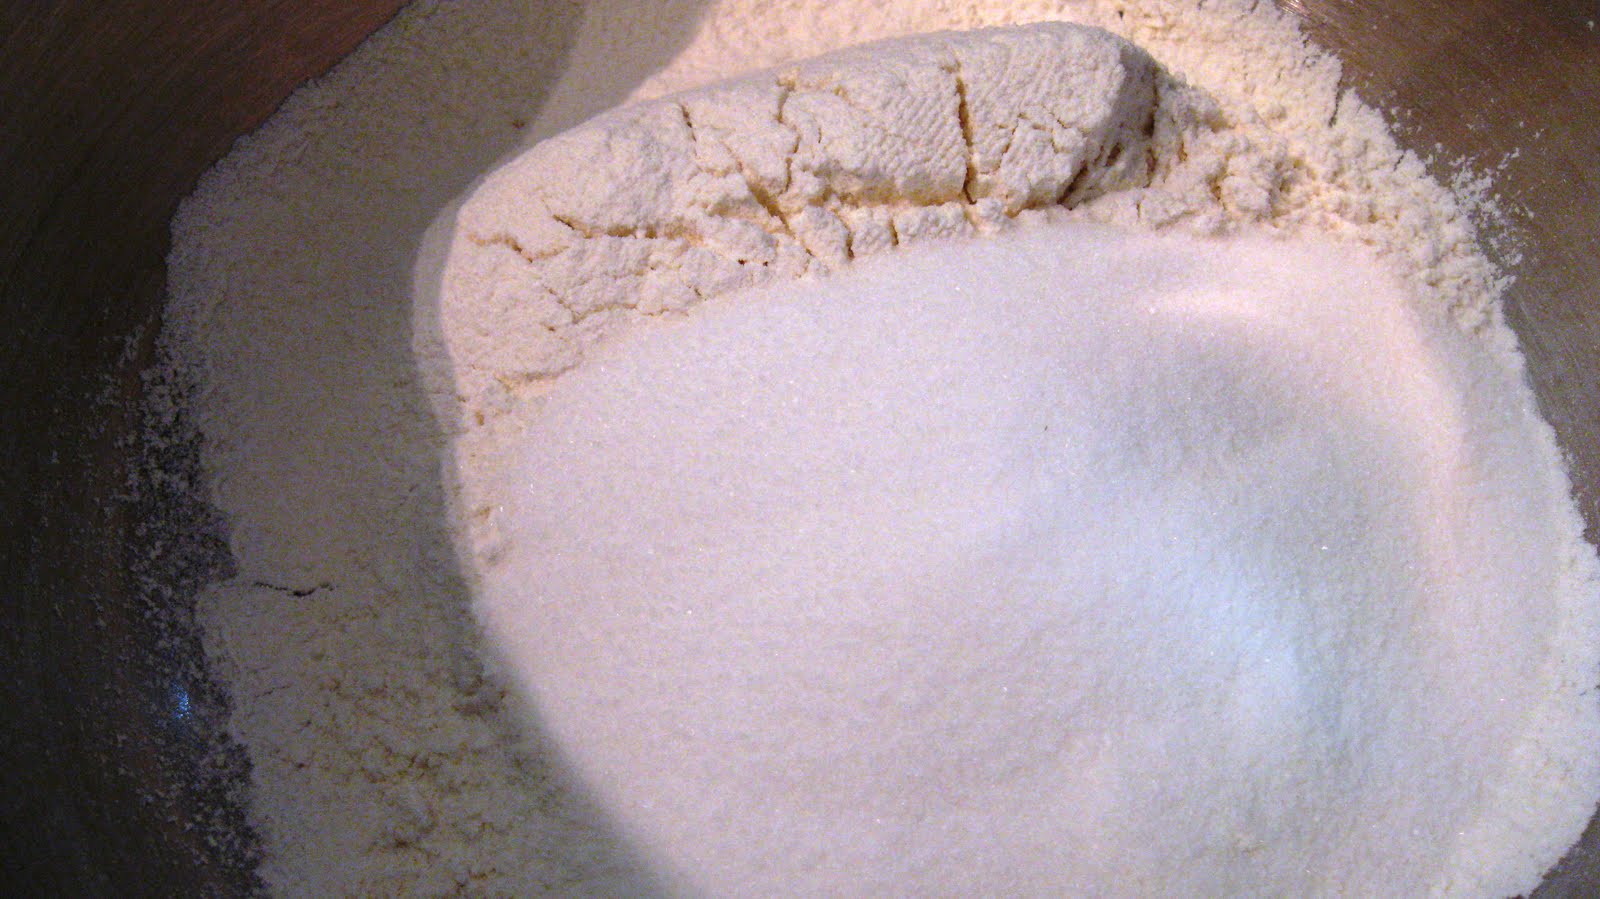
The first thing I did was take the flour and 3/4 cup of the sugar and whisk it in a small bowl.
In case you are wondering what you do with the remaing 3/4 cup sugar just set it aside in another bowl. A word about the egg whites. I used 12 eggs, but I ended up needing an additional 3 eggs in order to get to 1 3/4 cups. Once the egg whites are properly measured (and at room temp) whisk the eggs at low speed while using a standing mixer. Be sure you mix it until just so the eggs are broken and just beginning to froth.
Turn the mixer to medium speed and add your cream of tartar and salt. Beat until the egg whites form soft, billowy mounds. Now, you are going to take the small bowl you set aside with your 3/4 cup sugar and 1 tbsp at a time add it in the mixing bowl (at medium speed). The whites should begin to look shiny and form soft peaks. Now, you will add the vanilla, almond extract, and lemon juice (optional). Beat until just blended.
Next, place the flour and sugar mixture into a sifter and sift about 3 tbsp at a time into the whites. Gently fold in the flour/sugar mixture with a rubber spatula. Continue doing this a little at a time until the flour/sugar mixture is no more.
Now, you will gently pour the batter into your prepared tube pan. Give the pan a couple taps on the counter to release any large air bubbles.

Bake until the cake is golden brown and the top springs back when pressed firmly. It will take anywhere from 45 minutes to 60 minutes.
I believe it took me around 45-50 minutes to bake. Invert the pan and let cook for a couple hours. Before releasing the cake from the pan, take a knife and run it around the edge of the pan. You should be able to release the cake from the pan. You will need to cut the slices by using a long serrated knife and by sawing gently.

(Click here for printable recipe)

Friday, November 12, 2010

Pizza Puffs

Pizza is practically a religion in our family. We probably eat it at least once a week. Ok, maybe two times. Or more. Don’t judge. Anyway, when I saw that this appetizer managed to get all the delicious flavor of pizza into a two-bite package, I knew it would be a winner. It’s such an easy recipe, and it’s infinitely customizable—just like a pizza. I started with the basic pepperoni, but you could sub in any kind of meat, cheese, or veggie you want to make your perfect pizza puff! I found this recipe on Susi’s Kochen Und Backen Adventures, via Tastespotting


Ingredients:
3/4 cup flour
3/4 teaspoon baking powder
3/4 cup milk
1 egg, lightly beaten
1/4 teaspoon Kosher salt
1 teaspoon Italian seasoning
4 ounces mozzarella cheese, shredded
4 ounces pepperoni cut into small cubes
Your favorite pizza or marinara sauce for dipping

Start by preheating your oven to 375 degrees and spraying a 24 mini-muffin pan (or two 12s, like I did). Whisk together the flour and baking powder, then whisk in the milk, egg, salt and Italian seasoning. If you want to add any other kind of seasoning, now would be the time. Then add the cheese and pepperoni and stir (don’t whisk… I made this mistake and the whisk plus pepperoni and cheese doesn’t really work.) Now portion them out into the cups. I decided to sprinkle just a little more mozzarella on the top of the cups (you could use any cheese) to give it even more of a brown crust. Cook them for about 22 minutes and serve with microwaved marinara or pizza sauce. It’s just the thing to satisfy your occasional (or not so occasional) pizza craving!

(Click here for printable recipe)

Friday, November 5, 2010

Chicken and Dumplings


For those who know me well; you'll know that I'm not a big fan of winter. As a matter of fact, I really detest winter. I'll take a 100 degree day over a 30 degree day every single time. But, if there's one thing I do like about winter it's the food. Warm, comforting, and yes, fattening food! One of my favorite meals of all time during the cold months is Chicken and Dumplings. Probably my favorite part is the dumpling, and it definitely keeps me warm on those cold winter nights. The recipe I use is from one of the best, fatten-you-up, comfort food cooks of the south; Ms. Paula Deen. The dumpling I use, well, not sure where I got that recipe from, but it's delish. Enjoy!

Ingredients
Chicken:
1 (2 1/2-pound) chicken, cut into 8 pieces
3 ribs celery, chopped
1 large onion, chopped
2 bay leaves
2 chicken bouillon cubes
1 teaspoon House Seasoning, recipe follows
1 (10 3/4-ounce) can condensed cream of celery or cream of chicken soup

Dumpling:
2 c flour
1 tsp salt
4 tsp baking powder
1 egg, beaten
2 tbsp melted, butter
2/3 c. milk
Sift together the flour, salt, and baking powder. In a separate bowl combine the milk, egg, and melted butter. Pour liquid mixture into flour mixture, and stir quickly. Wait till the end before adding pieces of the dough to the soup.

To begin, I prepped my vegetables by chopping them and setting aside. Also, I did not use an onion. Instead I used 4 carrots. I also just used about 2 pounds of chicken breast. Placed the chicken, carrots, celery, 2 bay leaves, the chicken bouillon cubes, and the house seasoning into the pot and cook until the juices from the chicken run clear. It took about an hour. Also, about the house seasoning. I just guesstimate everytime, by taking a teaspoon and pouring a little of the garlic powder and pepper, and add more of the salt into it.
Once the chicken is cooked thru, remove it and wait till it cools. Then either shred the chicken or cut it into small pieces (however you prefer). Add back to pot and then add in the can of soup. This time I used cream of chicken, but it really doesn't matter which one you use.

Paula recommends adding 1/4 cup water and 2 tbsp of corn starch (stir together) to the pot of soup if it is not thick enough. I usually do follow this step, and I add it in twice. I also usually add a couple sprinkles of dried thyme to the soup as well. I also add more salt and pepper. Last it's time to add the dumpling dough to the pot. I just grab some of the dough and roll it in my hands and drop into the pot. Cover with a lid and bring to a rolling boil.
Cook until the dumplings are cooked thru. It usually takes about 10-15 minutes for this to occur. Keep in mind that the soup is usually really hot when serving. Enjoy!

(Click here for printable recipe)

Spicy Honey-Brushed Chicken Thighs

So. I am clearly a teenage boy trapped in a thirty (ok thirty-one) year old’s body. Because something about this recipe sounds so dirty to me. Those spicy, honey-brushed thighs. It’s something straight out of a trashy romance novel like “His for the Taking,” or “Baby Don’t Forget My Number.” (Those are real titles, by the way. Yes, people get paid for stuff like that). “Erica let her jeans fall to the floor, revealing her spicy, honey-brushed thighs.” I mean—right?

Anyway, regardless of the title, these thighs are seriously tasty, and pretty darn easy to make. Thigh meat in general is juicier than breast meat, so there’s that. I was surprised to find this recipe on Cooking Light, actually (via My Recipes). I always thought thighs were bad for you. But this recipe calls for boneless, skinless thighs, which helps the health factor. It also cuts down the cooking time significantly. This might seem like a lot of spice, but the honey really balances that out, so I may actually put a little more spice in next time.


Ingredients
2  teaspoons  garlic powder
2  teaspoons  chili powder
1  teaspoon  salt
1  teaspoon  ground cumin
1  teaspoon  paprika
1/2  teaspoon  ground red pepper
8  skinless, boneless chicken thighs
6  tablespoons  honey
2  teaspoons  cider vinegar

Start by preheating your broiler. Then mix all the spices together in a bowl. Toss in those thighs and make sure they are good and covered with the spices before putting them on a broiler pan (which you have coated with cooking spray). Then just broil the chicken for 5 minutes, flip ‘em and go for another 5.

In the meantime, mix honey and vinegar in a small bowl. I read a tip that if you spray your tablespoon or measuring cup with cooking spray it helps the honey come out instead of coating the utensil. It worked moderately well for me. I usually just eyeball it to avoid the problem. Anyway, just brush the mixture on one side of the chicken, making sure you coat it well. Broil one minute. Repeat on the other side and broil one more minute. And you’re done! Do not try this with bone-in thighs! You’d have to increase the cooking time significantly, and probably wouldn’t want to broil it.

There you have it. Juicy, tasty, slighty trashy, spicy honey-brushed thighs. I bet this would be a big hit rubbed on breasts too. Chicken breasts. Get your mind out of the gutter. 


(Click here for printable recipe)

Monday, November 1, 2010

Oatmeal-Basil Meatballs

Apparently, I like to experiment with my meatballs. The first time I ever attempted meatballs was in June for Iron Chef Melon. Now, those were some amazing meatballs, even though the recipe was a bit unique (those meatballs were served in a watermelon puree - the Iron Chef winner of the evening, I should add!).

Tonight, I tried meatballs again. I started with my ground turkey and tossed it into a bowl, only to realize that I had no breadcrumbs. How do you make meatballs without breadcrumbs?
I went to the internet, and of all of the options, I was intrigued with the idea to swap out oatmeal for breadcrumbs. Those of you that think this is odd, keep in mind, last time I experimented with meatballs, this brought us to watermelon puree. Oatmeal is rather tame in comparison.

So apparently, I’m not fated to make normal meatballs. I am, however, fated to make awesome meatballs. This recipe is a purely original creation. I’m not saying it’s an original idea, just not inspired from any website or cookbook. I always keep my fingers crossed when I attempt such things, but this one was a huge success. De-lish.

Ingredients: 
1 pound lean ground turkey
1 egg
½ cup uncooked oatmeal
Basil (about 5 shakes of the spice bottle, or to taste)
Garlic powder (about 5 shakes of the spice bottle, or to taste).


In a bowl, mix all ingredients thoroughly (this is best done with your hands). Form mix into small balls. Brown in a skillet. Either mix with spaghetti directly or cook for a minute in spaghetti sauce before mixing with pasta, (I did the latter).
This was simple and delicious.

A tip: Something that I have regretted on both occasions in my life when I have made meatballs is that I have taken the ground meat out of the fridge, dumped it in a bowl, and dove straight into the mixing and such, throwing my hands right in. Doing so just after the meat is pulled from the fridge is the hand equivalent to brain freeze. I’d suggest letting the meat sit outside of the fridge for a few minutes before starting.

Happy cooking!
-KSP


(Click here for printable recipe)

Iron Chef in R Home Magazine

As many of you already know, our most recent Iron Chef party (Iron Chef Coffee), hosted in Cara's lovely home, is featured in the November/December issue of R Home Magazine. The article was written by our own Kris Spisak and features some gorgeous photos of our delicious food and bright smiling faces! I haven't been able to get my hands on a copy yet, but I'm chomping at the bit to see how it turned out. Be sure to check it out! The magazine is available on newsstands now!

Thursday, October 28, 2010

Slow-cooker North Carolina style Barbecue

My husband had a really depressing weekend last week. His Phillies, who were expected to easily make it to the World Series, fell to “The Freak,” the San Fran Giants’ Tim Lincecum. His Eagles and their ever-going quarterback controversies had a heart-attack inducing loss to Tennessee. He's collecting tied games in his fantasy league. What do you do with a husband with a playoff beard with no playoffs? I knew I had to do something to cheer him up. Isn’t the way to any man’s heart through food?

Personally, I love a different type of barbecue, but Frank’s favorite barbecue is North Carolina style: vinegar based. Any excuse to use my slow-cooker and have my house smell glorious for hours of the day is worth using, though.


Ingredients
1 cup cider vinegar
1 tablespoon salt
½ teaspoon cayenne pepper
1 teaspoon chili powder
1 teaspoon crushed red pepper flakes
1 tablespoon brown sugar
Three chicken breasts

Stir all ingredients (minus chicken) together inside crock pot. When thoroughly mixed, add chicken breasts. Cook on low for eight hours. When it’s ready, using two forks, shred chicken (this is really, really easy). Serve alone or on a bun.

Honestly, this recipe didn’t impress me, but as I said, I’m not a huge vinegar based barbecue fan. Frank, on the other hand, absolutely loved it, eating ever last bit of the left-overs for lunch the next day. So maybe it was awesome, and I just didn’t appreciate it. If you’re a NC-style barbecue fan, I hope you like it!

Happy cooking!
-KSP


(Click here for printable recipe)

Salsa Chicken Casserole

I’ve always had a go-to chicken burrito recipe that I serve on occasion, but when it comes to Mexican, my menu ended there. I have a bit of a weakness for good tortilla chips and salsa, an adoration for cheese, and find exquisite glory in a perfectly timed cold cervesa. More Mexican dishes in my repertoire seemed only logical, right?

Stick a slice of lime in your Corona and serve this casserole for dinner. You won’t be disappointed by its ease, simplicity, or flavor.


Ingredients: 
2 cups uncooked white rice
2 boneless, skinless chicken breasts
Shredded Monterey Jack cheese
Shredded Cheddar cheese
1 can condensed cream of chicken soup
¼ onion
1 ½ cups salsa.
(I fully admit using a pre-made salsa is cheating – sweet, glorious, getting-dinner-on-the-table-with-ease cheating)


Cook the rice. Cube the chicken and sauté it until cooked through (I spiced mine with pepper). In a small bowl, combine salsa, cream of chicken soup, and chopped onion.

After everything above is finished, in a casserole dish layer cooked rice, chicken, salsa-soup mix, sprinkled layer of both cheeses, cooked rice, chicken, salsa-soup mix, sprinkled layer of both cheeses, etc…


Stick in the oven at 350 degrees for 25 minutes (or until the casserole is bubbly).

Happy cooking!
-KSP


(Click here for printable recipe)

Tuesday, October 26, 2010

Restaurant Review: Pescados on China Street


There are a lot of restaurant options in the City of Richmond. My family and I were contemplating where we wanted to go for dinner on Saturday night. We couldn’t decide between restaurants we had never been to before such as Zeus Gallery Café or our favorite, tried and true restaurants such as Edo Squid’s. Then we thought of trying the new Pescados located on China Street. We’ve been to the Midlothian location many, many times, and it has never once let us down. So, we went with the new Pescados in Oregon Hill. It’s a quaint little restaurant located on the corner of China and Pine Street. Pescados is a little pricey, so you probably want to go if you have a little extra cash or for a special occasion.

We got there around 7 pm and by that time it was already bustling with patrons waiting to be seated. This is a very busy restaurant and for good reason. The food is seriously excellent. The server was very attentive and even made a joke or two.

To start out, we ordered 3 different appetizers; the Arepas, the Ceviche,and Conch Fritters. Wow. The presentation for each dish was beautiful. The pork in the arepas was very tender and packed plenty of flavor. The ceviche was delicious, however it could have used a little more salt. And, the conch fritters were fried heavenly goodness. It was just the right amount for 4 people.

For dinner, three of us ordered the Fish Tacos and I ordered the Plaintain Crusted Grouper. Wow. Are you sensing a theme here? The grouper was silky, smooth, and cooked to perfection. The zucchini was a tad on the tough side, but the black beans were delicious. I was told the Fish Tacos were absolutely delicious with some heat added to it.

Though we were stuffed beyond belief, we went ahead and ordered a Flourless Chocolate Torte for dessert.
Boy, was that rich with chocolate. Usually dessert is such a let-down at most restaurants, but if you love dark chocolate then you will love this dessert. Overall, it was such a satisfying meal. Pescados on China Street definitely did not disappoint with their new location. For the next special occasion, I can’t wait to go back.

Pros: Food, Service, Cheap Date Nights on Thursday and $10 Tacos on Tuesdays
Cons: Parking, Pricey, Potential for Long Waits

My rating: 5 sporks out of 5.
Location: 626 China Street Richmond VA 23220
Website: http://www.pescadoschinastreet.com/
Cuisine: Seafood, Meat
Pricing: $$$

Monday, October 25, 2010

Restaurant Review: The Boathouse at Rockett’s Landing

When someone talks about The Boathouse their first comment is inevitably about the great view. Well… we finally got around to trying this restaurant at 7pm in late October, so we didn’t really get much of the view as the sun had already gone down. But after trying the food and dealing with the slow service, I am guessing that there’s a reason why the view is the best part of dinner here.


(Clockwise from top left: spicy tuna roll, tuna tartare, lobster bisque, calamari)

The food wasn’t bad, per se. In fact, I very much enjoyed the tuna tartare (though the whole spoon thing makes it hard to eat in polite company). I heard that the calamari was also tasty. And the desserts were actually quite delicious. But the main course was a bit of a snore for me, and I know Steve was quite unhappy with his portion size. We went in expecting a great meal, and got just a fine meal. Similarly, the service. It wasn’t egregious. It was just a bit slow. Mostly in the beginning and end of the meal.


(Shrimp & grits, filet mignon topped with crab, grouper topped with crab, seared rare tuna)

For the money, I think you could do better. However, it might be a nice option in good weather to hit up happy hour and enjoy the apps and drinks. And of course, the view.

Pros: View, good apps and desserts, Wednesday 1/2 off wine deal
Cons: Main course is just ok, slow service

My rating: 3.5 sporks out of 5.
Location: 4708 East Old Main Street
Richmond VA 23231
Website: http://www.boathouserichmond.com/rocketts_landing/
Cuisine: Seafood, Steaks, Pizza
Pricing: $$$

Saturday, October 23, 2010

Creamy Pasta with Veggies and Chicken

In the continuing quest to try new recipes with the ingredients I already have in my house, I stumbled upon this one. Now everybody has their favorite comfort food. For some it’s chocolate, or homemade mac & cheese, or chicken pot pie, or crawfish jambalya (to each their own, right?). There are always those busy days where you get home and just want your tastebuds to be spoiled, wrapped in warm, delicious extravagance.

As for me, deep into the logistics of the James River Writers Conference – yes, shameless plug: www.jamesriverwriters.org – I just wanted something creamy, full of noodles, and simple. (Yes, observant readers, you’ll also note I’m posting this a few weeks after the conference.)
Be it stress, or a rainy day, or any other excuse for it, I highly recommend the ease and soul-food appeal of this Creamy Pasta recipe.


Ingredients:
2 Chicken Breasts
Pasta (I used penne)
Three handfuls chopped carrots
Four handfuls baby spinach
Two shakes garlic powder
1-½ cup Milk
2 Tablespoons Butter
3 Tablespoons Whole Wheat Flour
2 teaspoons Paprika
1-½ Tablespoon Olive Oil
Salt And Pepper (to taste)
Parmesan Cheese (for Topping)

Whisk together milk and flour in a small bowl. Heat butter in a small sauce pan and add sprinkle a few shakes (to taste) of garlic powder. After the butter has melted, add the milk mixture and whisk thoroughly. Add salt and pepper (to taste). Continue stirring until the mixture thickens. Then remove from heat and set aside.

Cut chicken into 1 inch cubes. Season chicken with salt, pepper, paprika, and garlic powder.
Bring a pot of water to a boil. Cook pasta.

Heat drizzle of oil in a pan and brown the chicken until cooked through. Once the chicken is cooked, remove from pan and cover.

In the same pan, drizzle oil and then add carrots and spinach. Cook the veggies for a few minutes until tender. Then, remove from the heat.

In a large bowl, combine pasta, chicken, veggie mixture, and cream sauce. Sprinkle with parmesan cheese before serving.

Happy cooking!
-KSP


(Click here for printable recipe)

Wednesday, October 20, 2010

Restaurant Review: Chopstix

I had seen the sign for this restaurant waaaay out off Midlothian in a new shopping center called the Watkins Center, and I really wanted to try it. Mostly because… I was confused. Asian Bistro? Sushi Lounge? This place has an identity crisis. And unfortunately, you can taste it.

The décor is nice-ish. Very dark, but I like dark in my restaurant. Service was fine as well. They have a full bar and the normal array of wine & beer. We started off the meal with two appetizers, the Gyoza which are pan fried pork dumplings, and Tuna Tataki, a seared tuna (which I get everywhere). The gyoza were probably the best things we had all night. Very tasty, great dipping sauce, perfectly cooked. The tuna was… a bit bland.


(clockwise from top left, Tuna Tataki, Gyoza, Rock n' Roll)

For our main course, Steve ordered the Grilled Lemongrass Shrimp. I got Pad Thai and the Rock n’ Roll. The shrimp was just ok, but Steve was very impressed by my Pad Thai. I thought it was good, too. The Rock n’ Roll was pretty good. The pieces were too big, which is a sushi pet peeve for me, but overall it was fine. For dessert we got the deep fried banana. It was... phallic. And not that great. There was just nothing special to it.


(Clockwise from top left: Pad Thai, Grilled Lemongrass Shrimp, Fried Banana)

We left the restaurant feeling just a little disappointed. There were some hits, but mostly misses. I don’t think we’ll go back to the restaurant, but we may order some food for takeout. Overall, this restaurant proved the occasional problem with fusion cuisine: you end up with a chef who specializes in neither.

Pros: Gyoza! Range of options. Gorgeous plating.
Cons: Overall lack of flavor. Hits & misses.

My rating: 3 sporks out of 5.
Location: 15801 City View Drive
    Midlothian, VA 23113
Website: www.chopstixva.com
Cuisine: Asian Fusion; Sushi
Pricing: $$

Tuesday, October 19, 2010

Spicy Corn Chowder

Ok, I’m going to be honest. I did not make this. I had a root canal earlier in the day (hence the soup decision for dinner) and my wonderful husband Steve made the soup. And maybe it was because I didn’t help a lick, or maybe it was just made with lots of love, but it tasted really, really good. So good that I’m going to eat it again tonight.

I found this recipe on Tasty Kitchen and the only tweaks Steve made were to double the bacon (because, c’mon, it’s bacon) and add an extra chipotle pepper and pepper (our changes are incorporated in the recipe). We thought about adding cheese but the soup really doesn’t need it. I would caution you that it’s pretty spicy. If you want a milder soup, only add one chipotle chile, and maybe not the entire can of green chiles.


4 slices bacon, chopped
2 tablespoons butter
1-½ whole yellow onion, diced
5 ears corn, shucked
3 whole chipotle peppers in adobo sauce, minced
1 4oz can diced green chilies
32 ounces, low sodium chicken broth
1-½ cups heavy whipping cream
1 teaspoon kosher salt (or to taste)
Pepper
3 tablespoons corn meal OR masa
¼ cups water

Start with prepping everything. Trust me, this makes it way easier when you start cooking. Slice the corn off the cob, chop up your onion, bacon, and peppers. We got these lovely little glass prep bowls from Crate & Barrel that are just perfect for putting together a “mise en place.” Which is just a fancy way of saying “all the stuff I need to make this fantastic soup!”

Make this in a big pot, or even better, a Dutch oven. Cook the bacon pieces over medium heat for a couple of minutes (they won’t be fully crispy), and then add the diced onion. This is also when Steve added the pepper.  Cook the onion for 3 or 4 minutes, stirring occasionally, and then add the butter. Once it’s melted, put in the corn and cook that for one minute. Throw in the chipotle and green chiles and stir until it’s mixed. Finally, pour in the chicken broth, cream and salt. Stir it up and bring it to a boil (you might have to turn the heat up a little for that… it’s ok.)

Once the soup is boiling, reduce the heat to low. I don’t know what masa is, so I just used the corn meal. Mix it with the water and stir it before pouring it into the chowder. This is the thickening agent. I think next time I might skip the cornmeal and use cornstarch instead. Cover and cook for about 15 minutes. At this point you want to check the thickness of the soup. If it’s good, cover it and cook for another ten minutes. If you want it to be thicker (we did), add another tablespoon of cornmeal mixed in a little water. I have to say, this soup is billed as a chowder, which I guess should be pretty thick. But ours came out more like a cream soup, and it was excellent. Not sure I would have wanted it to be too much thicker. After ten minutes it’s ready to eat, and it’s a really enjoyable soup. The corn was perfect—tender but still with that great crunch. I suggest you try it on one of these cool fall days, and if you can get someone else to make it for you—even better!

(Click here for printable recipe)

Sunday, October 17, 2010

Spaghetti Soup


I really have no idea where this recipe came from. My original thought was that it came from my Aunt Cathy who lives in Illinois. But, perhaps, it's a recipe my mom has had for several years. I don't really have a story to go along with this one, either. Alas, it doesn't matter. This is the perfect recipe for trying to get rid of celery, spaghetti noodles, or getting rid of some of those green peppers growing in your garden. It's very easy to make. Really. And, it's very good.

Ingredients:
1 lb italian sausage (mild)
1 med onion, diced
1 green pepper, diced
1/2 c. chopped celery
2 cloves garlic, crushed
2 14 oz can diced tomatoes
1 15 oz jar spaghetti sauce
6 c chicken broth
1 tsp italian seasoning
1 tbsp sugar
Salt and Pepper to taste

Preparation:
First thing I did was prepare the vegetables by chopping the onion, pepper, and celery. Next, I took a large sauce pan and began browning the sausage over medium heat. Once the sausage was browned, I added the minced garlic cloves, the chopped onions, pepper, and celery. Continue cooking until the vegetables become tender. Then, you add the diced tomatoes along with the juice, the spaghetti sauce (I found a 14 oz jar of Ragu Plain Sauce at Kroger's), the chicken broth, the italian seasoning, sugar, and salt and pepper to taste. Simmer for about 30 minutes. Then, add about 2-4 ounces of spaghetti and break it in half. Cook until the spaghetti is tender. Serve with bread.

(Click here for printable recipe)